Maple Glazed Banana Bread

I was looking for a “fall” type of banana bread, and I found a great one that I want to share with you! This recipe from A Latte Food was a winner for us because it didn’t call for nuts. Many banana bread recipes use walnuts or pecans, but we are a nut-free household. Ken doesn’t eat gluten, but he wouldn’t have eaten banana bread anyway, so no big deal there.

The maple syrup in the glaze was the touch of “autumn” I was looking for. Sometimes I substitute the vanilla extract in the glaze for imitation rum extract, and that is a delicious fall flavor, too! But here’s the great thing about this recipe – it’s fantastic even without the glaze! If you want to skip on some of the sugar, skip the glaze and just make the banana bread.

Something that I like to do with baked goods or desserts is to split the recipe in two, and share the second one with a friend or neighbor. Not only do I feel like I am showing some hospitality to others by sharing goodies, but I am also keeping it out of the house so that I won’t overindulge!

A great way to share is to bake into foil pans with a lid. This is great because no one has to worry about returning a dish to you. I put this bread into a pretty bag with a tag. It’s the little touches that will make the recipient feel special and let them know they are cared for.

Maple Glazed Banana Bread

  • Servings: 12 slices
  • Difficulty: moderate
  • Print

A flavorful banana bread with maple glaze.

Credit: BelleAntiquarian.com

Ingredients

    Bread
  • 1/2 cup butter, softened
  • 1 cup sugar
  • 2 eggs, room temperature
  • 2 cups all-purpose flour
  • 1 tsp. baking soda
  • 1/4 tsp. salt
  • 3-4 medium ripe bananas
  • 2 tbs. brown sugar
  • 1 1/2 tsp. vanilla extract
  • 1/2 tsp. ground cinnamon
  • Maple Glaze
  • 1/4 cup butter
  • 1/2 cup pure maple syrup
  • 1 cup powdered sugar
  • 1/2 tsp. vanilla extract *OR* imitation rum extract
  • 1/4 tsp. ground cinnamon

Directions

  1. Preheat the oven to 350*. Grease two 8×4 pans.
  2. In a small bowl, mash bananas, brown sugar, vanilla extract, and ground cinnamon.
  3. In a large bowl, cream butter and sugar together until light and fluffy.
  4. Add eggs to butter and sugar mixture, beat until mixed.
  5. Add the mashed banana mixture to the large bowl with the butter, sugar, and eggs.
  6. In a separate bowl whisk together the flour, salt, and baking soda.
  7. Slowly add a little of the dry mixture to the wet mixture until it is all incorporated.
  8. Bake at 35-40 minutes (for two 8×4 pans) until cake tester comes out clean with just a few moist crumbs stuck to it.
  9. Allow to cool for 10 minutes. Move to a wire cooling rack.
  10. Maple Glaze
  11. Melt butter, maple syrup,vanilla (or rum) extract, and cinnamon over low heat. Once melted together, pull the pan off the heat. Sift in powdered sugar, and whisk until fully combined. Allow to cool for 8-10 minutes so the glaze can thicken.
  12. Once the glaze has thickened, give it a quick stir and pour it over the breads.
  13. Allow the glaze to harden completely before cutting into slices.

Fall Table Setting

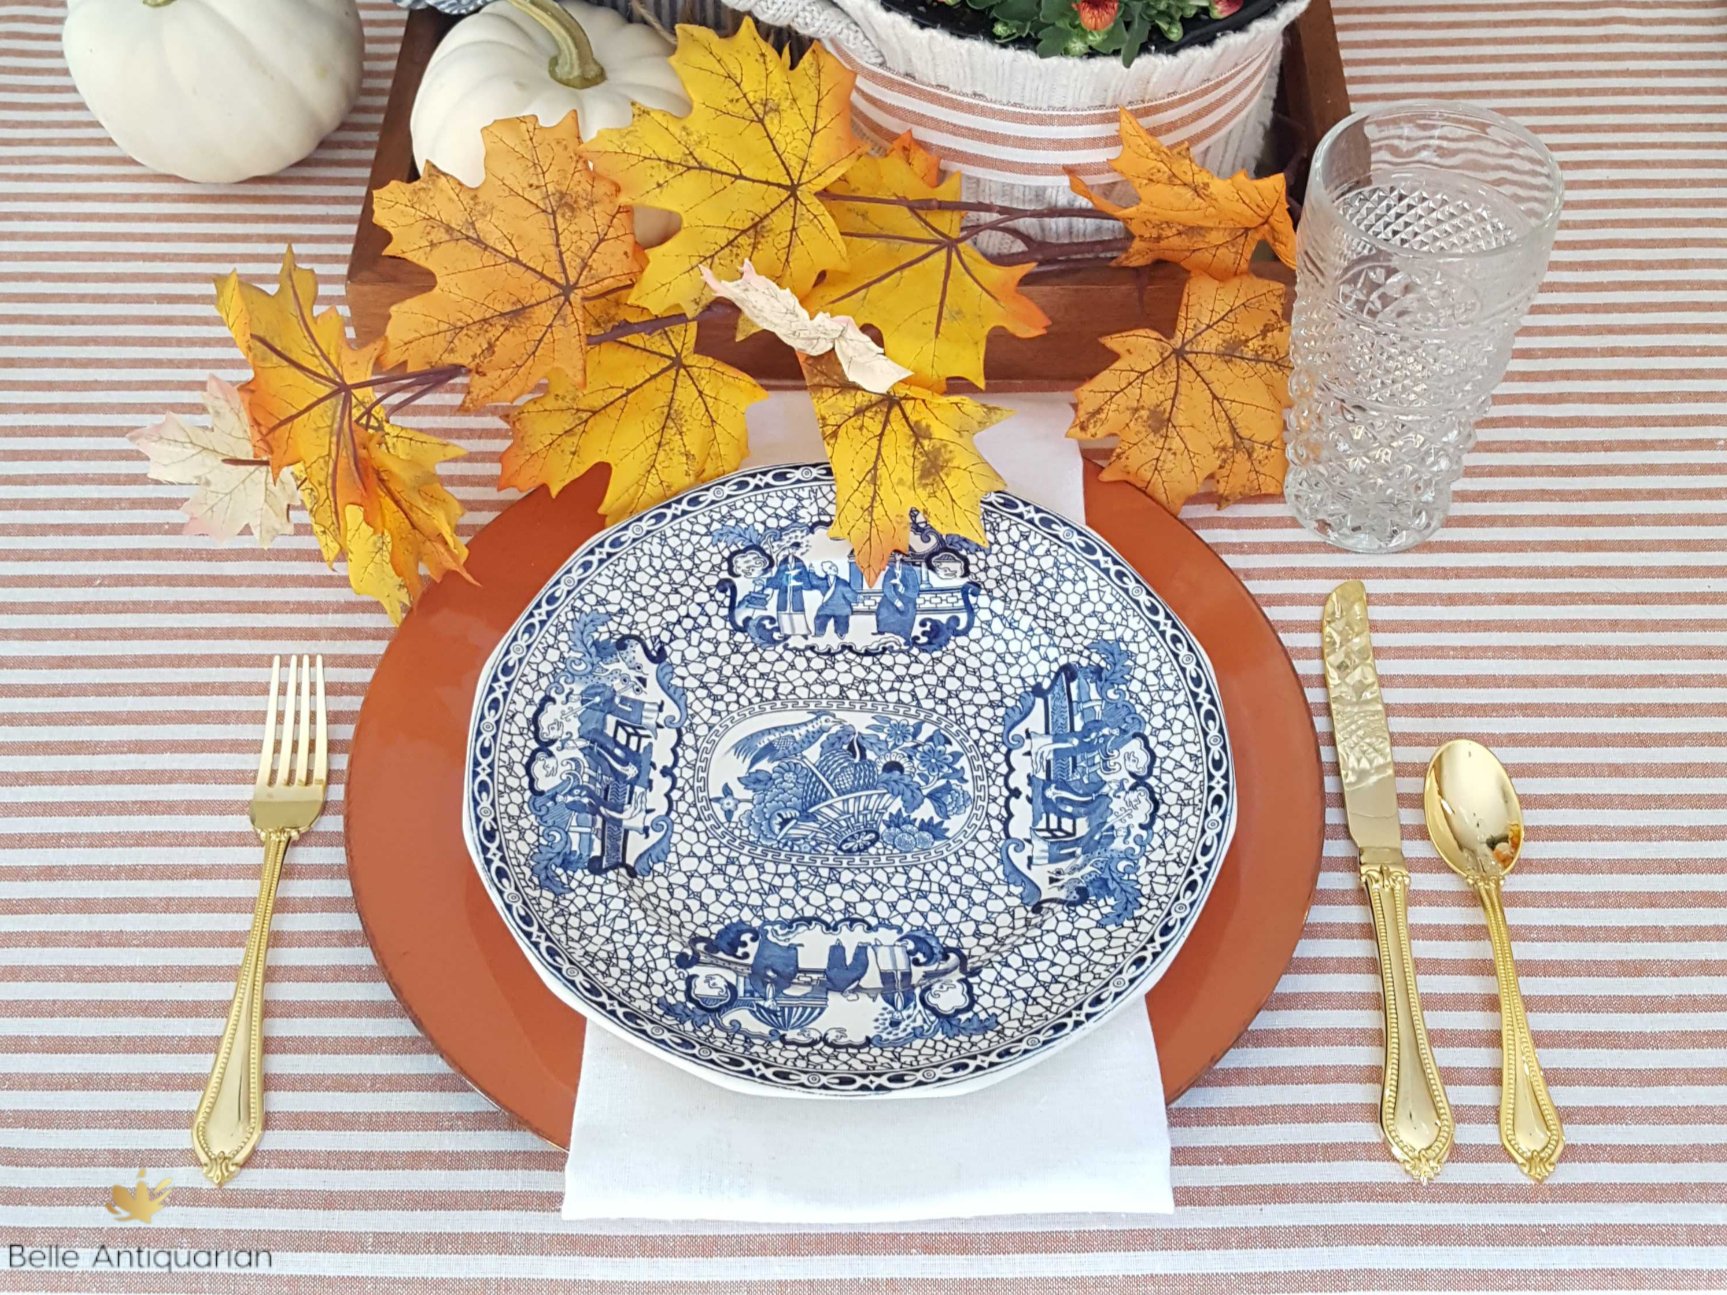
If you’ve been around for a while, then you know that I like to use the color blue in fall decorating. (I wrote a whole post on it HERE.) Part of the reason blue sneaks its way into really every seasonal decorating I do is that I love collecting blue and white dishes. I’m using what I have! LOL

This fall is no different! I was setting a table for fall, and I decided to use these Chinese Bird plates (3 men version) by Adams China. I was about to say that these aren’t particularly old, but then I realized that they’re almost 50 years old. That’s definitely not new, lol. I am a big fan of actually using china and not just keeping it tucked away safely. I hand wash them because dishwasher detergent is abrasive, but there’s no danger in using a pretty plate on your table.

It does feel a little odd setting a table for fall when it’s been mid-90s for months now. Atlanta has been breaking record high temperatures for almost the whole month of September. It’s said that fall is the southerner’s reward for surviving summer. But, honestly, at this point I’m not “surviving” very gracefully. The Atlanta forecast shows 90 degree temperatures through the first week of October, and I’m a little cranky about it.

I definitely may not feel like fall, but here’s to a happy one anyway!

Fall Mums Centerpiece

Not long after Pumpkin Spice Lattes arrive in your local coffee shop, everyone seems to get some mums and pumpkins for their front porches. Most people leave them on their porches for the season and then toss them. However, mums are great perennials, so if you plant them directly into the ground in late summer or early fall, they’ll most likely come back in the spring.

Interestingly enough, mums (full name chrysanthemum) can be grown indoors in a bright, sunny spot. Did you know that mums were tested in the NASA Clean Air Study, which is a test to see which plants can clean indoor air quality? Mums were found to improve the air quality against all 5 of the major toxins that were tested. How cool is that?!

Mums are inexpensive, and you can find them anywhere from grocery stores to home improvement stores. I picked mine up from Walmart for $4.88. I wanted to use mine for a fall centerpiece before I planted them outside. Since I was going to be planting them outside, and I only needed them on my table for a couple of days, I didn’t want to plant them into a pot.

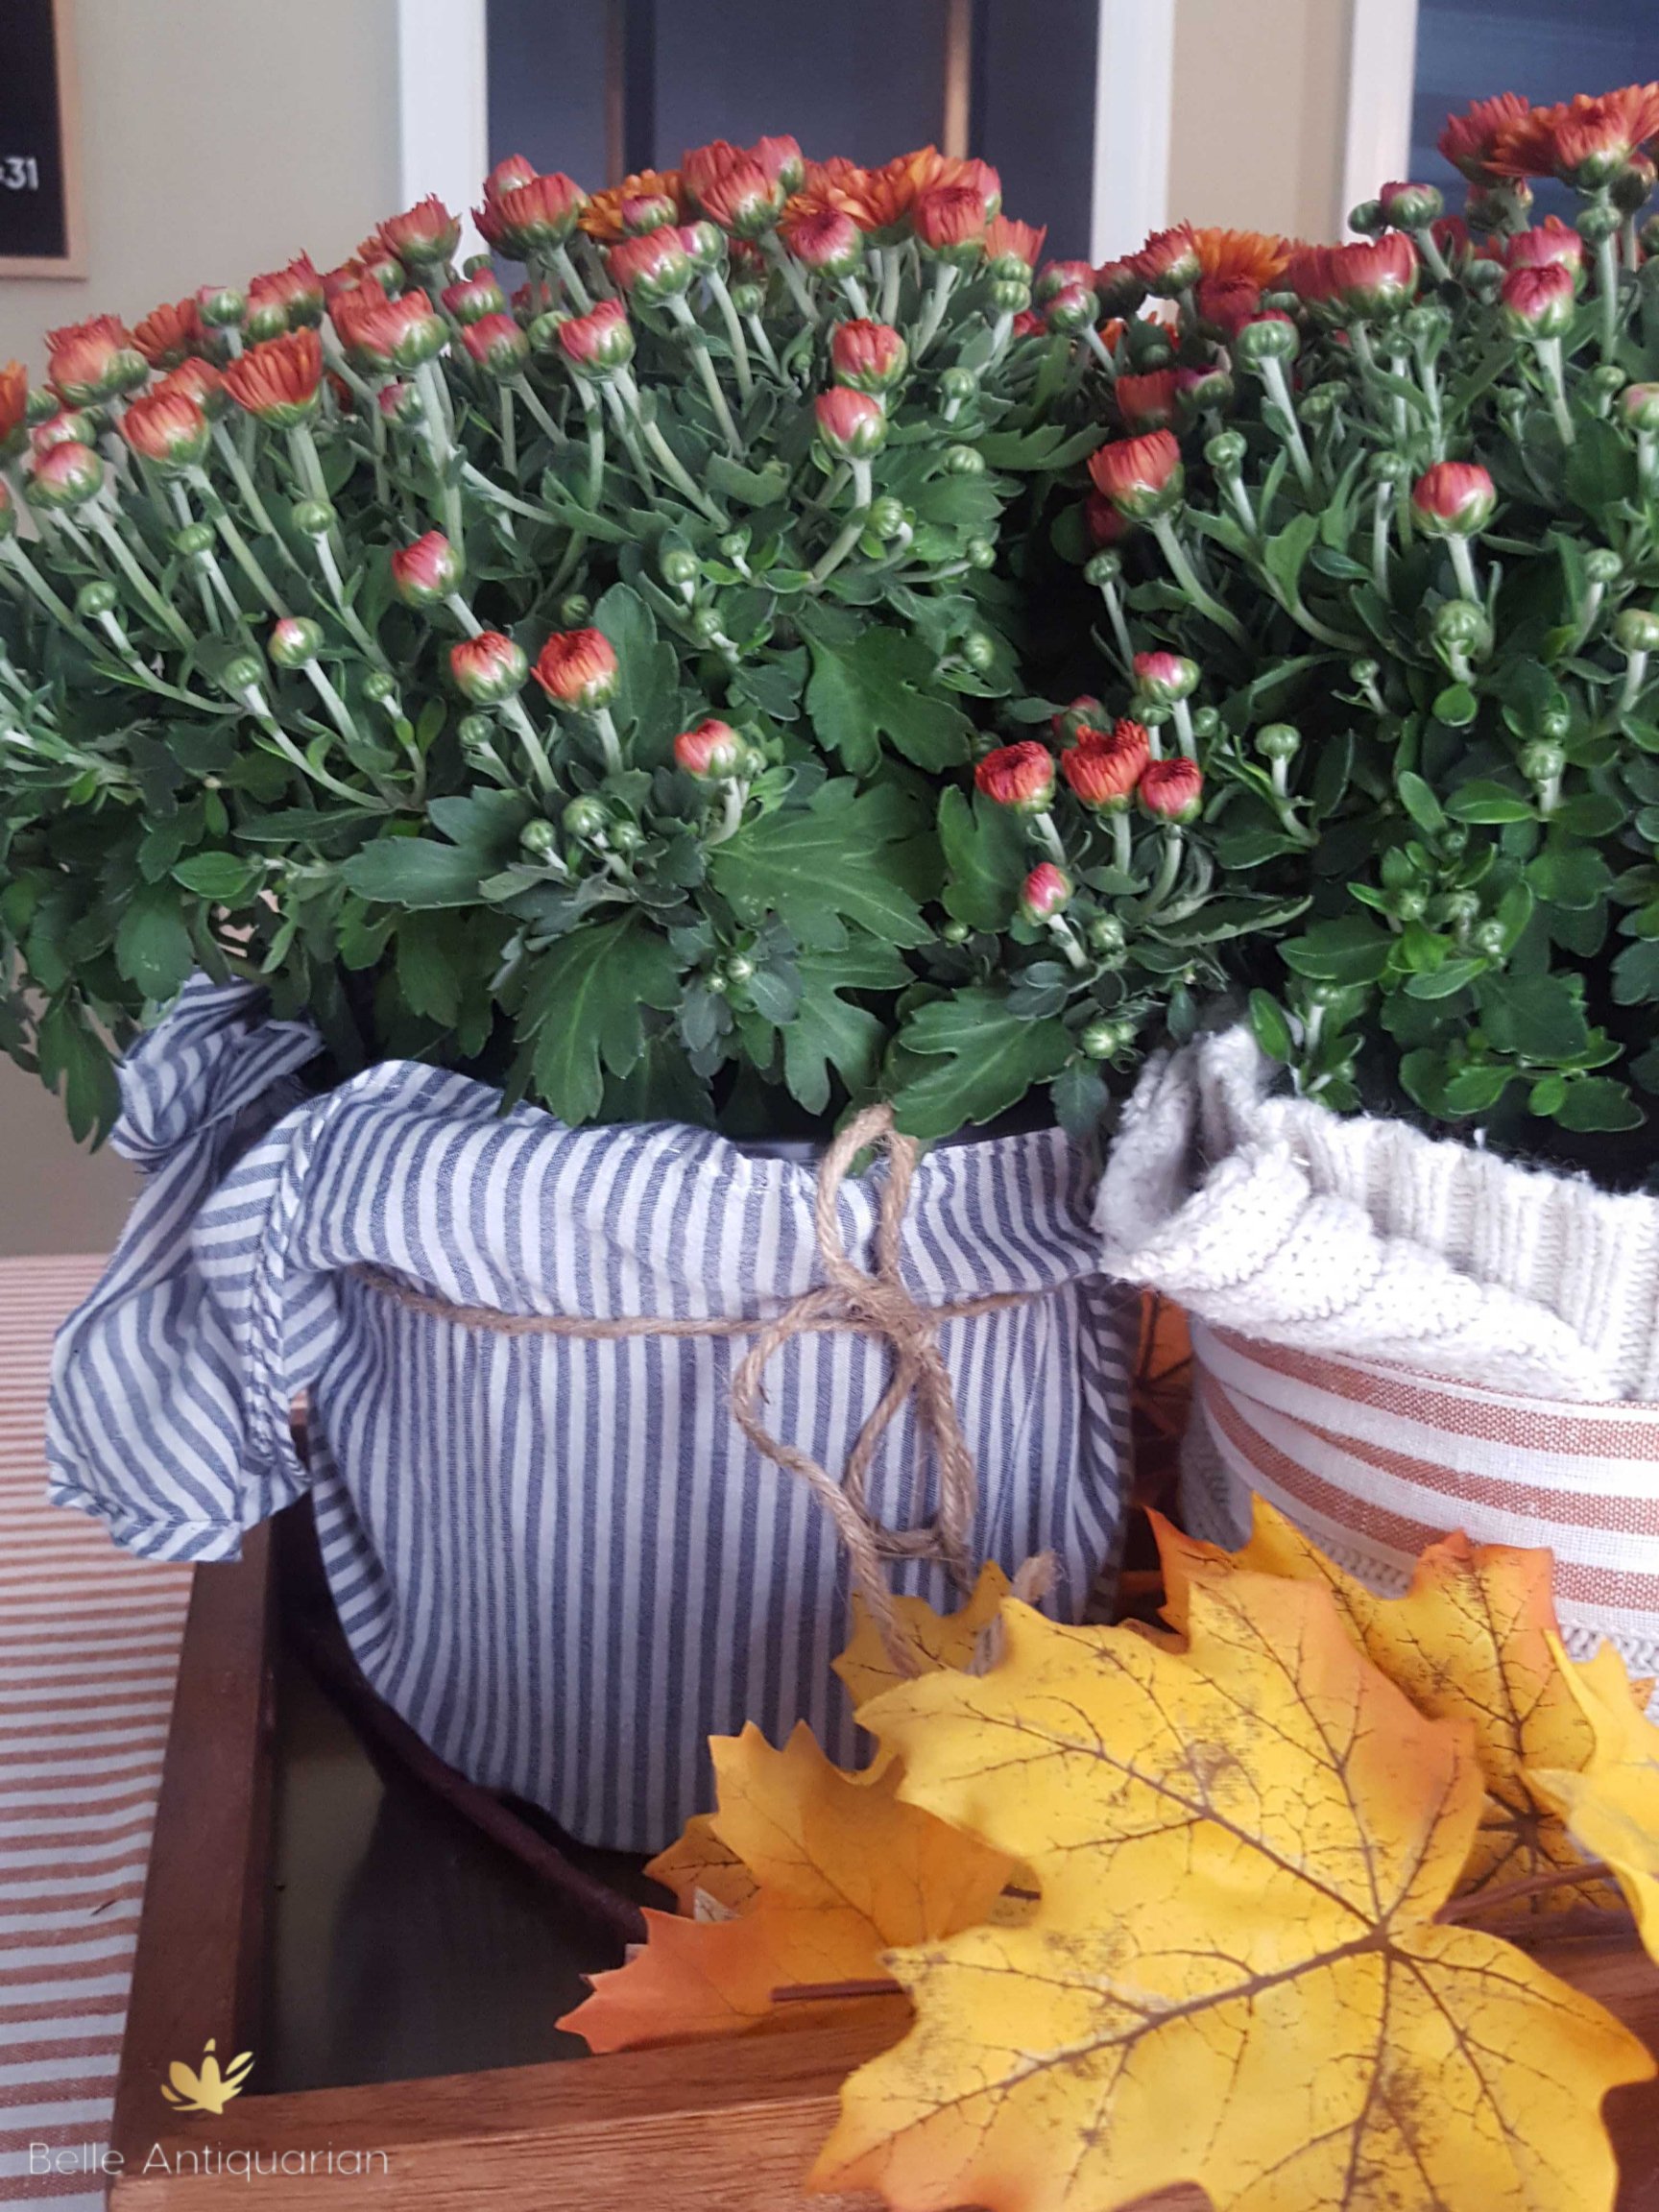
I decided to find a way to dress them up a little and hide their ugly, plastic pots. I dug through my donate pile and found a sweater and a shirt that went well with my table cloth.

I cut the shirts for a square piece of material that I could wrap around the pots. The piece of twine that I used with the striped material was a scrap we had in the garage. The striped piece of fabric around the sweater material was actually part of the packaging for the tablecloth that I was using.

This would be a really cute and easy way to dress up a mum to give as a gift. The mums cost $4.88 and the other materials were free because I already had them! Do you use mums in your fall decor?

These are going to be planted in my big whiskey barrel planters in the backyard once I am done with them on the table. Happy fall, y’all!

Mahi Mahi Fish Tacos

Here I am again with another fish recipe! We had a few more of our favorite frozen Mahi Mahi fillets from Costco in the freezer, and we love anything in a taco, so I thought I’d give this recipe from Jessica Gavin a try.

The recipe calls for a homemade Avocado Lime Sauce. But I have something easier and better to recommend. If you haven’t tried this dressing from Aldi, you need to! It is perfect on fish tacos, and it saves time when putting these together. You can find it refrigerated in the Aldi produce section.

This is a really fast dinner. We paired our tacos with some Spanish rice and Ken’s homemade guacamole. Ken doesn’t cook many things, but he LOVES avocados and guacamole, so he has a go-to recipe that can be found here.

After you rinse and dry your Mahi Mahi, liberally coat both sides with a seasoning mixture of paprika, brown sugar, garlic powder, onion powder, salt, cumin, chili powder, and black pepper. Cook them 3-4 minutes on each side in a pan coated with vegetable oil.

Okay, here’s another time and money saver for you. This recipe calls for shredded red and green cabbage and cilantro for garnish. I found a southwest salad kit at Aldi that has those ingredients. It’s cheaper to buy the salad kit for the cabbage than it is to buy two heads of cabbage and cilantro. Either throw out the dressing and toppings from the salad kit or save them for something else.

The recipe doesn’t call for cheese, but….why not? Half of us used cheese on our tacos, and half of us didn’t. I always opt for cheese. The printable recipe is below. You can always use the PinIt button to save it for later, too! Enjoy!

Mahi Mahi Fish Tacos

  • Servings: 8 tacos
  • Difficulty: easy
  • Print

A delicious, easy recipe for Blackened Fish Tacos.

Credit: BelleAntiquarian.com

Ingredients

  • 1 1/2 tsp smoked paprika
  • 1 1/2 tsp dark brown sugar
  • 1/2 tsp garlic powder
  • 1/2 tsp onion powder
  • 1/2 tsp salt
  • 3/4 tsp cumin
  • 1/4 tsp chili powder
  • 1/4 tsp black pepper
  • 4, 6oz Mahi Mahi fillets
  • 1 tbs vegetable oil
  • 8 corn tortillas (taco size)
  • lime wedges for garnish
  • diced tomatoes for garnish
  • shredded red and green cabbage for garnish
  • cilantro for garnish
  • Avocado Ranch dressing (We like Aldi’s!)

Directions

  1. Combine paprika, brown sugar, garlic powder, onion powder, salt, cumin, chili pepper, and black pepper in a small bowl.
  2. Rinse and pat Mahi Mahi fillets dry.
  3. Sprinkle spice seasoning evenly over both sides of the fish fillets.
  4. Heat oil in a large skillet or saute pan over medium-high heat.
  5. Add fish to the pan and cook 3 to 4 minutes per side until it reaches your desired degree of doneness. The spices will blacken, so watch carefully for burning.
  6. Warm the corn tortillas according to package directions.
  7. Divide the fish evenly over the warmed tortillas.
  8. Garnish with desired toppings of cabbage, cilantro, limes, tomatoes, and/or avocado ranch dressing.

Buffalo Check Table Settings

I am excited to share today’s blog post! Hobby Lobby has some really cute black and white buffalo check decor for fall. However, I want to show you that it’s not just for fall! The table runner and napkins that I picked up can actually be used for a lot of different themes and seasons. Here is a picture of how I used the black and white buffalo check decor for Halloween, but it can also be used with September Sunflowers, Thanksgiving, and Christmas. Now here’s the really exciting part: I am giving away a table runner, set of 4 napkins, a garland of black and white wooden beads, and a garland of orange and white wooden beads. Find out how to enter at the bottom of this post!

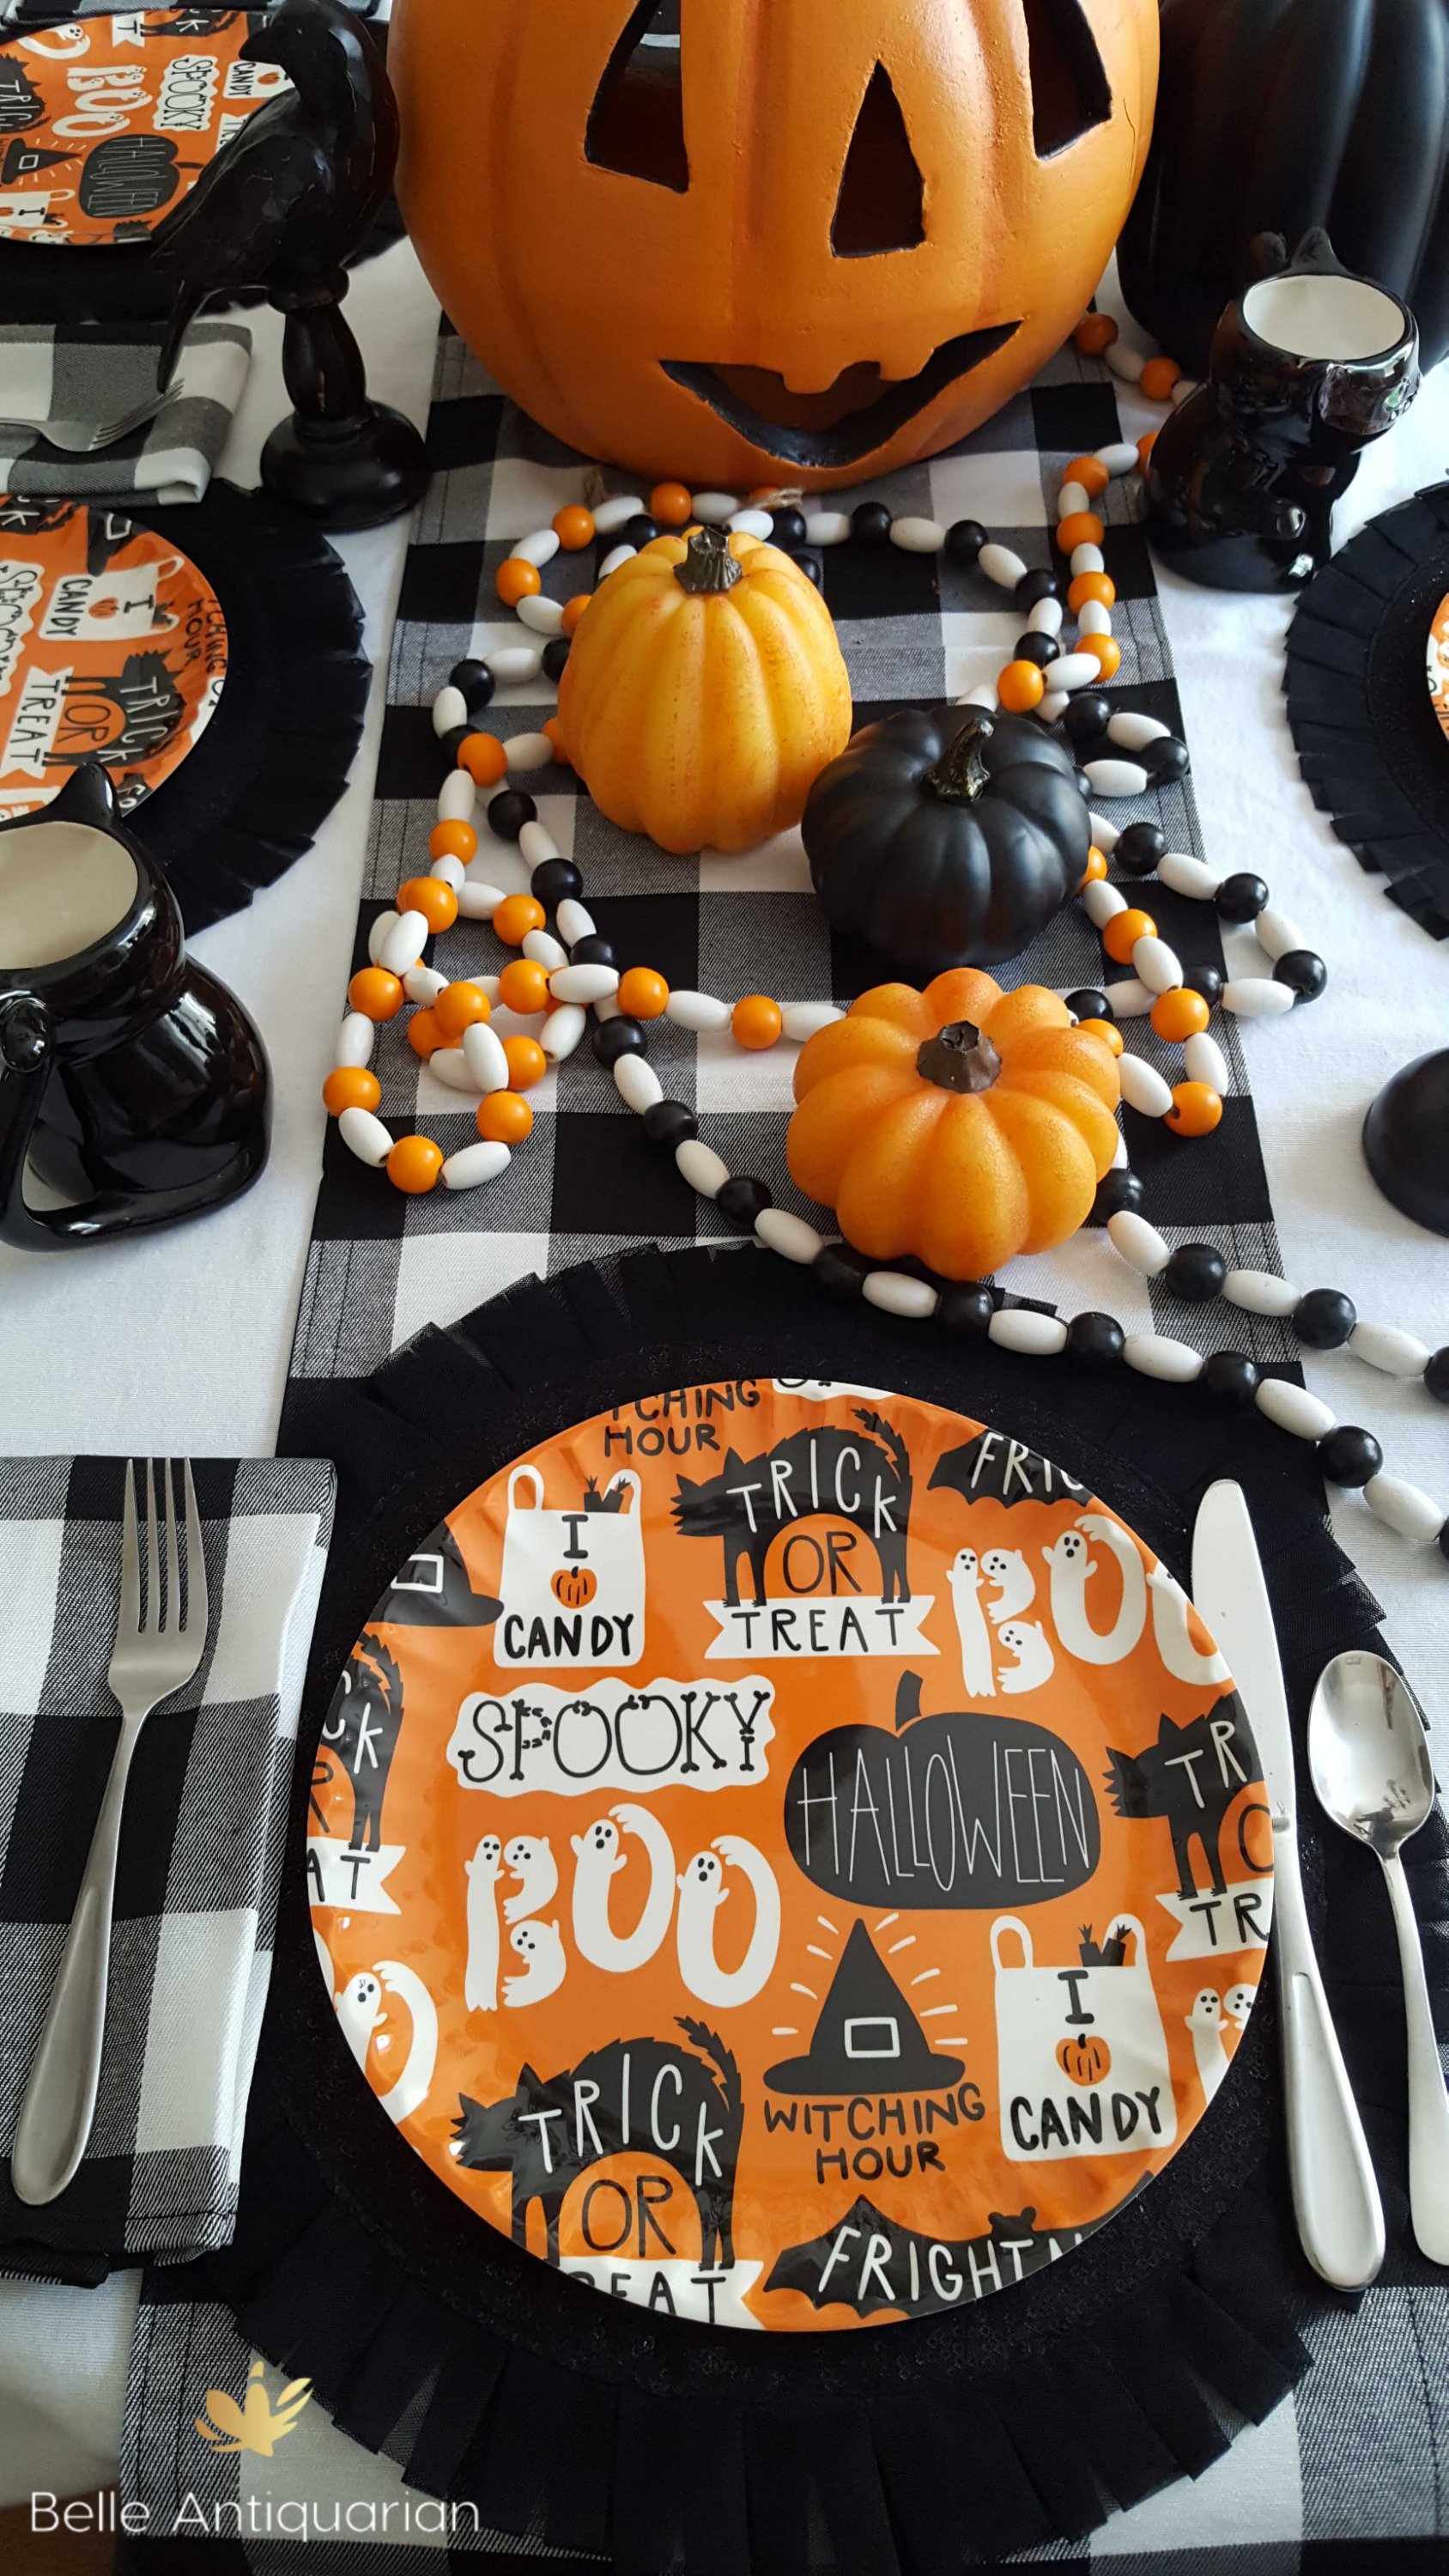
Buffalo Check decor at Halloween

Here are my black and white buffalo check table runner and napkins on our table for Halloween. The black and white are easy to mix with Halloween decorations. If Halloween is a busy night for you with trick-or-treaters, just pick up some basic orange paper plates to go with these, and clean up will be a snap.

Several other people have done a fantastic job of setting their tables with black and white buffalo check decor. I want to share a few of theirs with you so that you can see how versatile this pattern is.

First up is this sunflower table setting with buffalo checks from Driven by Decor. To me, this table setting is perfect for that time at the end of summer/beginning of fall when it’s still hot, but summer is over. Kris over on Driven by Decor did a beautiful job showing that fall decor can be more than just pumpkins!

Here’s an example from My Creative Happy on how you can use black and white buffalo check for Thanksgiving. She paired it with touches of brass, which brings up a great point. You can pair it with golden or silver tones, wood or metal. This pattern is very versatile to your tastes.

And for the fourth look today, here is a Christmas table setting using black and white buffalo check. This one is from Make a Joyful Home, and Tammy uses red accents with hers. But you could totally add green, or just silver, and it would still look Christmas-y.

Now for the exciting part! Here is a picture of what you can win: a table runner, a set of 4 napkins, a garland of black and white wooden beads, and a garland of orange and white wooden beads. To enter, simply hop on over to my Instagram, follow me on Instagram, like the contest post with the same picture as below, and tag a friend in the comments. Contest ends on Friday, September 13, 2019. You must live in the continental US to win.

Good luck!

Polly’s Scalloped Oysters

I grew up several states away from my grandparents, but we saw them at least once a year for a few days in the summer. My dad is the sixth of nine children. I am one of 27 first cousins, and that’s just on my dad’s side of the family. My grandmommy, Polly, had her 9 children over a 22 year span. Some of my cousins are close to my dad’s age. Polly saw the world change in many ways. She raised children during the Great Depression, World War II, the Vietnam War and more. I am thankful for the times we shared together and memories I have of her.

Pauline Virginia, my Grandmommy Polly

I can still see her hands making fried chicken. I remember her apron and her waist. I memorized her ankles, and I can picture her church shoes in my mind as though I was looking at them now. Her arms were soft and padded when she gave me a hug. She drank coffee in the afternoon. She perched on a Cosco folding step stool when there weren’t enough seats for everyone at the kitchen table. And she was the only person I heard call my dad Rob growing up. I wish I could talk to her again. I have a million questions.

Me with Grandmommy Polly. 1984? Yes, I have very poor eyesight.

I was recently given 2 of her recipes printed in a church cookbook. One of those recipes is for Scalloped Oysters. According to my dad, oysters were a Christmas dish. They ate them fried on Christmas Eve, stewed for breakfast Christmas morning, and scalloped for Christmas dinner, which was lunchtime.

Polly’s Scalloped Oysters

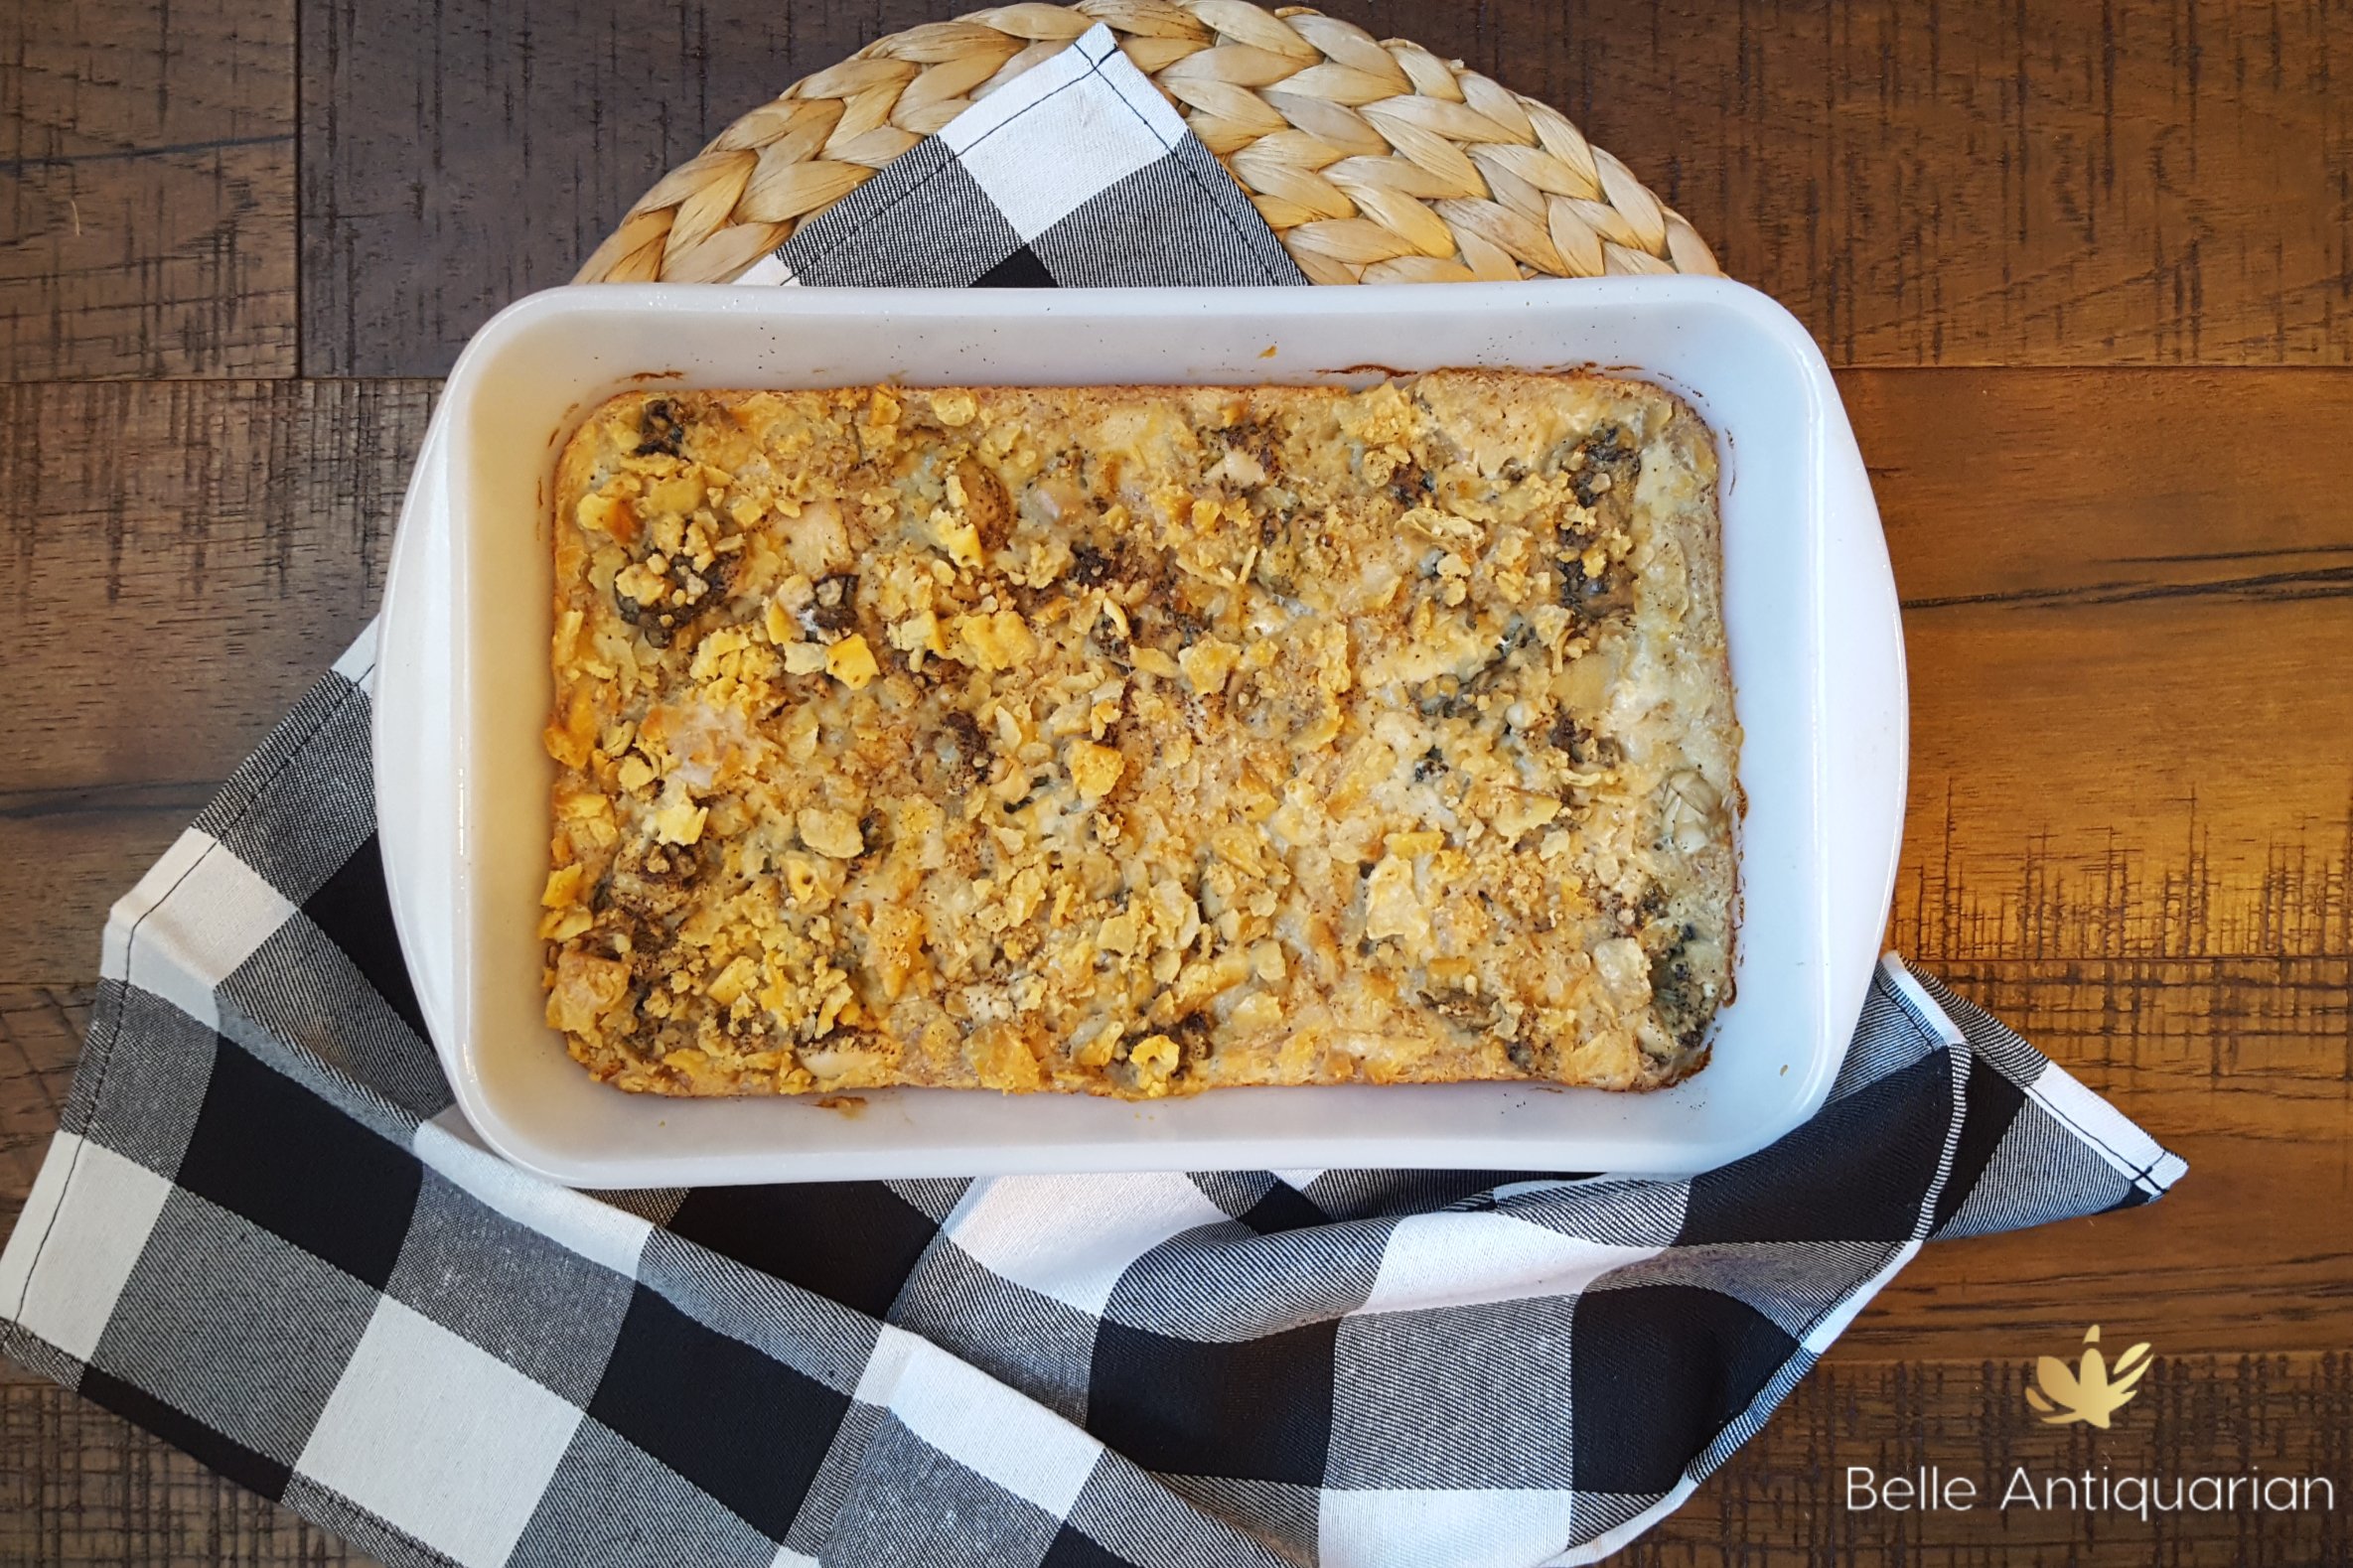
Freshly shucked oysters work best for this recipe, but those are not easy for me to come by. I’m an hour northeast of Atlanta, so I had to settle for oysters in a tub from the grocery seafood department.

If you love oysters, this is a recipe that you need to try! Enjoy!

Polly's Scalloped Oysters

  • Servings: 6
  • Difficulty: easy
  • Print

A traditional recipe for Scalloped Oysters.

Credit: BelleAntiquarian.com

Ingredients

  • 1 pint oysters
  • 2 cups cracker crumbs, small crush
  • 1/2 cup butter, melted
  • 3/4 cup half & half
  • 1/4 cup reserved oyster liquor
  • 1/4 tsp. Worcestershire
  • 1/2 tsp. salt
  • black pepper

Directions

  1. Drain oysters and reserve 1/4 cup of the liquor.
  2. Combine the cracker crumbs and butter
  3. Grease a casserole and put a layer of the crumb mixture on the bottom
  4. Put a layer of the oysters on top of crumbs and sprinkle them with pepper.
  5. Put a layer of crumbs on top of the oysters.
  6. Repeat another layer of the oysters and sprinkle with pepper.
  7. Combine the salt, cream, oyster liquor, and Worcestershire and drizzle over all. Do not stir.
  8. Top with remaining crumbs.
  9. Bake in a 350 degree oven for 40 minutes.
  10. Allow to rest 10-15 minutes before eating.

Peach Amaretto Whiskey Cocktail

Today is National Peach Pie Day. After weeks of 90+ degree heat, the last thing I want to do is turn the oven on and cook a pie. I love summer. It resets my soul from the rainy, cold, cloudy Atlanta winters. But towards the end of August (i.e. now), I’m done with it. Goodbye, “thighs sticking to plastic seats” season. Goodbye, “circling the parking lot for 30 minutes looking for a shady spot” season. Autumn is the Southerners rewards for surviving summer. And we are ready for it. So, instead of a peach pie, I present you with…a peach cocktail.

Don’t get me wrong. If you want to make a peach pie and share it with me, I’d eat it. But standing in front of a hot oven on this sweltering summer day, that’s going to be a “no”. Evenings on the patio with chirping cicadas, dogs chasing each other, and a few minutes of cool air during the “blue hour” make for a perfect moment for this easy cocktail.

Peach Amaretto Whiskey Cocktail

  • Servings: 1
  • Difficulty: easy
  • Print

A quick peach cocktail made with 3 ingredients.

Credit: BelleAntiquarian.com

Ingredients

  • 3 ounces of Simply Peach juice
  • 1.5 ounces of Bird Dog peach flavored whiskey
  • 3/4 ounce amaretto liqueur

Directions

  1. Pour the ingredients into a shaker.
  2. Shake well until blended
  3. Pour over ice into a lowball glass.

Watermelon Lemon Spritzer

Last week I shared my favorite fish recipe, and I can’t leave out this delicious summer spritzer that goes so well with it. It’s a perfect mixture of fresh and pre-made ingredients that come together quickly for a refreshing cocktail.

For this quick recipe you’ll need 4 cups of watermelon juice, 1 cup of lemon liqueur, 5 lemons – 4 juiced and 1 sliced, and 1 bottle of Prosecco.

The inspiration recipe used freshly squeezed watermelon juice. And I’m sure that is delicious. But I opt to use this no-fuss, no-mess substitute – Simply Watermelon juice. Also, Costco makes a great Prosecco.

Anyone remember the melon baller? I think every mom in the 80s went to Tupperware parties and the initiation piece was a melon baller. Anywho, to make this drink really impressive without a lot of trouble, try using a melon baller on some watermelon. You can freeze the balls and use them as ice cubes. FANCY, right?

Watermelon Lemon Spritzer

  • Servings: 12
  • Difficulty: easy
  • Print

A light, refreshing summer spritzer with watermelon, lemon, and prosecco.

Credit: BelleAntiquarian.com

Ingredients

  • 4 cups of Simply Watermelon juice
  • 1 cup of lemon liqueur
  • 5 lemons, 4 juiced and 1 sliced for garnish
  • 1 bottle of prosecco

Directions

  1. Mix the watermelon juice, lemon liqueur, and lemon juice together.
  2. Pour over ice or frozen watermelon balls into a lowball glass.
  3. Top each glass with 2 ounces of prosecco.
  4. Garnish each glass with a lemon wheel.

Mediterranean Fish Packets

I’ve been on a Mediterranean food kick this summer. Honestly, I have to say I feel SO healthy and well. That’s what it’s all about, right? I found this fish recipe that I love, and I changed it up a bit to make it work for me. I am excited to share it with you. I have even made a batch of this fish when no one else was home, just so that I could have leftovers. And here’s a secret *whispers*, one day I ate it for lunch AND dinner. That’s how much I love it.

I like to use Mahi-Mahi for this recipe. Costco sells a bag of frozen Mahi that is individually vacuum sealed. Get it. You need 4 of the fillets for this recipe. You’ll need to unwrap each the day before, put them in a dish in the fridge, and let them thaw.

You’ll take the next ingredients and mix them together in a bowl:

  • 1 can (15 oz) great northern beans, rinsed and drained
  • 1 can (15 oz) petite diced tomatoes, drained well. *I recommend Publix brand. They taste fresh and not like tomato soup.
  • 1 zucchini, chopped. *I like zucchini, so I add more.
  • 1 medium onion, chopped. I prefer less. Adjust to your taste.
  • 1 garlic clove, minced.
  • 1/4 cup white wine
  • 1/4 tsp pepper, divided (I like more).
  • 3/4 tsp salt, divided
  • 4 Mahi-Mahi fillets (6-8 oz each)
  • 1 lemon, cut into 8 thin slices.
  • Optional add-ins: 2 tbs. capers OR small, tender artichoke hearts OR mushrooms OR green olives

Take a piece of aluminum foil 12″ by 18″ or so. Spray it lightly with cooking spray. Rinse and pat dry the fish. Place it on the foil. Sprinkle with remaining salt and pepper. Spoon the mixture on top. Place 2 lemon slices on top. Fold the foil and crimp the edges so that nothing will leak out.

Now, you can either cook this on the grill or in the oven. You want to cook it at 400* for 15-20 minutes. The fish is done with it flakes easily with a fork and the vegetables are tender.

I served this with fresh watermelon and cantaloupe. I also have a cocktail that pairs perfectly with this. I’ll be sharing that soon! Finally, for dessert, lime sherbet and lemon cookies. This whole meal is refreshing and satisfying. I’ll put a printable below in case you want to try it.

Mediterranean Fish Packets

  • Servings: 4
  • Difficulty: easy
  • Print

A fresh, light, Mediterranean-inspired fish recipe perfect for a quick summer dinner.

Credit: BelleAntiquarian.com

Ingredients

  • 1 can (15 oz) great northern beans, rinsed and drained
  • 1 can (15 oz) petite diced tomatoes, drained
  • 1 zucchini, chopped
  • 1 medium onion, chopped
  • 1 garlic clove, minced
  • 1/4 cup white wine
  • 3/4 teaspoon salt, divided
  • 1/4 teaspoon pepper, divided
  • 4 Mahi-Mahi fillets
  • 1 lemon, cut into 8 thin slices
  • Optional Add-Ins: 2 Tbs. of capers OR small, artichoke hearts OR mushrooms OR chopped green olives

Directions

  1. Preheat grill or oven to 400*. In a bowl, combine beans, tomatoes, zucchini, onion, garlic, wine, 1/2 teaspoon salt, 1/8 teaspoon pepper. If you are adding optional add-ins, mix them in at this time, too.
  2. Rinse fish and pat dry. Lightly spray a 12×18 inch piece of foil. Place the fillet on top of the foil; season with remaining salt and pepper. Spoon bean mixture over fish; top with lemon slices. Fold foil around fish and crimp edges to seal. (Repeat for each fillet.) Transfer packets to grill or baking sheet in oven.
  3. Bake until fish just begins to flake easily with a fork and vegetables are tender, 15-20 minutes.

Thanksgiving Dinnerware Patterns

Only one holiday comes to mind that is almost entirely centered around the dining table and food: Thanksgiving.

Food is important in all of the holidays we celebrate, but other activities such as church services, gifts, egg hunts, or fireworks also take center stage. But when it’s time for Thanksgiving it’s all about the food. And therefore, I have a love of Thanksgiving plates that the food is placed on. 
There are many vintage china patterns with Thanksgiving or turkey patterns that I admire, but there are some new ones, too. Here are a few of my favorites that I’d like to share with you.
photo from Replacements.com

These plates called His Majesty by Johnson Brothers, England were produced from 1955 – 1983, but reintroduced in 2004. Johnson Brothers seems to have caught on that America loves to put a turkey themed pattern on their Thanksgiving table. They have produced many patterns featuring the bird of the day.

photo from Replacements.com
This Thanksgiving scene in red transferware is very handsome! It’s called Bountiful Harvest by Homer Laughlin. 

photo from Replacements.com
This pattern, called Thanksgiving by Spode, is elegant and formal. 
Blue and white transferware is very popular, but also quite timeless. This is Blue Turkey by Wedgwood. 
Available at Williams Sonoma this year are the Plymouth Turkey and Plymouth Pumpkin patterns, which are very pretty!
The Plymouth Pumpkin plates from Williams Sonoma could be displayed for the entire fall season from Halloween to Thanksgiving. 
What is your favorite Thanksgiving dinnerware pattern? I love discovering new vintage patterns that I’ve never seen before, especially when they’re mixed and matched. Please share yours with me.