Costco Rotisserie Chicken – Meal Plan Monday

The hardest part of cooking dinner is coming up with what to cook for dinner. I tell my family, “Just tell me what you want to eat, and I’ll cook it.” At the end of the day I’m tired, standing in front of a pantry full of ingredients, and no clue of what to cook.

A few years ago I started meal planning and meal prepping. Knowing ahead of time what’s for dinner, and knowing that I have all of the ingredients ready to go makes cooking SO much easier.

So each week, I’ll plan our Monday through Friday meals. If there are any shortcuts I can do ahead of time to cut down on cooking time or expenses, then I will plan those out, too. So here’s our meal plan for this week. (above) Two of the meals (Monday and Tuesday) are chicken dishes, and I thought I’d show you how I save money and time on chicken dishes. And here’s my secret…Costco Rotisserie Chickens.

Costco rotisserie chickens are much bigger than the average grocery store rotisserie chicken. I don’t substitute a grocery store rotisserie chicken, because it doesn’t give the same amount of meat, and they’re more expensive. Costco rotisserie chickens are $4.99. They aren’t priced per pound; it’s simply $4.99. So when you are buying them, buy the biggest ones they have set out. I love them because they’re cheap AND they’re already cooked.

After I bring them home, I immediately take all of the chicken off of the bones and put it into freezer bags. Depending on what meals I have planned and how much meat is on the chicken, I usually divide it into one or two pounds in each bag. And next, unless I am cooking with it that very same day, I put it into the freezer. Trust me on this – If you aren’t cooking with it that day – put it into the freezer. Think of all those bags of spinach and salads you throw away. The same thing will happen with meat. Life happens and plans change. When you are ready to use it, just put it in the mircrowave on the defrost setting. You can finish warming it up in a pan or in the oven.

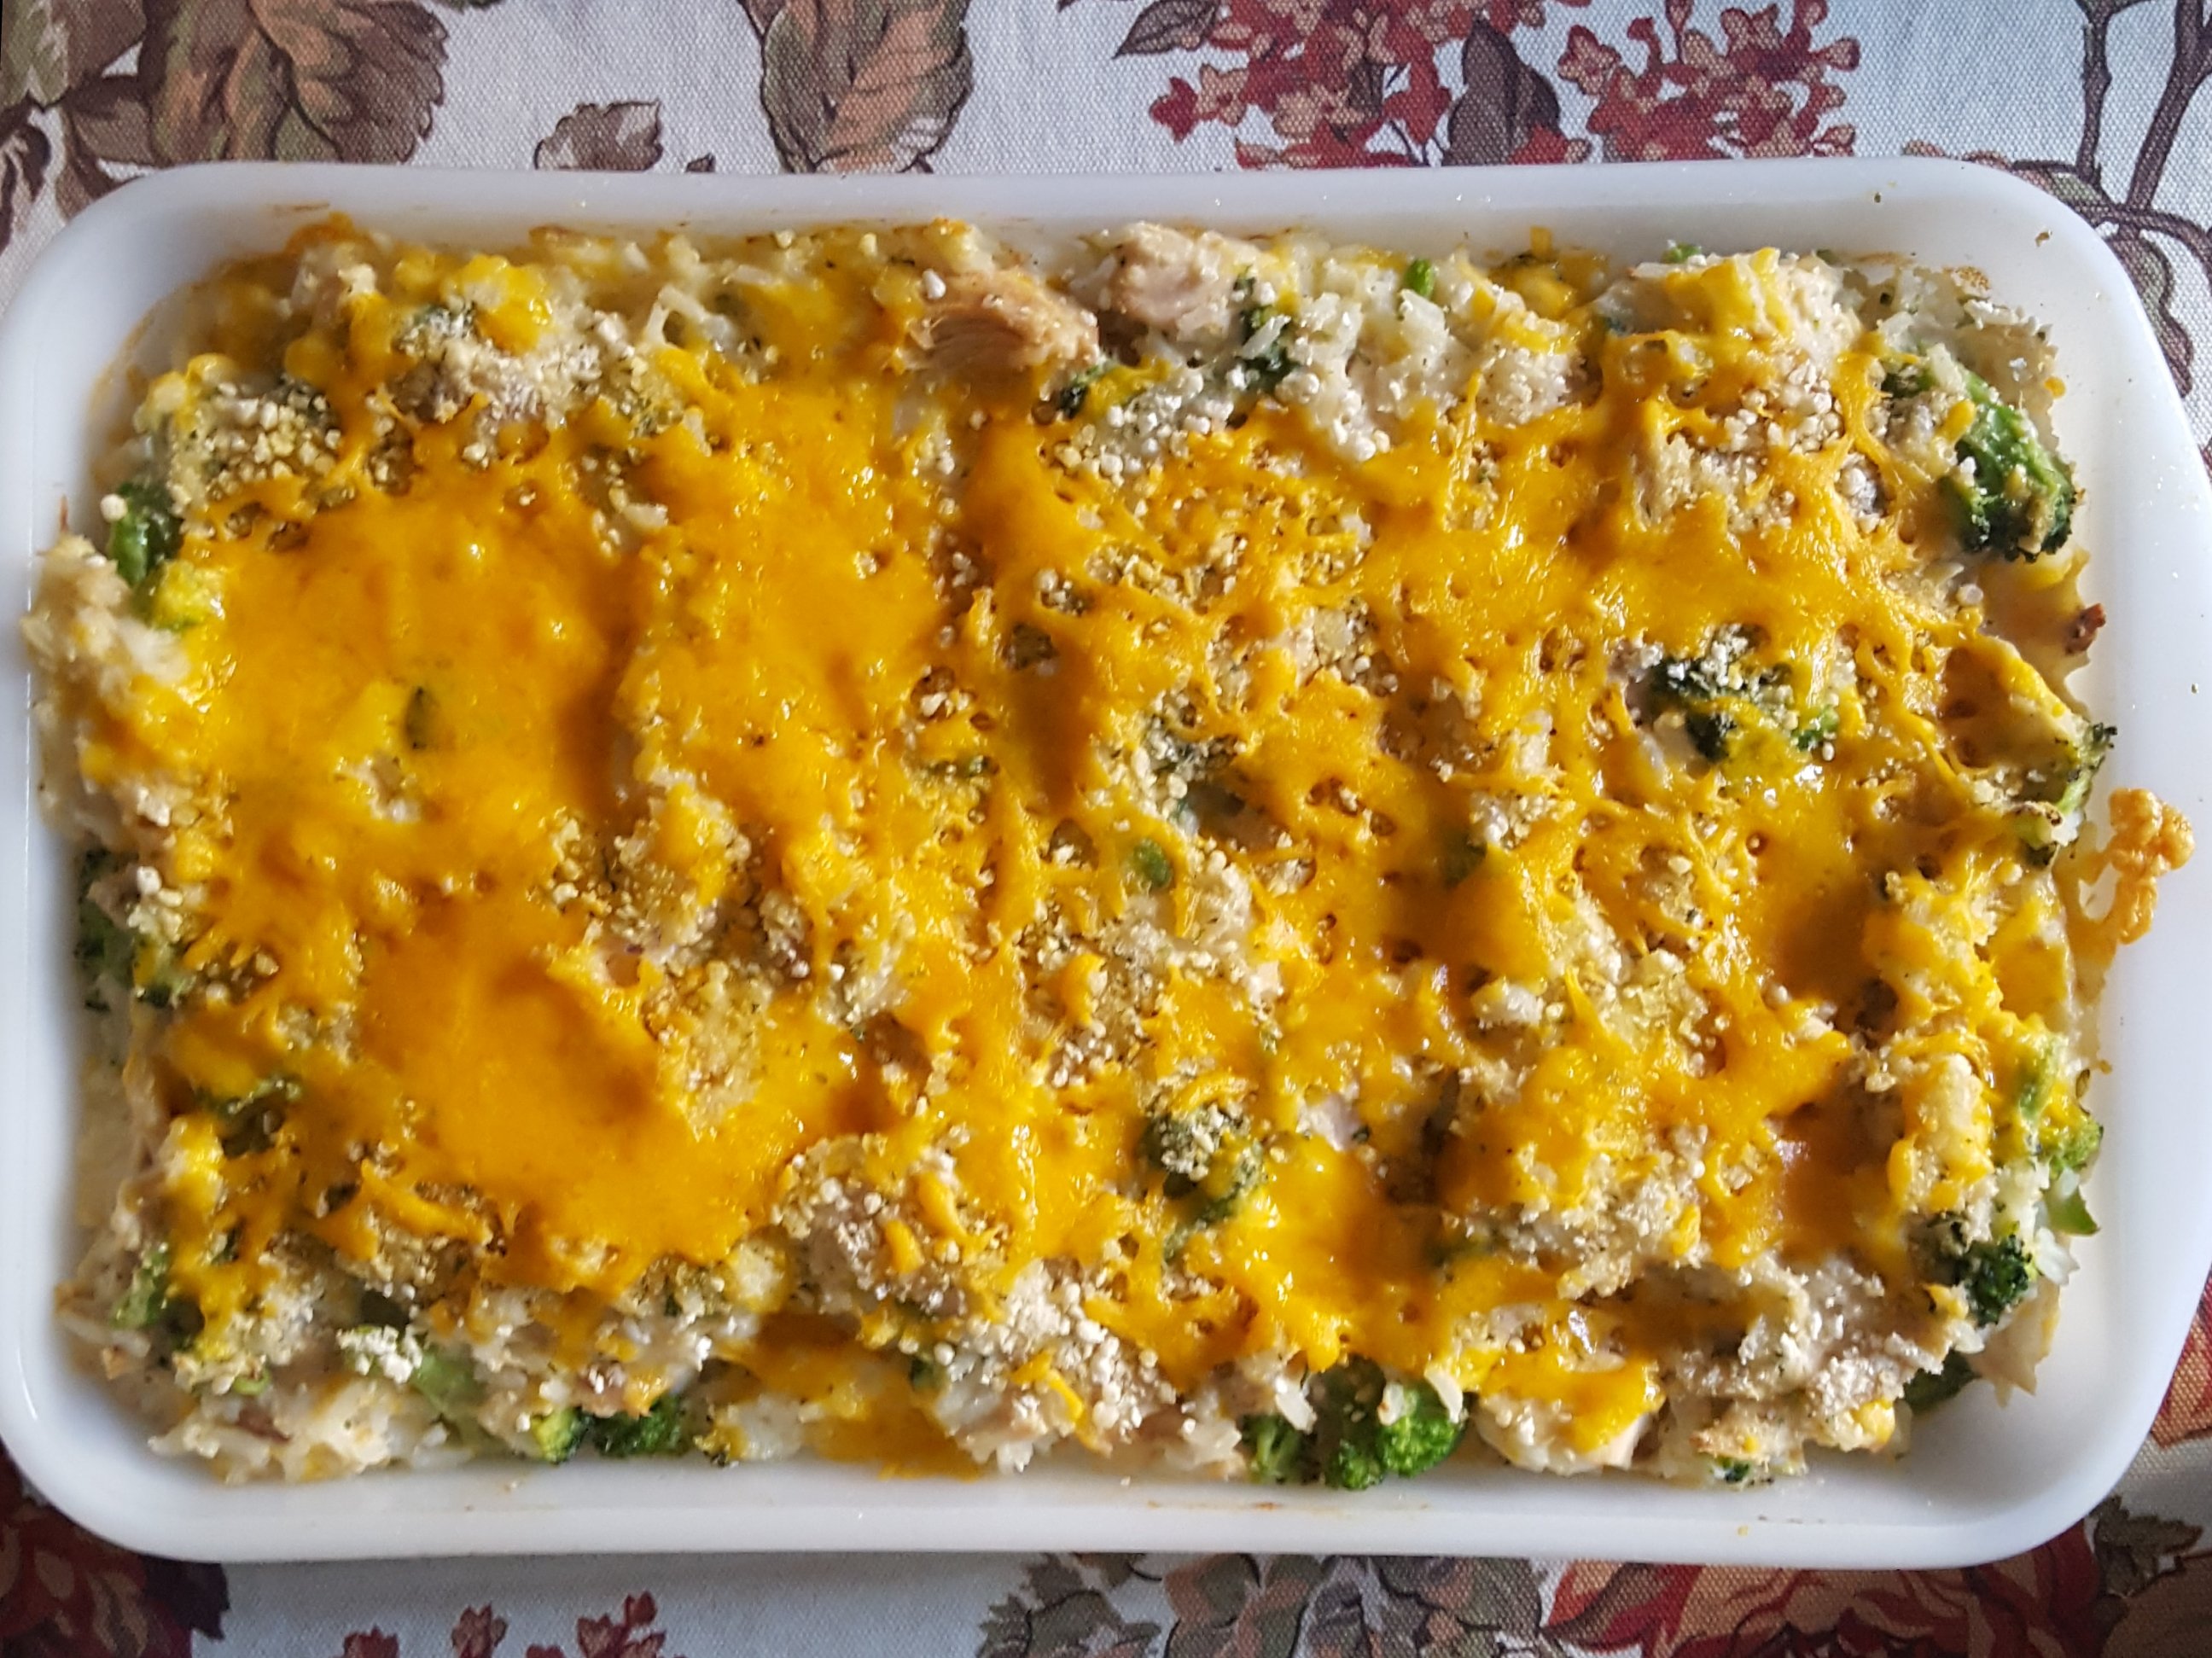
We use this in a lot of ways. Sometimes I do leave some in the fridge for lunches. We use it for salads, soups, chilis, wraps, and much more. This week I am using this chicken for a chicken, broccoli, rice casserole and chicken enchiladas. Since both of those meals will also use rice, I cooked rice ahead of time, too. HERE is the link for the chicken/broccoli/rice casserole. And HERE is the link for the chicken enchilada recipe I use. I make the chicken/broccoli/rice casserole gluten free by using Pacific Foods brand cream of chicken condensed soup, and I top it with 4C brand gluten free seasoned bread crumbs. I also don’t use Minute Rice – I precook rice for the week. To save the most amount of time with the chicken/broccoli/rice casserole, prepare it completely ahead of time and put it the fridge. Put it into the oven when you’re ready to eat it.

I’ll talk about it more in another blog post, but I do all of our meal prep Sunday evening or Monday. I do our grocery shopping on Thursdays or Fridays. We try our very hardest to reserve Saturdays and Sundays as days of rest.

Pumpkin Breakfast Cookies – Meal Plan Monday

Hi! I’m starting a new series called Meal Plan Mondays. Health and wellness are important to our family, and I thought I’d share a few ways we make cooking and eating more convenient so that we can be as healthy as possible. On Mondays I hope to share recipes I use to prepare convenience foods ahead of time. I may also share our menu for the week and show which ingredients I will prep ahead of time to make weeknight cooking as easy as possible.

This week I am sharing a recipe that I sometimes make so that we have something quick to grab for breakfast – Pumpkin Breakfast Cookies. I found this recipe a while ago from LeelaLicious. I’m not sure “cookie” is the right word for these, although the shape is reminiscent of one. These cookies have many granola type of ingredients, but they aren’t really crunchy or granola-like either. You’ll just have to try them! After I make them, I will put them in an airtight container. If I make more than one batch, I’ll put the second batch in the fridge. Ken just grabs one to-go, but I like to microwave mine for a few seconds before eating it.

With ingredients like oats, pumpkin seeds, and cranberries, these are delicious, gluten-free, and satisfy hunger all morning!

Tips: When I bake these I like to decrease the amount of pumpkin seeds to 1/3 cup. Also, I found Aldi to be the cheapest place to find gluten free oats, pumpkin seeds, coconut oil, and ground flax seed.

Pumpkin Breakfast Cookies

  • Servings: 12 cookies
  • Difficulty: easy
  • Print

A healthy seasonal cookie perfect for meal prepping your grab-and-go breakfast.

Ingredients

  • 1/4 cup coconut oil, melted
  • 1/4 cup honey
  • 1 cup rolled old-fashioned oats
  • 1 cup quick cooking oats
  • 2/3 cup dried cranberries
  • 2/3 cup pumpkin seeds
  • 1/4 cup ground flaxseed
  • 1 tsp. pumpkin pie spice
  • 1/2 tsp. salt
  • 1/2 cup pumpkin puree
  • 2 eggs, beaten

Directions

  1. Preheat the oven to 325*. Line a baking sheet with parchment paper.
  2. In a small bowl, warm the coconut oil to melt it. (Microwave is easiest. It only needs to get hot enough to melt.) Add the honey, whisk together. Add the pumpkin puree, followed by the eggs.
  3. In a large bowl, mix the remaining dry ingredients until combined.
  4. Add the wet mixture from the small bowl into the dry ingredients in the large bowl.
  5. Drop 1/4 cup sized scoops of the mixture onto your cookie sheet and flatten. (These will not spread while baking.)
  6. Bake 15-20 minutes until edges are lightly browned and centers are set.
  7. Let cool completely before moving to an airtight container.

Fall Snack Mix

I’ve never been a busy hostess. For many years Ken worked nighttime 12 hour shifts. He also worked a rotating schedule with only one full weekend off a month. On top of all of that, he worked most holidays. That meant that hosting friends for dinner on a Saturday night was almost always out of the question. When he did happen to be off at night or on the weekend, we had household things to get done and family time to spend together. Over the years I found that my way of showing hospitality to people was not to bring them to me; it was for me to reach out to them. Sometimes extending hospitality means reaching out to show people how much we care and appreciate them.

…it’s the small things, the size of a mustard seed, that ultimately move mountains.

Cory Booker

I’ve delivered meals to a lot of people over the years, usually when someone is sick. But my favorite way to reach out with hospitality is to treat people out-of-the-blue, “just because.” This week I mixed up a giant bowl of a fall snack mix, and I put it into bags with tags on them. Ken took them into work on Monday and handed them out to his coworkers. There wasn’t an occasion or reason – It was just because sometimes Mondays stink, and who doesn’t love a little treat on their desk?

I’ve seen pictures of similar mixes on Pinterest and Instagram. I’ve actually never looked up or used a recipe. I just mix up a bunch of things that I think taste good together.

Here’s what I like to mix in:

  • Brach’s fall mix candy corn (It’s the bag that also has the mallow pumpkins and assorted fall colors in it.)
  • A jar of dry roasted peanuts.
  • A bag of mini pretzel twists.
  • A “share size” bag of M&Ms. (We like to use the caramel or cocoa flavors in the fall mix.)
  • Chocolate flavored Chex Cereal (Not the whole box.)
  • Caramel Popcorn (We like “The Mix”.)

You can use more or less of the ingredients so that you have the proportions the way that you like. You can add or omit items that you want in the mix. (This time around I didn’t have caramel popcorn, so I used Teddy Grahams.) This is great to set out at a party or to put into bags like I have.

I think there’s an assumption that in order to show hospitality we must invite people into our homes. And that is wonderful way. But it’s not realistic for everyone. If you really want to “invite people in” and show them kindness, sometimes a little gesture can open the door.

Not all of us can do great things, but we can do small things with great love.

Mother Teresa

Maple Glazed Banana Bread

I was looking for a “fall” type of banana bread, and I found a great one that I want to share with you! This recipe from A Latte Food was a winner for us because it didn’t call for nuts. Many banana bread recipes use walnuts or pecans, but we are a nut-free household. Ken doesn’t eat gluten, but he wouldn’t have eaten banana bread anyway, so no big deal there.

The maple syrup in the glaze was the touch of “autumn” I was looking for. Sometimes I substitute the vanilla extract in the glaze for imitation rum extract, and that is a delicious fall flavor, too! But here’s the great thing about this recipe – it’s fantastic even without the glaze! If you want to skip on some of the sugar, skip the glaze and just make the banana bread.

Something that I like to do with baked goods or desserts is to split the recipe in two, and share the second one with a friend or neighbor. Not only do I feel like I am showing some hospitality to others by sharing goodies, but I am also keeping it out of the house so that I won’t overindulge!

A great way to share is to bake into foil pans with a lid. This is great because no one has to worry about returning a dish to you. I put this bread into a pretty bag with a tag. It’s the little touches that will make the recipient feel special and let them know they are cared for.

Maple Glazed Banana Bread

  • Servings: 12 slices
  • Difficulty: moderate
  • Print

A flavorful banana bread with maple glaze.

Credit: BelleAntiquarian.com

Ingredients

    Bread
  • 1/2 cup butter, softened
  • 1 cup sugar
  • 2 eggs, room temperature
  • 2 cups all-purpose flour
  • 1 tsp. baking soda
  • 1/4 tsp. salt
  • 3-4 medium ripe bananas
  • 2 tbs. brown sugar
  • 1 1/2 tsp. vanilla extract
  • 1/2 tsp. ground cinnamon
  • Maple Glaze
  • 1/4 cup butter
  • 1/2 cup pure maple syrup
  • 1 cup powdered sugar
  • 1/2 tsp. vanilla extract *OR* imitation rum extract
  • 1/4 tsp. ground cinnamon

Directions

  1. Preheat the oven to 350*. Grease two 8×4 pans.
  2. In a small bowl, mash bananas, brown sugar, vanilla extract, and ground cinnamon.
  3. In a large bowl, cream butter and sugar together until light and fluffy.
  4. Add eggs to butter and sugar mixture, beat until mixed.
  5. Add the mashed banana mixture to the large bowl with the butter, sugar, and eggs.
  6. In a separate bowl whisk together the flour, salt, and baking soda.
  7. Slowly add a little of the dry mixture to the wet mixture until it is all incorporated.
  8. Bake at 35-40 minutes (for two 8×4 pans) until cake tester comes out clean with just a few moist crumbs stuck to it.
  9. Allow to cool for 10 minutes. Move to a wire cooling rack.
  10. Maple Glaze
  11. Melt butter, maple syrup,vanilla (or rum) extract, and cinnamon over low heat. Once melted together, pull the pan off the heat. Sift in powdered sugar, and whisk until fully combined. Allow to cool for 8-10 minutes so the glaze can thicken.
  12. Once the glaze has thickened, give it a quick stir and pour it over the breads.
  13. Allow the glaze to harden completely before cutting into slices.

Mahi Mahi Fish Tacos

Here I am again with another fish recipe! We had a few more of our favorite frozen Mahi Mahi fillets from Costco in the freezer, and we love anything in a taco, so I thought I’d give this recipe from Jessica Gavin a try.

The recipe calls for a homemade Avocado Lime Sauce. But I have something easier and better to recommend. If you haven’t tried this dressing from Aldi, you need to! It is perfect on fish tacos, and it saves time when putting these together. You can find it refrigerated in the Aldi produce section.

This is a really fast dinner. We paired our tacos with some Spanish rice and Ken’s homemade guacamole. Ken doesn’t cook many things, but he LOVES avocados and guacamole, so he has a go-to recipe that can be found here.

After you rinse and dry your Mahi Mahi, liberally coat both sides with a seasoning mixture of paprika, brown sugar, garlic powder, onion powder, salt, cumin, chili powder, and black pepper. Cook them 3-4 minutes on each side in a pan coated with vegetable oil.

Okay, here’s another time and money saver for you. This recipe calls for shredded red and green cabbage and cilantro for garnish. I found a southwest salad kit at Aldi that has those ingredients. It’s cheaper to buy the salad kit for the cabbage than it is to buy two heads of cabbage and cilantro. Either throw out the dressing and toppings from the salad kit or save them for something else.

The recipe doesn’t call for cheese, but….why not? Half of us used cheese on our tacos, and half of us didn’t. I always opt for cheese. The printable recipe is below. You can always use the PinIt button to save it for later, too! Enjoy!

Mahi Mahi Fish Tacos

  • Servings: 8 tacos
  • Difficulty: easy
  • Print

A delicious, easy recipe for Blackened Fish Tacos.

Credit: BelleAntiquarian.com

Ingredients

  • 1 1/2 tsp smoked paprika
  • 1 1/2 tsp dark brown sugar
  • 1/2 tsp garlic powder
  • 1/2 tsp onion powder
  • 1/2 tsp salt
  • 3/4 tsp cumin
  • 1/4 tsp chili powder
  • 1/4 tsp black pepper
  • 4, 6oz Mahi Mahi fillets
  • 1 tbs vegetable oil
  • 8 corn tortillas (taco size)
  • lime wedges for garnish
  • diced tomatoes for garnish
  • shredded red and green cabbage for garnish
  • cilantro for garnish
  • Avocado Ranch dressing (We like Aldi’s!)

Directions

  1. Combine paprika, brown sugar, garlic powder, onion powder, salt, cumin, chili pepper, and black pepper in a small bowl.
  2. Rinse and pat Mahi Mahi fillets dry.
  3. Sprinkle spice seasoning evenly over both sides of the fish fillets.
  4. Heat oil in a large skillet or saute pan over medium-high heat.
  5. Add fish to the pan and cook 3 to 4 minutes per side until it reaches your desired degree of doneness. The spices will blacken, so watch carefully for burning.
  6. Warm the corn tortillas according to package directions.
  7. Divide the fish evenly over the warmed tortillas.
  8. Garnish with desired toppings of cabbage, cilantro, limes, tomatoes, and/or avocado ranch dressing.

Polly’s Scalloped Oysters

I grew up several states away from my grandparents, but we saw them at least once a year for a few days in the summer. My dad is the sixth of nine children. I am one of 27 first cousins, and that’s just on my dad’s side of the family. My grandmommy, Polly, had her 9 children over a 22 year span. Some of my cousins are close to my dad’s age. Polly saw the world change in many ways. She raised children during the Great Depression, World War II, the Vietnam War and more. I am thankful for the times we shared together and memories I have of her.

Pauline Virginia, my Grandmommy Polly

I can still see her hands making fried chicken. I remember her apron and her waist. I memorized her ankles, and I can picture her church shoes in my mind as though I was looking at them now. Her arms were soft and padded when she gave me a hug. She drank coffee in the afternoon. She perched on a Cosco folding step stool when there weren’t enough seats for everyone at the kitchen table. And she was the only person I heard call my dad Rob growing up. I wish I could talk to her again. I have a million questions.

Me with Grandmommy Polly. 1984? Yes, I have very poor eyesight.

I was recently given 2 of her recipes printed in a church cookbook. One of those recipes is for Scalloped Oysters. According to my dad, oysters were a Christmas dish. They ate them fried on Christmas Eve, stewed for breakfast Christmas morning, and scalloped for Christmas dinner, which was lunchtime.

Polly’s Scalloped Oysters

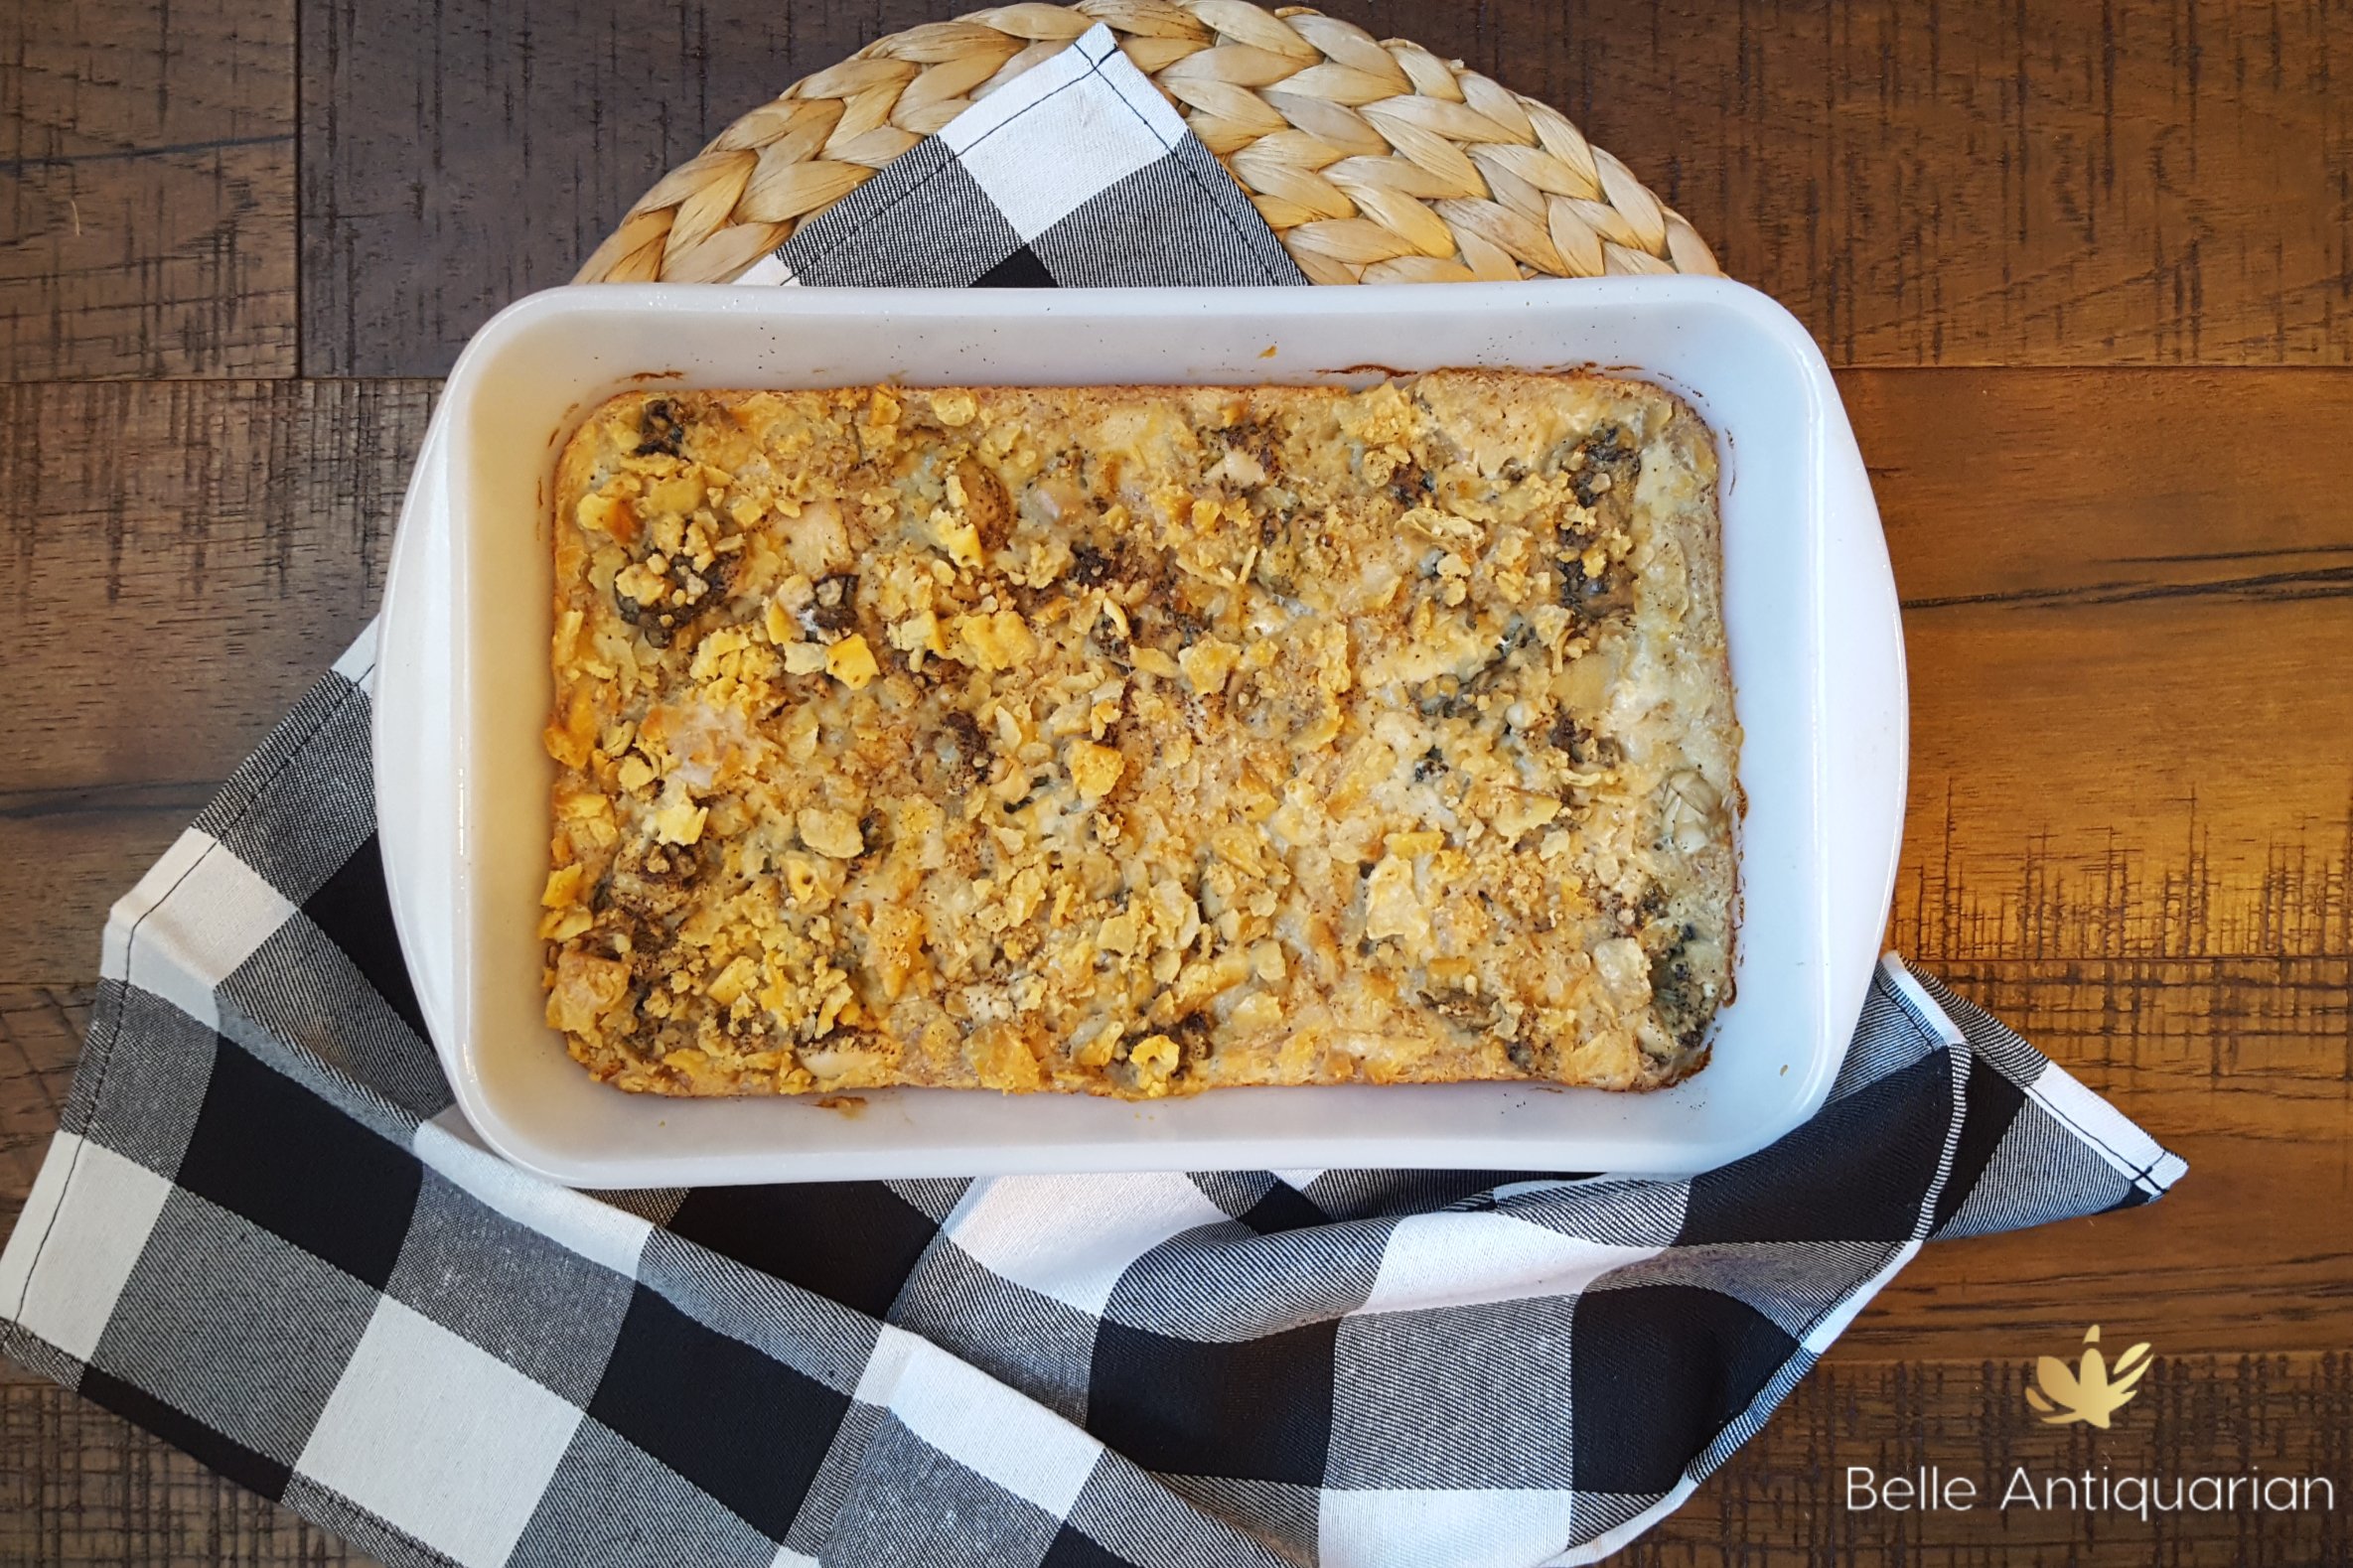
Freshly shucked oysters work best for this recipe, but those are not easy for me to come by. I’m an hour northeast of Atlanta, so I had to settle for oysters in a tub from the grocery seafood department.

If you love oysters, this is a recipe that you need to try! Enjoy!

Polly's Scalloped Oysters

  • Servings: 6
  • Difficulty: easy
  • Print

A traditional recipe for Scalloped Oysters.

Credit: BelleAntiquarian.com

Ingredients

  • 1 pint oysters
  • 2 cups cracker crumbs, small crush
  • 1/2 cup butter, melted
  • 3/4 cup half & half
  • 1/4 cup reserved oyster liquor
  • 1/4 tsp. Worcestershire
  • 1/2 tsp. salt
  • black pepper

Directions

  1. Drain oysters and reserve 1/4 cup of the liquor.
  2. Combine the cracker crumbs and butter
  3. Grease a casserole and put a layer of the crumb mixture on the bottom
  4. Put a layer of the oysters on top of crumbs and sprinkle them with pepper.
  5. Put a layer of crumbs on top of the oysters.
  6. Repeat another layer of the oysters and sprinkle with pepper.
  7. Combine the salt, cream, oyster liquor, and Worcestershire and drizzle over all. Do not stir.
  8. Top with remaining crumbs.
  9. Bake in a 350 degree oven for 40 minutes.
  10. Allow to rest 10-15 minutes before eating.

Peach Amaretto Whiskey Cocktail

Today is National Peach Pie Day. After weeks of 90+ degree heat, the last thing I want to do is turn the oven on and cook a pie. I love summer. It resets my soul from the rainy, cold, cloudy Atlanta winters. But towards the end of August (i.e. now), I’m done with it. Goodbye, “thighs sticking to plastic seats” season. Goodbye, “circling the parking lot for 30 minutes looking for a shady spot” season. Autumn is the Southerners rewards for surviving summer. And we are ready for it. So, instead of a peach pie, I present you with…a peach cocktail.

Don’t get me wrong. If you want to make a peach pie and share it with me, I’d eat it. But standing in front of a hot oven on this sweltering summer day, that’s going to be a “no”. Evenings on the patio with chirping cicadas, dogs chasing each other, and a few minutes of cool air during the “blue hour” make for a perfect moment for this easy cocktail.

Peach Amaretto Whiskey Cocktail

  • Servings: 1
  • Difficulty: easy
  • Print

A quick peach cocktail made with 3 ingredients.

Credit: BelleAntiquarian.com

Ingredients

  • 3 ounces of Simply Peach juice
  • 1.5 ounces of Bird Dog peach flavored whiskey
  • 3/4 ounce amaretto liqueur

Directions

  1. Pour the ingredients into a shaker.
  2. Shake well until blended
  3. Pour over ice into a lowball glass.

Mediterranean Chickpea Salad – 4 Ways

Last summer our daughter, Samantha, and I spent 9 nice travelling throughout Greece. We fell in love with the food while we were there. Both my husband and daughter have food allergies (each to different things), and it’s been very easy to find Mediterranean recipes that they can both eat.

When I made our Mediterranean Chickpea Salad for the first time, it was a big hit. It quickly became a weekly staple, and over time we modified it a few ways. It starts with a basic recipe that can be changed depending on your preferences.

My favorite thing about this Mediterranean Chickpea Salad is that it holds up incredibly well in the refrigerator. It is great to bring to a potluck or picnic.

The basic recipe starts with:

  • 2 cans chickpeas, rinsed and drained
  • 1 English cucumber, chopped.
  • 1 bell pepper, chopped. (Sometimes I use 2)
  • 1 medium onion, small dice. (I use yellow, but red onion would be great, too!)
  • 4 oz. crumbled Feta cheese (I use reduced fat. Add more or less to taste)
  • 3 – 4 oz. chopped green olives
  • 3 – 4 oz. chopped Greek kalamata olives
  • 1/2 cup of Ken’s Greek Simply Vinaigrette (I like the fresh taste of Ken’s, and it’s gluten free.)
  • Optional add-ins: chopped tender artichoke hearts or chopped canned beets

This basic recipe is very forgiving. You can add or leave out items depending on your tastes and what you have available in your pantry. Once you have the basic recipe prepared, here are 4 ways that we use it at our house:

1. As a weekly food prepped item

I include this as one of the recipes that I food prep for the week. We can eat it for lunch or dinner. It takes very little time to prepare it on Sunday, and then it’s ready whenever we need it. I store it in a airtight container, and it lasts for several days. If you are planning to use it throughout the week, I do not recommend adding the optional beets.

2. Add Quinoa

If you are looking to add even more protein, quinoa is a great add-in. I don’t recommend adding the quinoa in until you are ready to eat it. If you are food prepping, you can always prepare the quinoa ahead of time, but store it in a separate container.

3. Add Tuna

If you want to make this a more substantial meal instead of a side item, you can add tuna. I only use solid white albacore tuna in water. Make sure you drain the tuna completely of any water. If you are using tuna, you may want to add a little more dressing so that it doesn’t taste dry. I don’t add tuna unless I’m going to eat it right away.

4. Add Grilled Chicken

Ken loves chicken. It’s kind of a joke with everyone who knows him because he loves chicken more than the average person. He’s that guy who goes to a steak house and orders chicken. So naturally, we often add grilled chicken to this. I think the chicken holds up pretty well in the refrigerator. I sometimes will add it if I know that we’re going to be eating it within a couple of days. If you are into food prepping and saving time, you could even add a rotisserie chicken.

Mediterranean Chickpea Salad

  • Servings: 8
  • Difficulty: easy
  • Print

A healthy, versatile, Mediterranean-inspired salad perfect for a quick summer dinner.


Credit: BelleAntiquarian.com

Ingredients

  • 2 cans (16 oz) chickpeas (garbanzo beans), rinsed and drained
  • 1 English cucumber, chopped
  • 1 bell pepper, chopped
  • 1 medium onion, small diced
  • 4 oz. Feta cheese
  • 3 oz. green olives, chopped
  • 3 oz. Greek kalamata olives, chopped
  • 1/2 cup of Ken’s Greek Simply Vinaigrette
  • Optional Add-Ins: tender artichoke hearts, chopped or canned beets, chopped

Directions

  1. Drain and rinse the chickpeas. Add them to a large mixing bowl.
  2. Chop the cucumber, bell pepper, onion, green and kalamata olives. Add to the mixing bowl.
  3. Add the feta cheese and Greek dressing.
  4. Mix all ingredients well.
  5. Refrigerate for at least one hour.

3 Fast Weeknight Meals

Schools starts in Atlanta in less than 2 weeks, which means back to school for our high schooler and back to work for me. I work part-time as a substitute teacher, which is a blessing to me in many ways. (But that’s another blog post for later.) It also means sports practices and other extra-curricular activities all start back, too.

I really struggle to cook after coming home at the end of the day. Our day starts at 5:30 a.m., and most nights I can truly go straight to sleep the minute we walk in the door. When we get home the last thing I want to do is to cook dinner. And really, I can’t even think of what to cook.

If you’re like me, and you just need a quick, easy idea for what to make for dinner on hectic weeknights, here are 3 ideas for you. The key to all of these is having what you need waiting for you at home. Over the weekend, plan out your meals.

1.Costco Street Tacos plus Rice OR Tortilla Chips

Costco sells a Street Taco Kit. It includes grilled chicken, slaw, shredded cheese, corn tortillas, limes, a cilantro lime crema, and salsa. It is priced by the pound. Most of the kits are around $15. It’s enough to feed at least 4 people depending on the size of the kit that you buy. I recommend making rice ahead of time so that you can just warm it up. I usually make a week’s worth of white rice on Sunday, but we also like Zatarain’s spanish rice, which calls for a can of diced tomatoes. If you pair the taco kit with a bag of tortilla chips or pre-cooked rice, Dinner is ready in 5 minutes or less. If you have to cook the rice, dinner is ready in less than 20 minutes.

2. Aldi Cauliflower Cheese Pizza with a Salad Kit

Any frozen pizza will do, but we enjoy the gluten free cauliflower pizza from Aldi. Aldi sells a big selection of ready to bake pizzas. They are ready in 7-11 minutes, depending on the one you buy. Pair your pizza with a salad kit, and dinner is ready in about 10 minutes.

3. Filled Pasta with Steamed Broccoli and Bread

I select a refrigerated pasta that has some sort of meat in it, either chicken or sausage. My guys like to feel like they ate some meat in their meal. The refrigerated pasta cooks quickly, and the broccoli is cooked in the microwave for around 5 minutes. Your whole meal will be ready in about 10 minutes or less.

I hope these ideas help you when you’re tired after a long day at work.

Watermelon Lemon Spritzer

Last week I shared my favorite fish recipe, and I can’t leave out this delicious summer spritzer that goes so well with it. It’s a perfect mixture of fresh and pre-made ingredients that come together quickly for a refreshing cocktail.

For this quick recipe you’ll need 4 cups of watermelon juice, 1 cup of lemon liqueur, 5 lemons – 4 juiced and 1 sliced, and 1 bottle of Prosecco.

The inspiration recipe used freshly squeezed watermelon juice. And I’m sure that is delicious. But I opt to use this no-fuss, no-mess substitute – Simply Watermelon juice. Also, Costco makes a great Prosecco.

Anyone remember the melon baller? I think every mom in the 80s went to Tupperware parties and the initiation piece was a melon baller. Anywho, to make this drink really impressive without a lot of trouble, try using a melon baller on some watermelon. You can freeze the balls and use them as ice cubes. FANCY, right?

Watermelon Lemon Spritzer

  • Servings: 12
  • Difficulty: easy
  • Print

A light, refreshing summer spritzer with watermelon, lemon, and prosecco.

Credit: BelleAntiquarian.com

Ingredients

  • 4 cups of Simply Watermelon juice
  • 1 cup of lemon liqueur
  • 5 lemons, 4 juiced and 1 sliced for garnish
  • 1 bottle of prosecco

Directions

  1. Mix the watermelon juice, lemon liqueur, and lemon juice together.
  2. Pour over ice or frozen watermelon balls into a lowball glass.
  3. Top each glass with 2 ounces of prosecco.
  4. Garnish each glass with a lemon wheel.