Natural Christmas Decorations

//assets.pinterest.com/js/pinit.js
Christmas decorations inspired by nature can be very beautiful! Whether simple or extravagant, using natural elements is something easily done. Some materials that you may want to consider are fruit, pine cones, acorns, nuts, raw cotton, twine, jute, burlap, wood, berries, branches, feathers, and dried or fresh flowers. Here are just a few examples to inspire your holiday decorating. Tip: You can link back to all of the sources by clicking on the names.

This one from Better Homes & Gardens (click for link) looks very doable! Apples, pine cones, and evergreen branches. Did you know that most Christmas tree retailers will give you the cuttings for free? If you wanted to add a little something extra to those apples, try spraying them with a sheer glitter spray paint. Red apples would create a completely different feel, too.

There are so many ways to use pine cones in Christmas decorating.
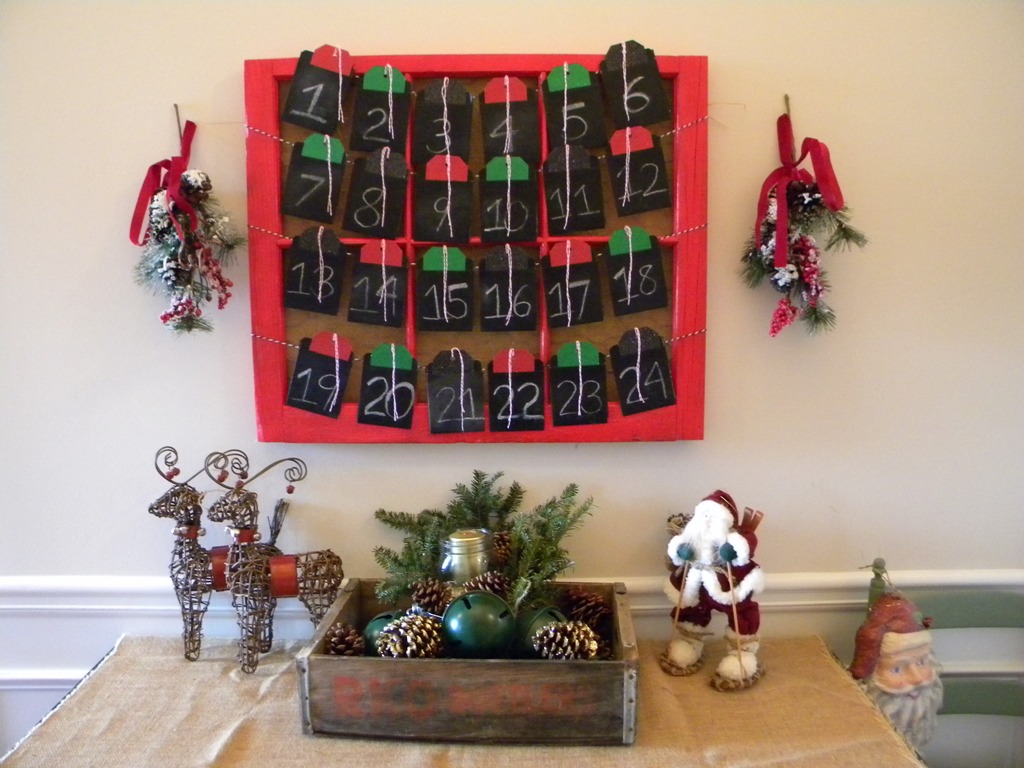
One of ours:

 From Make It & Love It:

Over on the The Lettered Cottage you can see how a poinsettia gets updated in a metal bin and the raw cotton looks marvelous nestled into Layla’s Christmas tree:

Another example of using raw cotton from Sophia’s Decor. Her whole post is a great example of using natural elements such as pine cones, branches, birds, and cotton.

//assets.pinterest.com/js/pinit.js

Classic and beautiful, check out this garland of dried oranges from Buckets of Burlap:

Here’s an example of a more detailed and sophisticated use of natural elements from Southern Living. 

Look around at what’s available outdoors (for free!) in your area. Simply filling a large clear vase with pecans, acorns, cranberries, or even evergreen stems will make a big impact.

//assets.pinterest.com/js/pinit.js

Use a Screen Door for an Organizer, Room Divider, or Craft Show Display

//assets.pinterest.com/js/pinit.js
I wanted to share this screen door that we use a lot. Over time this has evolved into something that I’ve changed to be functional and beautiful.

I currently use something similar in my antiques booth to display items on, but here you can see that you can create a home organizational piece with a screen door.

//assets.pinterest.com/js/pinit.js
Start by finding a screen door. You can either repurpose an old one or buy a new one from a home improvement store. I bought this one from Home Depot for around $20. Either paint or stain the door the color that you want. Staple chicken wire to the back of it. Make sure that you purchase a roll of chicken wire that is at least as wide as the door. At this point you can decide if you only want chicken wire on it, or if you want to back the chicken wire with something. For the one in my antiques booth I put some burlap fabric behind the chicken wire. On this one I used an old lace curtain that I purchased at a thrift store.

The final steps in this project are to make the door stand up. Screw some decorative wood corner pieces (Home Depot, trim department) onto the front and some metal L-brackets on to the back.

Diesel, our maltese, really thinks that you should give it a go and let us know if you like it!

//assets.pinterest.com/js/pinit.js
XOXO,
Abby

UPDATE: Thank you for all of the interest in the desk and screen door, both have sold. 
amzn_assoc_ad_type = “product_link”; amzn_assoc_tracking_id = “belbeaant-20”; amzn_assoc_marketplace = “amazon”; amzn_assoc_region = “US”; amzn_assoc_placement = “B00CXAEQKK”; amzn_assoc_asins = “B00CXAEQKK”; amzn_assoc_show_border = true; amzn_assoc_link_opens_in_new_window = true; http://ws-na.amazon-adsystem.com/widgets/q?ServiceVersion=20070822&Operation=GetScript&ID=OneJS&WS=1&l=as1&source=ac&ref=qf_sp_asin_til

Cosmetic Sugery: A Furniture Facelift

I have a big birthday coming up in a few weeks. Okay, no I don’t. It’s not a big one! It may or may not be a mid-life number. Okay, it’s not. I refuse to believe that half of my life is over. It’s not. I’m calm over-reacting.

*sigh* At what number did I stop wanting to get older? One minute I’m wishing that everyone would take my super-young, over-achieving, bossy-pants self seriously. The next minute I’m wishing that everyone would just chill out, relax, and get over themselves. How did I get from having two small kids, to having one that is bigger than me? Today is the day. It’s the day that I start my savings account for cosmetic surgery when everything is sagging and dragging on the floor mid-life crisis therapy.

Speaking of “cosmetic surgery.” Check out what got a facelift! Within a couple of weeks, we found two, almost identical chifferobes. This one, I’m embarrassed to say,  has been sitting in our foyer hallway for nearly 6 months. If you aren’t familiar with chifferobes, basically it is a closet, outside of a closet. Houses never used to have the enormous walk-in closets that are standard in today’s new construction. Closets were tiny, and if you needed more closet space, a chifferobe is what you got.

On one side (the left in this case), are drawers and a small cupboard. On the other side is a door that opens to a bar for hanging clothes. In this particular chifferobe, when you open the door, there is space under the drawers for a pair of shoes.

This piece definitely needed a face lift. It’s wrinkles cracks were spackled. It had a limp (one missing wheel). Surgery was successful.


I made my own chalk paint using Martha Stewart’s “silhouette” from Home Depot. Afterwards I used Valspar glaze in “mocha.” I finished it off with Minwax Paste Finishing Wax.

We had originally planned on keeping the mirrors, but while adjusting the hinges I dropped one of the doors. The mirrors were out and the chicken wire and burlap were in. I’m actually kind of glad it happened, because I love how it turned out.
I am having a hard time saying “goodbye” to this one. I would love to keep it in my foyer to hang guests’ coats in. Or perhaps it would be good for hanging the kids’ backpacks in. I can also imagine this being used in a kitchen for aprons, kitchen towels, and other linens. 
I will most likely have this for sale at my next antique festival in April.
I hope you love it!
XOXO,
Abby

Spring Wreaths


 I can’t believe it’s been two weeks since I’ve posted! There are several reasons, but the main one is that the flu hit our house hard. The females stayed healthy, while the guys were stuck in bed. Taking care of sick people is a lot of work!

Another reason is that, well, blogging can be hard! Blogging, in itself, can be a full time job. I know that some of the bloggers that inspire me are putting in long hours, and I have an appreciation of that. My brain (and attitude) needed a little break from blogging.

I have been busy, though! Sometimes when I get bogged down by the list of big projects that I need to get done, or the storehouse of furniture in my garage that needs to be refinished, it feels really good to have a project that I can get done from start to finish in a few hours.

I’m ready for spring, can you tell?

Flowers with sparkle, a songbird with her nest, some sweet blue and white baker’s twine. Even on a gray day, this wreath puts a pop of spring in your day!

Here’s a similar version, but in pink. I forgot to get a picture of it after I added the nest and the rhinestones. But you can get the idea.

I thought this one turned out so sweet. The antiqued pearl accents added the perfect touch on the lace ribbon on the left.

Do you know what’s better than burlap????

Colored burlap. True story!

I hope you like them!
XOXO,
Abby
P.S.
If you’re looking for baker’s twine, here is a great set:

Mason Jar Lamp (You.Can.Do.It.)

Cliche intro:
Getting started is the hardest part.

In this case, it’s true. I’ve had these large Ball mason jars for months and months. I’ve had the lamp shade for almost as long. I’ve had the light kit for weeks. But for some reason I had a mental block on this project, which turned out to be one of the easiest I’ve ever done.


Today was, well strange. Have you ever had one of those kinds of days where you just felt, I don’t know, out of place the whole day? That was my day today. And I needed to feel good about something. That something was this lamp.

So I took my light kit (that I purchased from Lowe’s) up to my closest Home Depot (bad form?) and asked the nearest guy in an orange apron to tell me exactly what I needed. Here’s what you’ll need:

Lamp kit (Lowe’s Home Improvement), a large mason jar (antique store), a drill bit (Home Depot), hammer, screwdriver, lampshade (Cost Plus World Market).

This drill bit is for metal. I’ll go over why metal in just a sec. It’s the right size for the metal piece that connects the lamp socket to the top of the lid. And, for some reason, it’s size really intimidated me.

You may or may not know, but an authentic lid for an antique Ball jar is made of zinc and ceramic. In order to drill through the ceramic glass I would need a different bit. My thought was that if I was going to drill through it and ruin it, why not just break it? So I did. Break it. This is what you’ll need the hammer for. Just give it a light tap, break it, and dump out the glass in the trash. It will leave only the zinc (metal) lid. Which is why I only needed a bit that would drill through metal.

Warning: Chipped Manicure is likely to occur while handling power tools.


After removing the glass, I very easily drilled a hole through the lid. I attached the socket and I was almost done! If you’re wondering, the cord does not go down through the jar and out the bottom. The cord is attached to the socket at the top of the jar. More on this in a sec.

Next, time for the lamp shade. I purchased this burlap lamp shade from Cost Plus World Market. It is the “accent” size. I’ve bought this shade before (see the post on the milk glass lamp), and for some reason the opening for it to fit over the socket is too big. I have a strange and simple solution for that, and it’s called, “Nerf Gun Bullet.”

Remove the end. Cut a slit down one side. Fit  over the opening.

These Nerf gun bullets are easily found, but mostly in piles by the hundreds in my front yard thanks to my boy.

Remember that I mentioned that the cord did not go through the lamp, but is attached to the socket at the top. That comes in handy if you choose to fill your jar with anything, say, wine corks. You could even change it out seasonally. Wouldn’t it look lovely filled with seashells?

Here is the finished product:

I need more wine corks. Who wants to come over and help me with that?

It turns out that the answer to getting this done was asking the right question of my Home Depot guy. Thanks, Home Depot guy. We salute you.

XOXO,
Abby//assets.pinterest.com/js/pinit.js

Circle of Love (Okay, a wreath.)

I really wanted a wreath to put up for Valentine’s Day, but I couldn’t find any in the stores that weren’t metallic looking. That wasn’t the look I wanted this year, so I found some inspiration on Pinterest, of course!

My inspiration was this wreath by Sweet Daisy Designs.

http://sweetdaisydesigns.blogspot.com/2011/11/wreath-update.html

I started by painting my grapevine wreath with Krylon’s “Ballet Pink.”
Darice GPV8 Grapevine Wreath 8″ Bulk (Google Affiliate Ad)

Next, I dug up some ribbon that I already had from other projects. The lace ribbon was a scrap that I got from Goodwill. The burlap ribbon was purchased from Save-on-crafts.com. It’s the same ribbon that I used in this project. I cut a piece of burlap ribbon the same length as the lace, and then I layered them. I am using this as my wreath hanger, as you’ll see.

Next, I wanted to make some flowers like the inspiration wreath has. I started by using some sweet rose flower buttons that I picked up at Walmart. They match the paint color almost exactly. My sweet girl even asked me if I had painted them that color to match. I put a floral wire through the button hole and gave it a twist.

I wrapped some more burlap around the wire, hot glued it, and then started making folds (petals) and hot gluing them around the wire.

I wanted a lace flower, too, but I was out of the lace ribbon. So I took a scrap of lace fabric I already had (picked up at a St.Vincent De Paul thrift store) and cut a length of it in the same width as the burlap ribbon. Then, minus the button center, I made a lace flower in the same way as the burlap flower.

After I was done with my flowers, I took the long end of the floral wire and poked it through the wreath where I wanted the flower. I twisted the wires onto the wreath and then cut the excess wire off with my wire cutters. (I’m telling you, I use those things all of the time! Don’t forget what tools you’ll need to get started!)

Here is the finished product:

I think I might actually use this for Spring or Easter, too.

Hope you likey!
XOXO,
Abby

//assets.pinterest.com/js/pinit.js

Repurposed Window Frames

I’ve been having a great time repurposing some old window frames that were crowding a corner of the garage. In a previous post I showed you how I made the kiddos an advent calendar. I’ve also found some other uses for them.

First, I’ve made a Christmas card holder. How cute is this?! When Christmas is over, remove the cards and use it as an all purpose organzier for the family. Wouldn’t the kids love to see their artwork and spelling tests hung up on this? I think so.

I attached the cards with some small clothes pins. I tried the regular size and they were a little too big to be functional. I think that I will throw these clothes pins into a batch of our vinegar barn wood stain so that they don’t look so bright and brand spankin’ new.

I *love* this as a jewlery organzier. It can hold a ridiculous amount of necklaces and bracelets. For the jewelry I picked up some “S” hooks from good ol’ Home Depot. They are p-e-r-f-e-c-t for hanging your lovely baubles.

Like I said, you can get a ton on this. I just hung a few pieces to show you how it can be used. I love it when things are pretty and functional, too. Makes this girl happy!

Good news! I have been busy, and I’ve made quite a few of these. You know what that means? They are available for purchase. Lucky you. 😉

These are currently for sale in my Etsy shop. You can click on the word Etsy or click on the icon on the top right corner of the page.
XOXO,
Abby
//assets.pinterest.com/js/pinit.js

3, 2, 1…….CHRISTMAS!!!

I remember being excited beyond belief that Christmas was coming. So excited that every waking thought was consumed with the fantasy of opening presents on Christmas morning. Sadly, though, I was a sneaker and a peeker. Being the youngest of four, the belief in the magic of Santa and the North Pole didn’t stick around too long before I caught onto older brother and sister talking about where everything might be hidden. So we looked, dug, and scoured until we found the “magic” of Christmas, which happened to be in a Toys R Us bag at the back of Mom’s closet. I look back and wonder, “Didn’t Mom and Dad ever think it was strange that they never got the right reaction?” I mean, the fake surprised looks or lack of surprise on all four of our faces must’ve given something away.

I’m trying to create some Christmas magic of my own now that I’m all grown up (boo!) with kids who are just as consumed with the thought Christmas morning, slightly out of their reach. There are two things I’m big on at Christmas all year long: Memory making and kindness. I want to give my kids rich, meaningful memories that will carry them through life. And I want to impress upon them the utmost important of kindness to every human being.

One way I combine kindness and family at Christmas is through our advent calendar. Every year it has evolved a little bit more, and next year it will probably change a little bit again. I have been inspired in the past by the blog Lil Light O’ Mine which encourages a campaign of random acts of Christmas kindness during the holiday season called Light ‘Em Up. Using this blog as a basis for my inspiration, last year I created an advent calendar with a different random act of kindness activity each day. This year I have decided to change it up a little bit and integrate my desire to intentionally create Christmas memories within our family. So this year I have divided our advent activities, with half being random acts of kindness and half being family activities. For our family, it’s best for us to find a balance in everything we do, which creates peace and also those pleasant memories I’m after for my kids.

This year I made a new calendar to use. Starting with some (free!) book pockets that my daughter’s teacher gave me when she was going through one of her storage closets, I spray painted them with Krylon chalkboard paint. Krylon 227037 Low Odor Clear Finish Aerosol Spray-Gloss-11 Ounces (Google Affiliate Ad)

I only sprayed the front of the pockets. The backs have a backing that you can peel off and use to stick them onto something. I wanted to leave the peeling on in case I decided to use them for something different in the future. After they were dry, I hot glued them onto some black and white baker’s twine.

Next I took an old window frame and turned it into the backdrop for my advent calendar. You can get one from my Etsy (click here) shop and use it for something else when it’s not being used as an advent calendar. (More on these in another upcoming post.)

Finally, I created some “tags” to fit inside of our advent pockets. I printed some labels that either listed a family activity or “Random Act of Christmas Kindness” on them. Of course, these needed some baker’s twine, too. Red, this time.

Hopefully no “sneakers” or “peekers” will be looking ahead to see what’s coming ahead in our advent calendar…


The magic of Santa and the North Pole, along with sweet baby Jesus is strong at our house. Don’t you go looking in the back of my closet for any Toys R Us bags!
Happy Ho Ho Ho to you!
XOXO,
Abby

P.S.
Here’s a list of what’s in our calendar:
(12) cards read: Random Act of Christmas Kindness
Make Christmas Cookies
Drive Around After Dark (And Look at Christmas Lights)
Outdoor Fire with S’mores
Decorate a Gingerbread House
Hot Chocolate Bar (With All the Fixings)
Make Christmas Ornaments
Nights of Lights (at Lake Lanier)
Christmas Movies (with Popcorn and Sodas)
Find the Pickle on the Tree
Call a Friend (Invite them to a Holiday Themed Sleepover)
Email from Santa is Waiting for You
Surprise! You’ll have to wait and see until we get there! //assets.pinterest.com/js/pinit.js

If You’ve Got It, Flaunt It

I’m in the holiday decorating mood today, but Ken is at work and there is no way that I’m attempting to shop for decorations with the kids in tow. Yesterday I hit up Home Depot with them, and by the time we got home, Mama needed something a whole lot stronger than hot chocolate.

So after scrounging around the house for materials that I already had on hand, I decided to get a little creative.

First I got together some different kinds of ribbon. I already had all of these at the house. On the right is a jute ribbon that I purchased from Save-On-Crafts.com several months ago. The other 5 types were all purchased at Michaels. The burlap style ones (all but the plaid) were purchased within the past 6 weeks. They have wired edges.

Next, I rounded up some containers. I use metal-type buckets for all of the kids birthday parties. I just change out a piece of ribbon on the handle to go with whatever the color/theme is. They’re great for utensils, etc. I also got some of the cuttings from our Christmas tree.

Three of the containers came from Goodwill: the wire egg basket, the fruit orchard basket, and the galvanized pail. The metal pail in the middle of the back row is a 2.5 paint bucket from Home Depot. It’s been a while since I bought it, but I think it was around $2. The oval shaped pail came from Target. It was in the “Dollar Spot” for $2.50.

Finally, I scrounged around and found some things to fill the buckets with.

I decided to start with the galvanized bucket. I layered two of the ribbons around it.

Proof in the background of yesterday’s Home Depot experience. Next I added some Epsom salts and a green tea light candle to a Ball jar. The jar, candle, and some Christmas tree cuttings were all nestled into the bucket. (I ended up not using the candles in the picture. I thought they were a little too big.)

Okay, so next I decided to play with the Home Depot paint bucket. He got two different ribbons layered onto the outside. He also got the same jar and candle routine.

Finally, I decided to use the orchard basket by the front door. I didn’t want to use a candle this time, so I opted to just fill it with tree cuttings.

The moral of the story is, try to use what you already have on hand. If you’ve got it, flaunt it! That’s all for now! I have some other ideas that I’m working on. Stay tuned.

By the way, if you hadn’t heard, our Etsy shop is opened! We are gradually getting lots of vintage, antique, and handmade items listed. Check it out! 🙂

Merry Christmas!
XOXO,
//assets.pinterest.com/js/pinit.jsAbby

So Bright, You’ve Got to Wear Shades!

Milk glass is one of my favorites. It is easy to find; however, there are some very unique pieces that can be hard to come by. I’ll post more some other time with cool facts about milk glass, but today is our daughter, Samantha’s birthday, we have piano lessons, and soccer practices. So you “get what you get and you don’t pitch a fit” with my post! 🙂

We found this little lamp a couple of months ago. I almost didn’t see it. Sometimes I get super focused on looking for things on my “list” (things I regularly hunt for), that I don’t see treasures right in front of me. This was almost this case with this lamp.

Vintage Milk Glass Lamp

This lamp most likely originally came with a tall glass shade. And I think shortly before I found it, that it still had it’s shade. The price tag said “lamp with shade.” However, the shade was gone, so I was able to get 1/3 of the price knocked off.

So now, what to do about a shade? I wanted something that complimented the brown and orange flowers, so I thought that a burlap shade would be perfect! I found this burlap lamp shade from Cost Plus World Market.

Burlap Lamp Shade
Shade, meet lamp. Lamp, meet shade.
 And there you have it! Another completely simple way to re-purpose something vintage.
Happy Tuesday!
XOXO,
Abby