A woman, Abby, stands in front of her garden holding a large basket full of tomatoes. There is a brown dog by her side.

Simple Garden Joys: Everyday Moments from a Southern Summer Garden

The Heart of a Southern Garden

I have found that there are few things in life as empowering as gardening. The humbling act of placing a tiny seed into rich, dark soil, watering it, and waiting for the sun to penetrate the earth…only for a pair of green leaves to emerge a few days later is a series of small miracles. Knowing that I have the capability to do this, regardless of anything else happening in the world, is a grounding force.

As a child I watched my mother use a rototiller to turn the soil and create her own garden in our backyard. I was awe-struck at the zucchini, yellow squash, and corn she grew. She told me the names of the wildflowers she planted: Black-eyed Susans, Bachelor’s Buttons, and Zinnias. I witnessed that by simply placing seeds in dirt, my mother had the power to make things grow. What I didn’t know then is that gardening would grow to become an important part of my life.

This article is part of my Old-Fashioned Summer Saturdays series, a weekly look at timeless summer traditions, seasonal recipes, and vintage-inspired living. This week we’re in the garden, talking about the simple joys that gardening will enrich your life with. Gardening, especially in a Southern backyard, offers more than food or flowers…it offers a sense of peace, purpose, and tradition.

If you’ve found your way here via Instagram, Pinterest, or Google, I hope you’ll take the time to check out the other articles in this series, which you will find linked at the end.

Morning Stillness & Rituals

In the South we are fortunate to have an incredibly long growing season. I begin my planting in February, and by the time July and August arrive, I find myself tending the garden in the early morning or late evening to avoid the sweltering heat. Not long after the sun rises, I make my way to my vegetable garden with a steaming cup of coffee in one hand, dragging the hose behind me with the other.

As I water the thirsty soil around my tomatoes and honeydew melon, there are no cellphone alerts or sounds from the morning news. It has become a time of stillness, peace, and meditation. I lose track of time as I breathe slower and think clearly. My early morning garden routine has become a quiet ritual, an antidote to a busy world and the heartbeat of my Southern summer days.

The thing is, gardening is something that anyone can do. With a little patience, you can create a garden to cultivate as an act of self-care. Whether you have a large backyard, a small deck at an apartment, or just a sunny window, I encourage you to plant a few seeds and become their caretaker.

The Joy of Tending

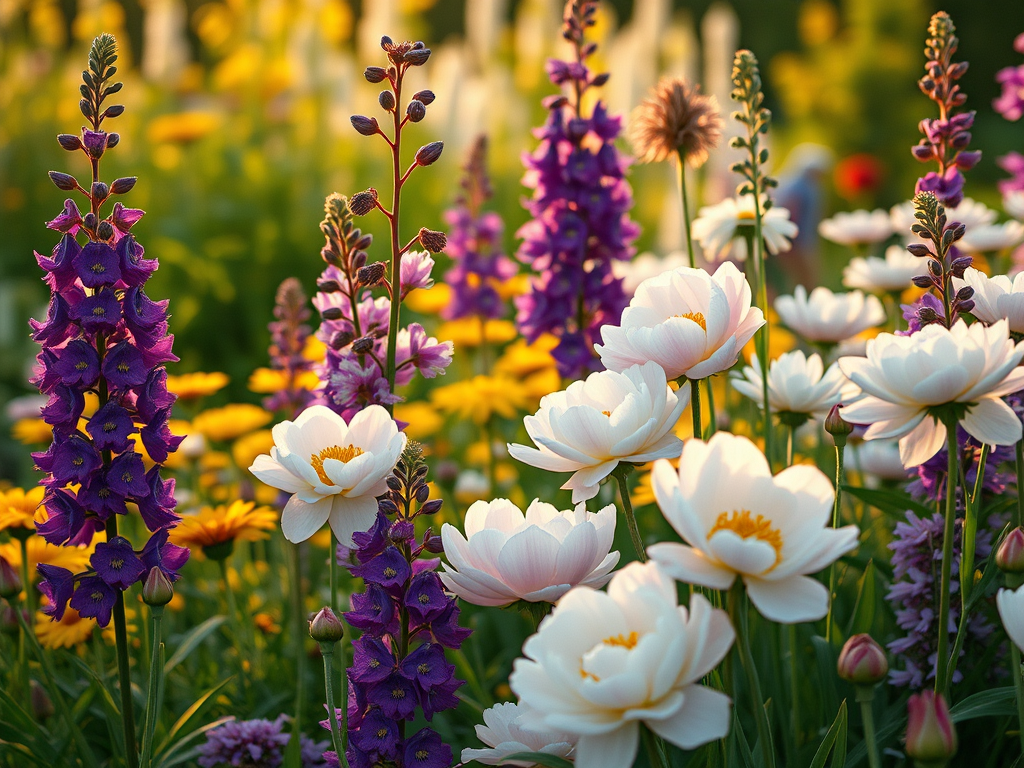
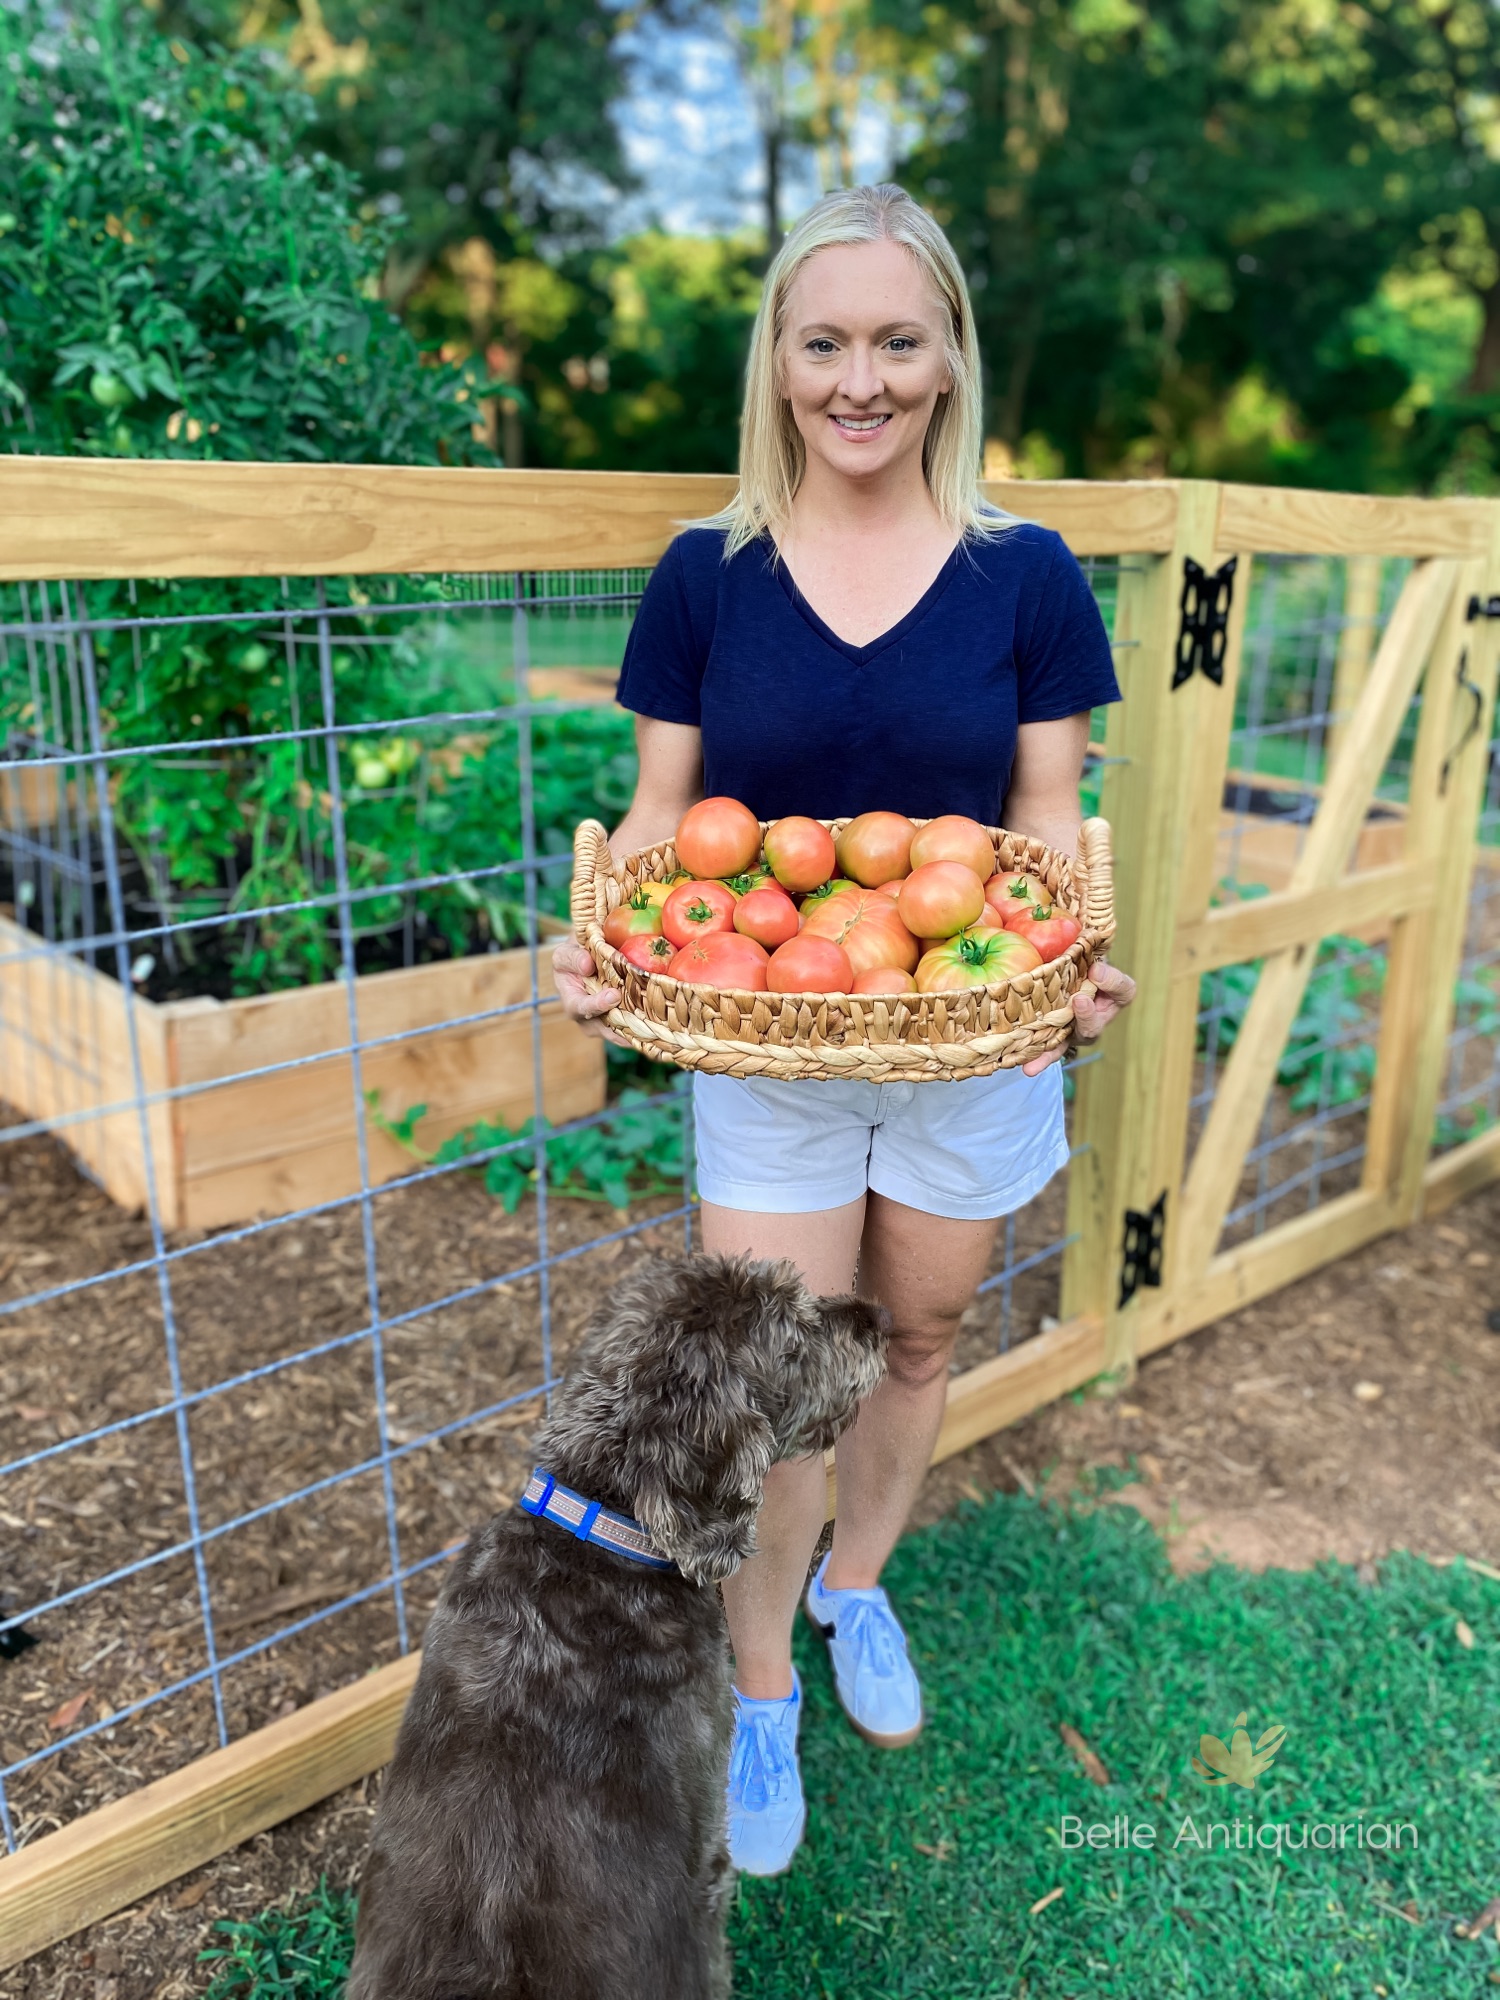
There is something sacred about working in the garden with your hands. In the rhythm of pulling weeds, tying up tomato vines with old twine, and gently snipping herbs for supper, I find a quiet joy that asks for nothing but presence. My garden is home to heirloom varieties passed down through generations. Cherokee Purple tomatoes, Rattlesnake pole beans, and Mammoth sunflowers stand taller than me by August. These plants, chosen with care, are more than produce; they’re a living thread between the past and present. Gardening reminds me that growth isn’t just about the harvest. It’s about showing up, getting your hands dirty, and tending to something with love.

Unexpected Visitors

As a result of tending a garden, I feel a gentle responsibility for the other visitors that come as a result of this habitat that I’ve created. Every year I breathe a sigh of relief when the pollinators arrive, because they are an integral part of gardening success. I look to see how many varieties of bees are moving from flower to flower. This year I have seen Common Eastern Bumble Bee, Western Honey Bee, and Blueberry Digger Bee.

The butterflies arrive a bit later in the season when the high temperatures settle in. The American Lady and Eastern Tiger Swallowtail flit by quickly as they search for nectar in nearby flowers.

In the evening, the song of the Cicadas starts soft and low, but by the time the sun sets, the Fall Southeastern Dusk-singing Cicadas are loudly calling in unison to each other. It is the song of a Southern summer night.

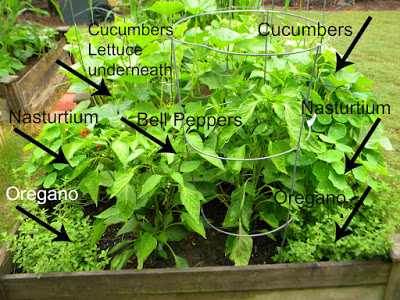
As I walk though the garden, past the cucumbers and beans, these creatures and I…the toads, bees, birds, and even the bats…we are all together, living on this marvelous earth, depending on one another for food, safety, and cooperation.

Gathering the Harvest

There have been years when I have not harvested a single tomato. The squirrels got to them before they started to blush, or the soil I planted them in wasn’t healthy. This year I planted a new bed full of zinnia seeds, and the results were disappointing, to say the least.

In other years, like this year, I am begging neighbors to take grocery bags full of cucumbers so that they don’t go to waste. (We made pickles more times this year than I ever have before.)

Regardless of the Southern summer harvest, there is joy simply in the act of gardening homegrown vegetables. The process of caring for something other than yourself turns into just that, caring for yourself. Gardening is both self-less and soul-sustaining.

A woman, Abby, stands in front of her garden holding a large basket full of tomatoes. There is a brown dog by her side.

A Garden is Never Just a Garden

Gardening feels like it is a huge part of who I am. It is something that I think about even on the cold, dark days of winter. I have wondered, though, would I still have followed this path if I hadn’t witnessed my mother gardening? My Great Aunt Fern was a gardener into her 90s, so is this something in my DNA?

Maybe the idea of a Tomato Hornworm has you swearing that you will never plant a Cherokee Purple heirloom tomato within 500 miles of your house. Maybe you’re not “outdoorsy.” That’s okay, but I encourage you to figure out what you ARE interested in that brings you simple joy. And I’m willing to bet that it’s not glowing back at you from a screen.

Whether you’re planting tomatoes or simply sitting among the blooms, slowing down with nature invites you to notice life again.

Explore More from Old-Fashioned Summer Saturdays

This article is part of my Old-Fashioned Summer Saturdays series, where I share timeless inspiration for warm-weather living. Be sure to check out these reader favorites:

Timeless Red, White, and Blue Decor Ideas for the Porch
Heirloom Tomato Dreams
Classic Summer Whites: Timeless Linen Dresses and Southern Style Staples
Refrigerator Pickles—A Southern Summer Staple
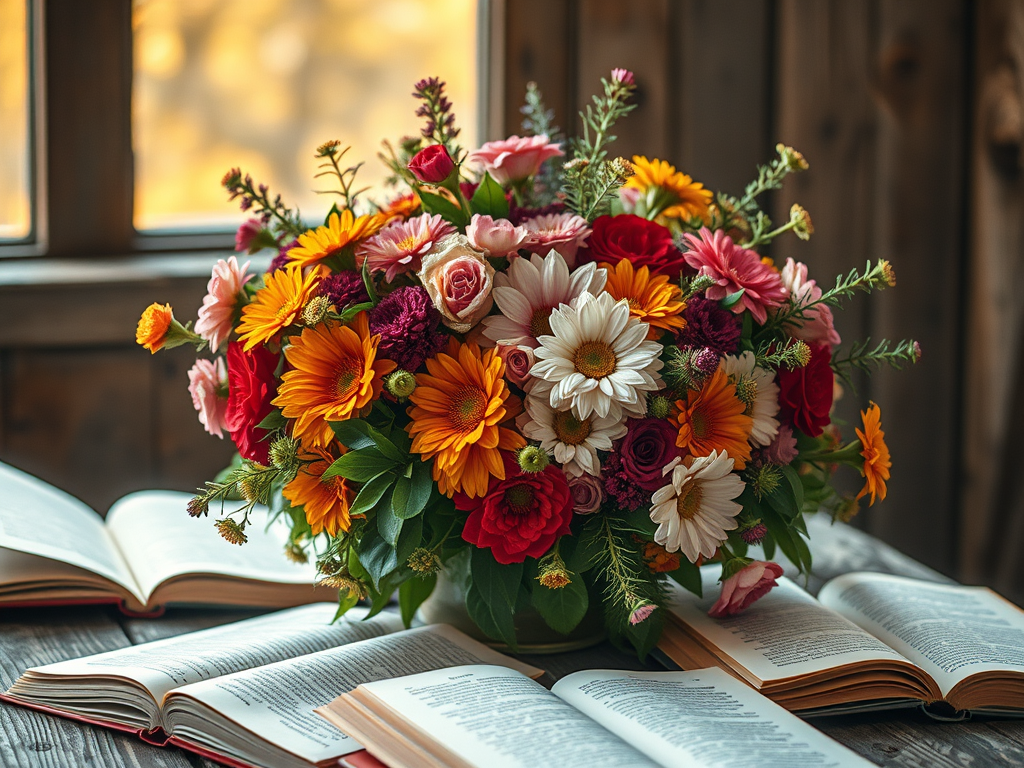
Creating a Cozy Summer Reading Spot
Old-Fashioned Strawberry Shortcake Cake
Blue and White China for Summer Entertaining
You can subscribe here to receive new articles, seasonal inspiration, and vintage-style favorites delivered right to your inbox.

I often get asked to recommend things that I use while gardening. You can find the items I recommend in my LTK shop HERE, or you can click the image below to be taken directly there.

Essential Books for Cut Flower Gardening Success

This article contains ads and commissionable links.

We’re nearing the end of October, and most people aren’t thinking about flowers and sunshine. However, if you want to have a bounty of cut flowers this spring and summer, now is the time to plan. In some cases, now is the time to get seeds and plants into the ground.

Spring Flowers of Larkspur and Aster used to decorate for Easter

There are many excellent resources on the internet to use when you’re planning a flower garden. But in my opinion, nothing beats a book in hand. There’s something about an actual book that is just inspirational and motivational. I have quite a few gardening books on my bookshelf, but today I want to share just a few of the flower gardening books that have become my favorites over the years. You can find the entire list as a group in my LTK storefront, or you can click the individual titles below to be taken directly to the website.

The Little Book of Cut Flower Gardening This is a small, but surprisingly helpful little book. It would make a great gift for someone just starting their flower growing journey. It gives applicable tips, and at the end gives a brief overview of some commonly grown cut flower varieties.

Peonies for Perpetual Profit Even if you aren’t planning to grow peonies for profit, and most people aren’t, this book gives valuable knowledge for growing peonies successfully. It also gives a list of peony varieties and descriptions so that you can choose the varieties best suited for your own garden.

In Bloom Is an excellent book for going a little deeper into the types of flowers you should grow for a well-rounded bouquet. It explains different shapes of flowers in a bouquet, varieties of flowers, and containers to arrange flowers in.

Seasonal Flower Arranging: Fill Your Home with Blooms, Branches, and Foraged Materials All Year Round This is a stunning book filled with gorgeous inspirational photos and valuable insight. One of my favorite things about this book are pages that read like recipes that can be helpful for pulling together a bouquet similar to the ones pictured.

The Flower Farmer: An Organic Grower’s Guide to Raising and Selling Cut Flowers If you’re becoming serious about cut flower gardening and want to consider selling them, this is the book for you. The book details farming practices, different ways to make income with flowers, and testimonials from successful people in the industry. There is an immensely valuable resource guide at the end for everything from where to buy buy everything from seeds to refrigeration.

The Complete Language of Flowers: A Definitive and Illustrated History This is a flower dictionary, of sorts. It details flowers and their scientific names, while also providing symbolic meanings, folklore, and facts related to each one.

The Cutting Garden: Growing and Arranging Garden Flowers An excellent resource for people who enjoy cutting their own flowers and making floral arrangements. Included are tips for how to pull together arrangements by season and color.

Martha Stewart’s Gardening: Month by Month Of all of the books on my gardening shelf, this one provides the most inspiration. I would buy it again, just for the illustration on the inside cover. This is my favorite book on the list!

Martha’s Flowers: A Practical Guide to Growing, Gathering, and Enjoying This book provides information for how and when to plant and harvest, tips for arranging, and other helpful advice. Not to mention there are pages of beautiful, inspirational photos of Martha’s home.

Arranging Flowers – The Best of Martha Stewart Living This is another inspirational book by Martha Stewart. This is for the home flower gardener that wants to grow and create simple home arrangements, often only using one or two types of flowers in them.

I enjoy reading and learning more about flowers. If you have a favorite flower gardening or floral arranging book, please leave me a comment below.

Happy gardening!

Abby

Creating the Perfect Flower Garden Plan

This article contains commissionable links and ads.

Today I am sharing my plans for a flower garden, how I chose the flowers that I’m planting, and when I will be planting them. I will be sharing the whole list of plant and seed varieties that I am using, in case you would like to use them as well.

Save on Seeds

There are many factors to consider when starting a flower garden. The main ones that I focused on for my garden were growing zone, sun exposure, color scheme, and height of plants. My growing zone is 8a. It’s important to know what your growing zone is because it will determine the earliest and latest dates that you can successfully plant and get the best results. It will also indicate if you need to put your plants in during the fall or the spring. If you don’t know what your growing zone is, you can check the Farmer’s Almanac website or the USDA website.

Next you will need to know what type of sun exposure your garden bed will have. My garden bed is “full sun.” You can figure out what type of sun exposure your garden bed gets by simply seeing how much shade it gets throughout the day. Most flowering plants like to be in the sun.

After finding your growing zone and sun exposure, it’s time to decide what type of flowers you want to plant. One suggestion that I have for creating a beautiful garden is to decide on a color scheme. Just like interior rooms look more cohesive with a set color scheme, garden beds do as well. I decided to use a color scheme of purple, yellow, and white. This is a complementary color scheme because purple and yellow are directly across from each other on a color wheel. In gardening, green and white are considered neutral colors, so white flowers in my bed will be “neutral.”

Just a note about red: For those that love red flowers, if you want a complementary color scheme, your garden colors will be red and white flowers with green foliage, since green is the complementary color to red. Another color scheme that looks nice is red, white, and blue. A monochromatic color scheme with reds, oranges, and pinks is also one to consider, although it’s not my personal favorite.

Okay, after I chose my color scheme of purple, yellow, and white, I then looked at height of plants. I wanted the tallest plants to be in the back and the shortest plants to be in the front. This way none of the flowers are hidden, and taller or “leggier” plants have their stems hidden by the shorter row of flowers in front of them. Something else I looked at was when each plant would be blooming during the season. If everything turns out like I planned, I should have at least one type of flower blooming from early spring through late summer.

This is one of the spaces I am using for a flower garden. This space gets full sun. Everything that I’m planting in the fall will be planted here. I’ve added 6 bags of manure and completely turned the soil over to prepare it for seeds and tubers.

What I’m planting this fall, so that it will be ready to flower in the spring:

  • Allium Gladiator, purple, 40″ tall, perennial
  • Peony, Festiva Maxima, white, 39″, perennial
  • Itoh Peony, Bartzella, yellow, 24-36″, perennial
  • Canterbury Bells, Campana Lilac, purple, 30-34″, biennial
  • Allium Mount Everest, white, 30″ tall, perennial
  • Stock Seeds, Miracle Blue Mid, purple, 24-30″, annual
  • Allium Purple Sensation, purple, 28″, perennial
  • Yarrow, The Pearl, white, 16″, perennial
  • Alyssum, Basket of Gold, yellow, 8-12″, perennial

As you can see, most of these plants are perennials, so they come back each year.

In the spring, I will be planting the rest of my seeds, which are all annuals. These are going to be in a separate, but adjacent, flower bed.

  • Cosmos, Double Click, purple, 36-42″
  • Zinnia, Benary Giant White, white, 36-40″
  • Zinnia, Isabellina, yellow, 36″
  • Snapdragon, Snowflake, white, 36″
  • Love in a Mist, Orientalis Transformer, yellow, 28″
  • Snapdragon, Madame Butterfly, yellow, 24-30″
  • Cosmos, Xanthos, yellow and white, 20-24″
  • Love in a Mist, Blue, blue, 18-24″

I purchased all of my flowers from Eden Brothers. The Eden Brothers website is very use friendly. You can filter by all of the things I mentioned in this article – color, growing zones, perennial, and so on. When your seeds arrive they will have a QR code to get specific instructions. I also received a link via email with helpful information for most of the flowers that I ordered.

Save on Seeds

I’ll update this article with photos of my blooms in a few months. In the meantime, please let me know below if you have any questions!

Spring Easter Decor

While most of the country is sheltering in place during the Covid-19 Pandemic, how are you keeping busy? I am a homebody by nature, but I admit…I’m getting bored and itching for a project. My kids realized yesterday how bored I was when I took all of the art off of the walls and started rearranging it. Something quirky that my “interior design” mind does after sitting in a room for a while, is that I start mentally rearranging the furniture. Full disclosure, if I’ve sat in your house for any amount of time, I’ve probably mentally rearranged your furniture, too. It’s like doing a puzzle in my head. (Teacher friends, I’ve rearranged your classrooms in my head. LOL) After sitting in our family room/breakfast room/kitchen for weeks on end now, I’ve decided I’m going to rearrange and paint. But I’m going to wait for projects until after the pandemic to buy supplies because it’s our civic duty to shelter in place. <3

So this year my birthday falls on Easter. And Easter falls within the shelter in place order that my county is under. I’m not sad about being home for my birthday. I’m not a birthday person. I don’t care about presents at all. But I am a little bummed about Easter. No surprise if you’ve been reading my posts for a while, but I am HUGE on traditions. To me, traditions are like glue for a family. So I’m going to miss taking flowers to church and adding them to the cross, getting new church clothes, etc. If you want to know more about what our family does and eats for Easter, check out these posts here and here. (Sidenote: I think it is okay to feel bummed or even depressed about missing out on things during the pandemic. Won’t it make it all the more sweeter when life returns to normal?)

With all this time on my hands, and no where to go, I am using what we already have around the house to decorate for spring and Easter. I pulled out my Blue Willow egg cups (made by Allerton’s) and a blue and white platter (Yuan by Wood and Sons) to put on our mantel.

I had these tiny glass jars left over from some cold-pressed juice drinks. Glass recycling is not available in our area (which seems crazy to me in a major metropolitan area), so I try to reuse glass when I can. They were the perfect size to add a little ribbon and some Carolina Jessamine cuttings from our yard.

It turns out that Carolina Jessamine doesn’t do well as a cut flower and drops the flowers after a few hours, so I’ll be switching these flowers out for something else from the yard soon. One last picture for you – our Easter tablescape. These are all items we already had in our home. I bought these plates several years ago from Williams Sonoma, and I still love them!

How are you doing during this crazy time in our world? If you are sheltering in place, thank you. Thank you for putting the needs of others before yourself. If you are sheltering in place in a dangerous or abusive situation, I’m praying for you.

As I wrote on my Instagram page recently: This Easter there won’t be egg hunts, flowers on the cross, or sunrise church services. There won’t be ham and potato salad with extended family. Maybe this year Easter will just be about an empty tomb.

If I can pray for you, feel free to send me a DM on Instagram or email. You could even drop it in the comments below. Happy Easter, friends!

Garden Update: 3 Sisters Garden & Square Foot Garden

This article contains commissionable links and ads.

Quick Update! Back in March I posted my garden plans using the 3 Sisters Method, as well as some square foot gardening. I thought I’d post some pictures so that you could see how it grows in, and also so that you could visualize how it all works out. To see the original post with the garden plans, go HERE.

Save on Seeds

Here’s an update on how the 3 Sisters Garden comes together:

3 Sisters Garden
To see any photo larger, just click on it!

I did end up supporting the corn with some garden stakes. We had a few days of heavy rain and wind, and it fell over. I am really enjoying the nasturtium this year. I’ve never grown it before. The leaves as well as the flowers are pretty. And then there’s the fact that it does double duty keeping pests away.

Nasturtium at dusk after rain.

Here you can see the beans climbing up the corn…those 3 sisters!

Here’s a view of one of my square foot garden beds:

Original garden plan found HERE.
To view any photo larger, just click on it!

So far. so good! Everything is coming in nicely. We’ve already eaten a bunch of the lettuce. One night I wanted to make tacos, but had forgotten lettuce. Then I realized I had lettuce in the backyard. Perfect!

Here is how I train the cucumbers to grow vertically:

I also use twist ties left over from bread bags. Be careful not to break off the heads of the vines!
Pretty soon the cucumbers will be ready!

Thanks for stopping by! Happy gardening to you!

Save on Seeds


Caring for Blueberry Bushes

//assets.pinterest.com/js/pinit.js

So I pruned my blueberries a few weeks ago. Super Important. You will not believe how much blueberry production will increase if you’ve never pruned before. More branches and growth do NOT equal more blueberries. For more info on how to prune go HERE. If the plant is using all of its energy and nutrients to feed leaves, guess what it won’t be doing? That’s right, making blueberries!

Now is the time (I’m zone 7) for all of the flowers to cover my bushes. And time, too, for the very important work of bees. Without the bees and their pollination, the blueberries would not be possible.

A busy bee at work pollinating my blueberry bushes.

//assets.pinterest.com/js/pinit.jsThis essential pollination is why you should have at least two varieties of blueberry bushes planted. Next to each other.The cross-pollination will greatly increase the production of blueberries. Some varieties won’t produce at all without cross-pollination. Side note: this is really the only time of year bees will be attracted to the plants. So if you have bee sting concerns, don’t worry!

All of these flowers will soon be blueberries!

//assets.pinterest.com/js/pinit.js

During the time of year when the bees are pollinating the bushes, I also like to fertilize with Epsom salts. I let 1/4 cup dissolve in a couple of gallons of room temperature water, and then I divide it between the two mature plants. (I planted 3 new ones this year, and I’m not going to fertilize them this year.) Epsom salts provide magnesium, which blueberry bushes like. (Your tomatoes and bell peppers like it, too, BTDubs.)

Okay, so are you ready to see my bushes? I hesitate to post a picture because it doesn’t look like these two could actually produce the gallons of berries that they do. Here you go…

These guys are in full sun on the south side of our house.
They love to be mulched, so there is pine straw covering the soil. 

Can you believe it? They don’t look like much, but they are big producing bushes!

If you want to read more about my blueberry care and other blueberry related posts:

Blueberry Muffins

Blueberry Pie

Misc. Blueberry Nonsense

//assets.pinterest.com/js/pinit.js

How to Prepare Your Garden Soil for Planting

 
Yay, Spring! If you missed my last post on my plans for my garden beds this summer, check it out HERE. Before I plant anything, I want to make sure that the soil is healthy for my plants. This will help them to produce the maximum amount of food and keep them disease resistant. Here are a few steps I take before summer planting:
Save on Seeds

#1 Turn over the soil. 
One reason I like raised beds so much is that if you don’t need heavy machinery to till the soil before planting. When I prepare the garden soil for planting I like to turn the soil over to loosen it up, remove rocks, and also to search for unwanted pests. To do this, simply put in your shovel, dig in, and turn it over. Go through the entire box and dig down as deep as you can. My boxes have been there for several years, so the organic burlap that I laid on base to kill the grass the first year has now decomposed. I am able to reach down and mix in some of the Georgia red clay with the garden dirt.

Here are my 4 – 4×4 garden beds. They are about 12″ deep. I’m in the process of installing garden pavers for a path through and around them, which is why there are 4 random pavers in the middle.

#2 Check for pests. 
As I mentioned above, while you are turning over the soil look for unwanted pests. An important part of preparing your garden soil is to remove these guys. If you dig deep enough and thoroughly, you will be able to see if there are any grubs or larvae. I had a problem with tomato hornworms last year, so when going through the bed I had my tomatoes planted in I was especially vigilant for getting the hornworm larvae out. You can toss out smaller grubs and step on them. The tomato hornworm larvae are disgusting and large, so I take a shovel to them and annihilate them. I can use terms like “annihilate” with them because I hate them. Hate is such a strong word. It works here.

A tomato hornworm larva that I removed from my garden.
They are large, but blend in with the soil. If you find them, remove them and destroy them. It’s much easier to remove them as a larva then after they have changed into the green, destructive pests that will ruin your tomato plants.

#3 Rotate your crops. 
A little advanced planning will help you prepare your garden soil for the next season of planting. You don’t want to plant the same thing in the same spot two years in a row. There are a couple of reasons for this. First, the pests that are attracted to particular crops will become a problem. Also, your soil will become nutrient deficient. Some plants use a lot of nitrogen and some feed the soil nitrogen. With quick and simple planning of how to rotate your crops, you will be able to make sure that your crops are actually producing food.

How I plan to rotate my crops over a 4 year period.

#4 Amend the soil.
With raised beds it is easy to forget that you aren’t replacing the soil. Instead you are amending it, adding to it. After the first year you don’t want to just dump bags of garden soil from the hardware soil into your boxes. You want to mix it with the native soil. While I am turning over the soil (see #1!) I will add a bag of compost, some bone meal, some blood meal, and some Epsom salts. If you make your own compost or buy it, 1-2 cu feet of compost per box is a good starting point. Don’t overuse the blood meal and bone meal; a little goes a long way. Blood meal and bone meal are exactly what they sound like, and what they sound like are a little disgusting. But they are good, organic options to fertilize and amend the soil. Preparing your garden soil by amending it will again keep your plants healthy, making them disease and pest resistant and yielding high crops.

Just a side note, the first year you start raised beds you’ll most likely need to fill them up with bags of soil from the store. In subsequent years you might need a bag or two to keepl the soil level up. What I recommend avoiding is completely replacing the soil each year. I don’t think it’s necessary, and it would not be cost efficient. Use these steps to amend the soil, and you won’t need to replace it.

#5 Consider cold weather crops.
Another good way to prepare the garden soil is to plant something in the cooler seasons that will replace nutrients used in the spring and summer. Kale, peas, and many other foods can be grown in the colder months. (I’m in Zone 7; things may be different in your area.)

#6 Consider helpful insects.
If I happen to be digging elsewhere in the yard and notice lots of earthworms, I will take them and put them in the garden. Worms, bees, ladybugs, praying mantis and many other types of bugs and insects are friends to your garden. Consider ways to attract beneficial visitors that will either contribute to the soil or prey on harmful pests.

I hope this is helpful! Enjoy your garden.

Save on Seeds

Square Foot Garden Plans for 4 x 4 Beds

Save on Seeds

This article contains commissionable links and ads.

Today is the first day of Spring, so it’s fitting that I post about my garden plans! I made these plans for myself, but I thought that I’d share them with you.


Just to be clear, I am not a master gardener. I am average in my experience, but above average in my passion for growing things. What I lack in experience I make up for in random knowledge of gardening that I’ve picked up over the years.

I am so thankful to be living in that Age of Information. Several years ago when I was planting my first garden I checked out dozens of books from the library and did countless hours of research on the internet. Anything you want to know, it’s out there! You just simply have to ask Google!

Our backyard is on the south side of our house, which is perfect for full-sun loving plants. I have set up our raised bed garden boxes to orient along with the east-west axis that the  sun travels in. I purchased our raised bed garden boxes as kits from Home Depot. While it may be slightly more money than making the boxes on your own, there are several reasons why I chose to go with a kit. #1 I could do it myself. I’m a small person and working alone I needed to be able to handle the materials and build the boxes. #2 No tools required! While we own all of the tools needed to cut wood, I am not comfortable using them without help. #3 My step-dad was recently building some garden boxes for my mom and had an accident resulting in a hospital visit and loss of fingers. #4 These come with untreated cedar. Treated cedar will poison your food and I didn’t want to hassle with finding untreated wood. I know these garden box kits are still available because I recently had to purchase another one to replace broken boards from a passionate soccer player we have in the house.

Knowing which direction the sun moves across your garden is very important.

Knowing where North and South are will help you decide what to plant in each garden box. This is very important because you will want to make sure that the taller plants are on the North and West sides of the garden, otherwise they will shade your other plants and block the sun that they need. In my case, I need to make sure the taller plants are on the left and back sides.

Below are the details of the 4 garden boxes that I am planting in this area. You may wonder why I chose the plants I did or did not use. First and above all else, you’ll learn quickly to only plant what you will eat. Also, there are things that I love, like carrots, but after 4 years of trying with no luck to grow them I am giving up on them. Maybe a neighbor will trade some with me.

The 3 Sisters method using cantaloupe instead of squash.
C = Corn, B = Beans

In the back left corner I am using the Three Sisters method. This is a Native American technique of growing food. Traditionally the 3 Sisters are corn, beans, and squash. The corn gives the beans something to climb on. The beans feed the soil nitrogen that the corn and squash use. The squash with its large leaves shades the soil, keeping it cool and moist. I love squash, but my family hates it. So I am not opting for summer, zucchini, or pumpkin. Instead I am using another relative of the squash family, the cantaloupe! Since I am working in a 4 x 4 garden box, I am using a dwarf variety. But honestly, any variety would work. In the Three Sisters method, plant the corn first. When it is 6 inches high, plant the beans and cantaloupe (squash). I am also including Marigold and Nasturtium because they are companions for them, deterring pests. I’m using a dwarf variety of Nasturtium to save space. Did you know you can eat the flowers and leaves of the Nasturtium? Hmmm…


In the back right corner I am using the 3 Sisters method again, but with a dwarf variety of watermelon. We want a full size variety also, so I’m going to find another spot in the yard for that. I have enough wood for one more square foot garden box, I just need to decide where to put it.

Tomato Garden Plan for a 4 x 4 Raised bed


In the front left corner, or southwest corner, I am planting a square foot garden box for tomatoes. Mainly what I want to note on this one is the placement of the taller plant varieties so that they don’t shade the shorter varieties. Also, I’ll be planting companions basil and marigold to deter pests. I’ve had issues with Hornworm in the past. I know they aren’t completely avoidable, but I detest them, and I’m hoping the basil and marigold will cut down on them. When I prepared my boxes (another post maybe), I did search for any larvae. The box I’m using for the tomatoes is a new addition this year. I’m hoping that will also help. Did I mention that I hate loathe Hornworms? I’m going to plant several different varieties with different color. We eat a lot of homemade salsa in the summer, and it’s beautiful to see the different colors in it.

Cucumber & Pepper Garden Plan for a 4 x 4 Raised Bed


My final garden box in this area is for cucumbers and peppers. I always grow my cucumbers vertically. The easiest way to do this is to put a round tomato cage over the mound. As the cucumber vines grow, train them onto the cage. You have to do this; they won’t do it on their own. My daughter and I love to find the “curly q’s” (unofficial term) at the end of the vines and wrap them onto the cage. You can also use twist ties from bread to keep the vines on the cages. I do this for two reasons. #1 It saves space in a small square foot garden box. #2 It keeps the vines off of the ground and away from pests.

Notice that the lettuce is intentionally planted to get shade. This is another reason you need to consider sun movement. Also notice that two weeks after the first cucumbers are planted there is a second planting. This is will just extend the time we can harvest cucumbers. For this planting I will possibly NOT grow them vertically. They can shade the ground and keep in moisture for the peppers.

The other plants are companions and will keep pests away. (Hopefully!)

I hope this helps you! Maybe this will be your first year gardening…you can do this! I’m happy to answer any questions you may have. I’m not an expert, but I don’t mind sharing what my experiences have been. Feel free to leave any questions in the comment section below.


Save on Seeds

Blueberry Investment: Blueberry Pie

The birds left a few blueberries for us to eat. We only have two bushes, so when we manage to actually get some ripe berries before the birds, I really try to use them wisely. I froze several small baggies for smoothies or for using in muffins. We ate a quart or so for snacking, and the kids ate a bunch off of the bushes. After that, I’ve been hoarding them. I wanted to make something delicious and I knew that would require a great investment of blueberries.

This is what 5 cups of blueberries looks like. For what? A pie. I don’t know why it had to be a pie. I’ve never baked one before. Which is ridiculous, considering the number of pie plates that I own. I looked on the web for the easiest, simplest recipe that I could find. I picked this one.

Pour one tablespoon of lemon juice over 5 cups of blueberries and set aside.

Mix one cup of sugar, half a cup of all-purpose flour, 1/8 teaspoon salt, & 1/2 teaspoon cinnamon.

Add the blueberries and gently stir together to coat the berries. Next use pre-maid pie crust to cover the bottom of a 9 inch pie plate. Fill the crust with the berry mixture and dot with 2 tablespoons of butter. Use the remaining crust to cover the pie. Trim the edges, crimp, and cut slits to vent.

I know, I know. It’s not pretty. But I did it! My first pie. And I didn’t burn it!

You simply have to have it with some vanilla ice cream. So good.
XOXO,
Abby
P.S. I hope one day my pies will be this beautiful. And isn’t this pie plate to die for? Love it. 

I "garden" at Publix.

I really, really want to be good at gardening. The planting part is easy. Next when little plants germinate and poke their green heads out of the ground there is a huge feeling that something wonderful and amazing just happened. Then comes the growing part. Things happen then. Strange, gross, frustrating things.

We have blueberry bushes. The thing about blueberry bushes is that they take a few years to really get going and produce fruit. Within that time there won’t be a single bird in your backyard.

You will know when your bushes are going to explode with berries, because the year before that you’ll notice one or two birds. You will proceed to Home Depot and buy a scary looking owl to keep the birds away. It will work.

The following year your bushes will literally have dozens, even hundreds of green blueberries just waiting for the sun to ripen then. But the birds will come, and they will land on your owl. And they will poop on it. They will steal your blueberries. All of them.

If it’s not the birds, then it is bugs. I don’t even know if “bugs” is the correct term, because half of the time I cannot even identify the alien looking creatures crawling out (yes, out) of the food I am growing. Imagine my excitement when tomatoes actually start growing and butternut squash spring off of the vine.  And then I find this on a squash:

It doesn’t matter what it is. It’s gross. Nothing within 12 inches of where this was found will be eaten. I may even (once I get the nerve up to put my hands back over there) pull up the whole plant. Why? Because it’s gross. And we don’t eat Gross for dinner.

Hi, I’m Abby. And I garden at Publix.

~~~~~~~~~~~~~~~~~~~~~~~~~~~~~~~~~~~~~~~~~~~~~~~~~~~~~~~~~~~~~~~~~~~~~~~~~~~~