Guy’s Bedroom Decor

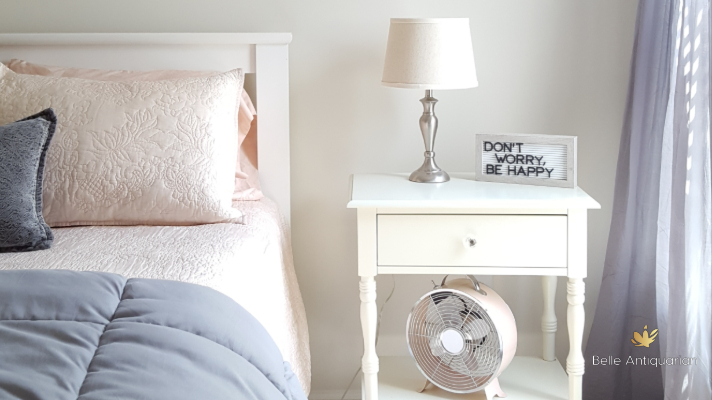
Jackson is off to his freshman year of college, and I finally had an opportunity to take pictures of his room. Unlike Samantha’s room, there wasn’t a recent makeover in his space. I feel like I keep repeating, “When we had new flooring put in…” But having new flooring put into our entire house was really like moving out, and then moving back in again. It forced us to purge, organize, and rearrange everything we own. So, “after we had new flooring put in” we painted Jackson’s room. I’ve linked the bedding and more decor on my LiketoKnow.it. You can find it by clicking HERE.

Before his room was Benjamin Moore Shaker Beige with one red stripe and one navy stripe running horizontally throughout the room. As I mentioned when I posted about Samantha’s room makeover, we are planning to move in the next few years, so we went ahead and painted Jackson’s room the same color, Benjamin Moore Dove Wing. It’s a great color that I love, love, love.

Benjamin Moore Dove Wing

Speaking of moving, it has been on our hearts for so long. Ken and I were both born and raised in Gwinnett County, which is a suburb east of Atlanta. I use the word “suburb” loosely, because our area is technically categorized as urban. When Ken and I grew up here it was rural/suburban. The major highways were 2-4 lanes in each direction, and now they are 8-10 in some places. It makes us sad and long for the setting that we grew up in, so we hope an opportunity will present itself for us to live in a more rural town soon.

Almost everything in Jackson’s room is from an estate sale, a garage sale, a thrift store, or an auction. If you follow me on Instagram (@belleantiquarian), you saw that I recently picked up this vintage typewriter for $13.50. Normally, I’d take it out of the case, but I really like the green and gold colors in this room.

I mentioned on a previous post that our family likes to collect vinyl records. We found an end table at an estate sale that has a lamp attached and an area below that is perfect for holding records. It was meant for magazines, but it works perfectly for us.

The vintage Hudson Bay point wool point blanket in this picture is one of my favorite finds. Don’t worry, it was professionally cleaned. 😉 You can purchase a new Pendleton blanket just like it HERE.

I’d rather buy cool, vintage stuff for my kids’ rooms than junk. Even if something doesn’t work, it can still be art.

We miss Jackson while he’s at college. It feels weird not having him sleeping in his room. But he will be home visiting before we know it.

Teen Girl Bedroom

The last time we updated our daughter, Samantha’s, bedroom was when she was 2 years old, and she was transitioning from a crib to a full size bed. At the time we invested in some yellow and green Pottery Barn bedding. I even did a yellow faux finish on the walls. That shows you how long ago that was – faux finishes on the walls were all the rage. LOL

Samantha is starting high school, and we recently did a room update for her. We kept her white full sized bed, dresser, bookshelf, and nightstand. Her bedroom is on the small side, so we didn’t want to upgrade to a queen bed and lose any of the space that she has.

Benjamin Moore Dove Wing 960

We decided to paint a neutral color that would stand the test of time, so we went with Benjamin Moore Dove Wing. I absolutely love the color on her walls. It’s a very light warm gray. Not only will the new paint color work if she decides to change her bedding colors in the future, but we are hoping to sell our house in 4 years. Buyers will prefer the neutral color over something else.

Samantha found some Pottery Barn bedding in a blush color that she liked, the Monique Lhuillier Blossom Embroidered Quilt & Shams. I have purchased a lot of Pottery Barn bedding over the years, and it is incredibly well made. I have never been disappointed in the quality of their bedding. In addition to the blush colored quilt and shams, we added a lightweight gray comforter from Amazon. Samantha is cold-natured, so she can pull the gray comforter up when she needs it. (Yes, sometimes even on hot summer nights. That’s our girl!)

I found a gray curtain on clearance at World Market that pulled in the gray from the comforter. We added in some blush pink accessories like the fan from Home Goods.

We had a lot of fun putting Samantha’s new room together. She works really hard at school and all of her extracurricular activities. I’m glad she has a space that she can relax in during her high school years.

Our Easter Mantel


//assets.pinterest.com/js/pinit.jsI thought I’d share a few photos of our Easter mantel this year. If you’ve read my past posts then you know that I like to decorate by “shopping” my house for items I can use. I always gravitate towards shopping for items of specific color. This time I was on the hunt for blue.

To see the photo larger, just click on it!

I can’t for the life of me remember where I bought the banner, but I am certain that it was one year after Easter and on discount. Then it sat in a Rubbermaid bin for a couple of years before Samantha and I put it together last year. We stamped “Hoppy Easter” on it.

The blue books on the mantel were easy to collect throughout the house. And well, Ball mason jars are pretty common around here. Let’s just say that I’ve hoarded passionately collected them. I regret every one of them that I’ve sold!

You might recognize the little bunnies from this post HERE. They’re from World Market.

I keep meaning to spray paint that candle holder. Warmer temps are here, so now may be the time!

I am pretty sure the bunnies (one piece) came from Hobby Lobby. The wall color is Danville Tan by Benjamin Moore. It’s been our wall color since we moved in ten years ago, and I still love it as much as I did the first day. It looks different at night than in the day. It’s very calming in person. (P.S. This color looks great in person. It looks totally wonky on my cellphone screen, so keep an open mind!)

Do you remember the barn wood that Ken and I got off of a an old barn/army building HERE? And also used to make THIS?

We used some our favorite pieces to make some free wall art for our mantel. The color is all natural and original. All we did was cut it and attach it together.

The “S” is for our last name. 😉 The window was picked up on one of our Craig’s List adventures.

I had fun pulling everything together. Everything other than the fresh tulips and the tiny bunnies on top of the books are things we already had. My favorite kind of decorating…FREE!

If you want to save any of these pictures, just click on the Pin It button and you can save it to Pinterest.

//assets.pinterest.com/js/pinit.js

Barn Wood China Cabinet: Before & After

I like refinishing hutches. I have a whole folder on our hard drive dedicated to before and after pictures of hutches that we’ve done. They are straight forward, and they sell really well for us. (BONUS!)

So I don’t know why it is that we hate china cabinets. But both Ken and I do. Somehow those simple doors on the front that officially make it a “china cabinet” also turn it into a project from hell. I also have a folder dedicated to before & after pictures of china cabinets. I hope I don’t ever have to add another picture to it. I don’t want to say, “never” but, I never want to refinish another china cabinet again. Unless it’s free. And unless I’m doing it for myself.

Ugly, ugly!

Here’s the before of the latest china cabinet that we’ve redone. It was next to free because the glass shelves on the inside were gone. Buying it we knew we’d have to invest in the expense of replacing them, but we know a guy. 😉 Not really. We know Ace Hardware. They sell and cut glass.

Now, this is the point that I also have to point out the missing pane of glass on the right. I wish I could blame that on the kids. But that was an adult in the house. And not me.

The other pane came out and some chicken wire went in. Because chicken wire definitely goes with what we had planned for this.

Yesterday I posted about how we came upon the jackpot of barn wood. Check out that post (here). Before we even started on this china cabinet we knew that we wanted to add some of the barn wood to it and change the look completely. This is where I get on my soap box and proclaim, “Please do not throw out furniture. Find a way to reuse it. Invest in quality furniture to begin with and you will never need to replace it!”

Ahem, without further ado, the AFTER:

This took over a week to complete. Seriously, it did. With prepping, cutting wood, installing wood, drying wait time, painting, drying wait time, sanding, curing wait time, waxing, hardening wait time, installing chicken wire, and new glass shelves it was a FULL WORK WEEK. The wood is priceless. It cannot be replaced or replicated. This is a one of a kind, truly unique piece. And since I’m never making another one (never say never?), there is only one opportunity to get anything like it from us!

Now THAT’S a makeover! Completely different.

//assets.pinterest.com/js/pinit.jsHope you enjoy the before & after. If you’re local and you’re interested in purchasing this, please use the icons at the top to contact us. Facebook is the best way!

Update: This piece has sold and is no longer available,

Barn Wood: The wood that almost wasn’t.

The area we live in, a suburb of Atlanta, has changed a lot in the past 25 years. Like, a LOT. It’s not the same place it was when Ken and I grew up. There aren’t many open fields left. It’s mostly businesses and neighborhoods and concrete. And more people. And it wasn’t. Before.

Atlanta is known for having the native-born people far outnumbered by the transplants. But we’ve lived here our whole lives, and we know a lot of other people that have, too. So this story is for them. And us. But I have to start from the beginning:
Fort Daniel isn’t just the name of an elementary school in Gwinnett County, and Hog Mountain isn’t just the name of a road (or two). Fort Daniel was an actual military fort built in the late eighteenth and early nineteenth centuries on Hog Mountain, which was the southern boundary of the Native American hunting grounds.  This area is approximately located on Scenic Highway and in between Old Peachtree Road and Gravel Springs Road. The fort was rebuilt in 1814, but there is some speculation as to whether it was completely rebuilt from the ground up, or rebuilt using the existing structures. For our purposes, it just matters that it’s old.
Recently a barn-type structure located near our home was being demolished. A sign invited anyone that wanted to take whatever wood they liked. And so, being us, we started the process of removing wood.  During our visits there to load up our truck, we talked with the landowner, Mr. Boyce, a few times. He was having the structure removed so that his two sons could build their homes there. Someone was supposed to come demolish the building and haul it away, but those plans didn’t work out. And, it turns out, this wasn’t just a barn. Mr. Boyce bought the property 25+ years ago, and he was told that at some point in time someone had moved one of the old barracks from Fort Daniel there, and it had been used as a storage barn ever since.
Ken carefully removing pieces of wood from the structure. At one point he was balancing
on a rotten tree stump to get the perfect pieces for me.
This wood that we got, is, at youngest, from the early nineteenth century. Each piece of wood is stunning. On the sides that were exposed to the elements you can see the faint, original green color, places where a “newer” (which may be decades old, as well) whitewash color shows. Mostly there is the much sought-after silver gray color. On the back, the sides that were not exposed, the wood is rich and brown. It is a color that you can only get with time, and a lot of it. This color is enough to move you me emotionally.
This is my favorite piece of wood that we got. Isn’t it beautiful?! I’m saving it for something special.
We’ve taken some of the wood that we collected that weekend and added it to a china cabinet that we’ve customized. The wood looks weathered and beautiful, but don’t mistake it as fragile and brittle. This wood is rock hard and strong. It has lasted a very, very long time. This wood is our history. It’s special. And it was almost trash.
Here’s the china cabinet! I was trying to avoid my reflection, so you have to see it from an angle. 😉
Ready to be filled with special things!
Ahhh! THIS WOOD is a dream!
This piece is currently available and can be seen by appointment. Use the icons at the top of the page to contact us. 
~~~~~~~~~~~~~~~~~~~~~~~~~~~~~~~~~~~~~~~
To learn more about Fort Daniel, Georgia, visit these websites:

Once You Go Black: The Dirty Details on Painting Doors


A few days ago I posted some before & after pictures of my painted black doors. I love how it looks. It’s completely changed the feel of the rooms. Despite how much I grumbled about it, I’m glad I did it.

I’ve gotten mostly positive feedback. It was a little funny when my mom commented, “What made you decide to do that? Well, it does take a little getting used to.” Translation: Why in tarnation would you paint your white doors black?? LOL, my mom rocks.

Now I’d like to share some things that I did or thought of while painting. I was completely wrong in estimating how long it would take and how hard it would be, but there were a couple of little things that I did that did cut down on the time and make it easier.

  • Research. Check out my Pinterest board on doors. I read a lot on how to paint a door. You might think that sounds silly, but there are specific ways to paint a door. Read on.
  • Doors should be painted with semi-gloss paint, similar to your baseboards and millwork.
  • The more sheen (shine) there is to paint, the more it shows brush marks. Semi-gloss has a lot  of sheen. Hence, there is a specific order on how to paint a door.
  • More sheen also means that if you use a roller for any of it, you need a large nap, at least 3/8″ or more. Otherwise, you’re going to see roller marks. It will drive you nuts once it dries.
  • Consider: Do you want to paint the entire door, or just the side that shows in the hallway? My thought was, “I want a black door, not a white door that has a black side.” So I painted the entire door.
  • Consider: Do you want to take the doors off of the hinges or leave them on? Taking the doors off of the hinges will greatly increase your workload for two reasons. One, You’ll most likely need two people to put the doors off and on the hinges. Two, you can only paint one side at a time.
  • If you’re leaving the doors on the hinges, prepping them will add some time.
If you leave the door on the hinges, be sure to tape them. Use an Xacto knife to trim the tape.
Prepping keeps it from looking sloppy.
Be sure to protect your floors. I taped down trash bags.
Drips don’t leak through the plastic. You can tape onto any surface, including carpet.
Paint can leak through canvas drop cloths or cardboard.

  • Each side of the door will need about 3 coats, even with primer.
  • Consider: Do you want to take the doorknobs off or leave them on? Taking them off adds time, but prepping (taping) and carefully painting around them adds time, too. I recommend taking them off. It’s not hard. I ended up painting all of my doorknobs and I’ll post about that soon.
  • Consider: It will take several days for the paint to cure and completely harden. Even if they are dry to the touch, they won’t be completely hardened for a few days. Ladies, think “nail polish.” Even if your nails feel dry on top, you know that it takes a few minutes for them to get rock hard.
  • Consider: Do you want to use a primer or a paint that has a primer already in it?

Okay, now there are some things that I would’ve done differently if I could do it all over again:

  1. I really hate to say this (hangs head), but I believe it would’ve made a huge difference. 😦 I wouldn’t have used Behr paint. I use Behr a lot for painting furniture. It is my go-to base for my homemade “chalk” paint colors. But, I never, ever, ever use it to paint walls. Ever. I always use Benjamin Moore paints. People often assume that Ben Moore paints are super expensive. They’re not. In fact, the gallon of Behr that I bought was more expensive than the last gallon of Ben Moore that I bought. Ben Moore paints are superior quality. It covers better. The color is better quality. It is better paint, hands down.
  2. Instead of a jet black color, I would have used a dark gray. I’m crushing on Dragon’s Breath by Benjamin Moore.

I hope this helps you! The biggest pains (literally) for me were my knee and hand. It is a lot of up & down, and my hand was killing me from holding onto the brush for so long. (sooooo.long.)

XOXO,
Abby//assets.pinterest.com/js/pinit.js

Painted Black Doors


I couldn’t decide to pull the trigger on painting the doors in our house black. I’m not really into doing anything trendy. Read: All of you who painted chevron stripes on your walls will be repainting in a year or two. But the more that I saw pictures of doors painted black, the more I decided that it was something that could actually last a while. When I decided to go ahead and do it, my thought was, “It’s paint. We can always paint them back to white.”

I did a lot of research before I started. Check out my whole Pinterest board on doors, and you can see some of the blogs that I read on how to paint a door. One of the blogs I read said something like, “This was so easy that I decided to go ahead and paint all of the basement doors, too.” Yeah, in that case, I’m in!

Y’all. I’m all about telling you when things are easy. I’m all about empowering you to do projects. But I’m not going to lie, this was no cake walk. I may or may not said a few curse words in my head  the whole time a few times. I don’t know for sure, but I’d be willing to bet that if you hired a bunch of painters to come to your home, and they needed to also paint a few of your doors from white to black, that they’d make the new guy that they all hate paint the doors.

So I may have once thought, “It’s paint. We can always paint them back to white.” But make no mistake, I will move before I paint those doors back to white. I originally thought I’d do one blog post on the whole thing, but I’m going to break it up into three: 1. Before & After pictures so you can decide if you want to do it, too. 2. What I did while painting the doors, that you might want to try. 3. How I painted the doorknobs from gold to antiqued pewter.

Here’s a before and after of the hallway. The walls are Revere Pewter by Benjamin Moore. The color I used for the doors is Black Suede by Behr.


and here’s a before and after of the front door:


I’d love some feedback! Please leave me a comment below and let me know what you think. I’ll be posting soon with the how to’s and what-nots.

XOXO,
Abby//assets.pinterest.com/js/pinit.js

A whole new hue (in the bedroom)!

I love color. All kinds of color. I could look at paint colors for hours. I am inspired to come up with a million different ideas simply by pouring over a paint color fan deck. One of my favorite college classes was Color Theory. I liked learning about how colors work together. But I really, truly enjoyed learning about how color makes people feel. Color Psychology! It’s a real thing. Companies use it every day to get you to buy their products. Color psychology is also a very real thing to consider when selecting paint colors for your house, both inside and out.

I’m going to show you the steps I go through when I’m selecting a bedroom paint color for myself or for someone else. Below are suggestions of what to consider when picking your color, but I still stand by the philosophy of go with what you like. You are going to be the one living in the room. Make it your own and love it. I simply want to help you avoid painting a room that you turn out to hate.I’ve been there. I have painted a dining room three times in one day. And I’m sure many of you have, too.

1. How do you want to feel in your bedroom? This is the first question I always ask, and the answers I usually get for adult bedrooms are: cozy, warm, calm, relaxed, and refreshed. This is where color psychology comes in. Here is a great info-graphic on the psychology of color. Avoid painting a color that is stimulating (red) when your goal is to be calm and relaxed (green or lavender).
The Psychology and Tradition of Color (Google Affiliate Ad)

2. Light – How much and what kind? What direction does your bedroom face? Does your bedroom get a lot of natural light? If so, it can handle a more saturated color or a darker color without visually tiring you. Also consider that paint colors look different at different times of day. One of my favorite colors to use is Benjamin Moore Danville Tan (HC-91). However, this color looks drastically different in rooms that get different light and at different times of day. If your room is dark, or if you spend most of your time in your room while the sun is down, make sure you look at your paint color during that time.

Benjamin Moore, Danville Tan HC-91

3. Size – Size does matter. How big is your room? Larger rooms can handle darker and more saturated colors. If you are planning to use a darker color in a smaller room, keep everything else simple. For example, use a plain, neutral bed covering and don’t over decorate the walls.

4. Existing colors – Of course you want to find a paint color that goes with your existing bedroom furniture and bed coverings. However, don’t forget to consider the flooring and rooms that are adjoining the bedroom. Our bedroom has a wide entry with double doors. When the bedroom doors are open, quite a bit of the paint color is seen from other rooms. Picking a bold color for your bedroom walls when all of the surrounding walls are subtle will not be pleasing to look at.

5. Resale – How willing are you to repaint your bedroom when it is time to sell? If you have no problem repainting to a buyer-friendly color when it’s time to sell, then this doesn’t need to be a big consideration for you. However, if you don’t think that this is a job that you’ll want to tackle again when it’s time to sell, then I recommend picking a paint color that isn’t “offensive.” In other words, you want the buyer to see the whole room and not get stuck on the paint color you chose.

Some bedroom colors I like are: Benjamin Moore Paris Rain 1501,  Benjamin Moore Antique Jade (465), Benjamin Moore Shaker Beige (HC-45), Benjamin Moore Revere Pewter (HC-172), Benjamin Moore Palladian Blue (HC-144),

I love color, and I’d love to know what color you painted your bedroom. Please tell me about it!
Come back tomorrow when I give a tutorial that shows you how to sample your paint color without buying a paint sample!

XOXO,
//assets.pinterest.com/js/pinit.jsAbby