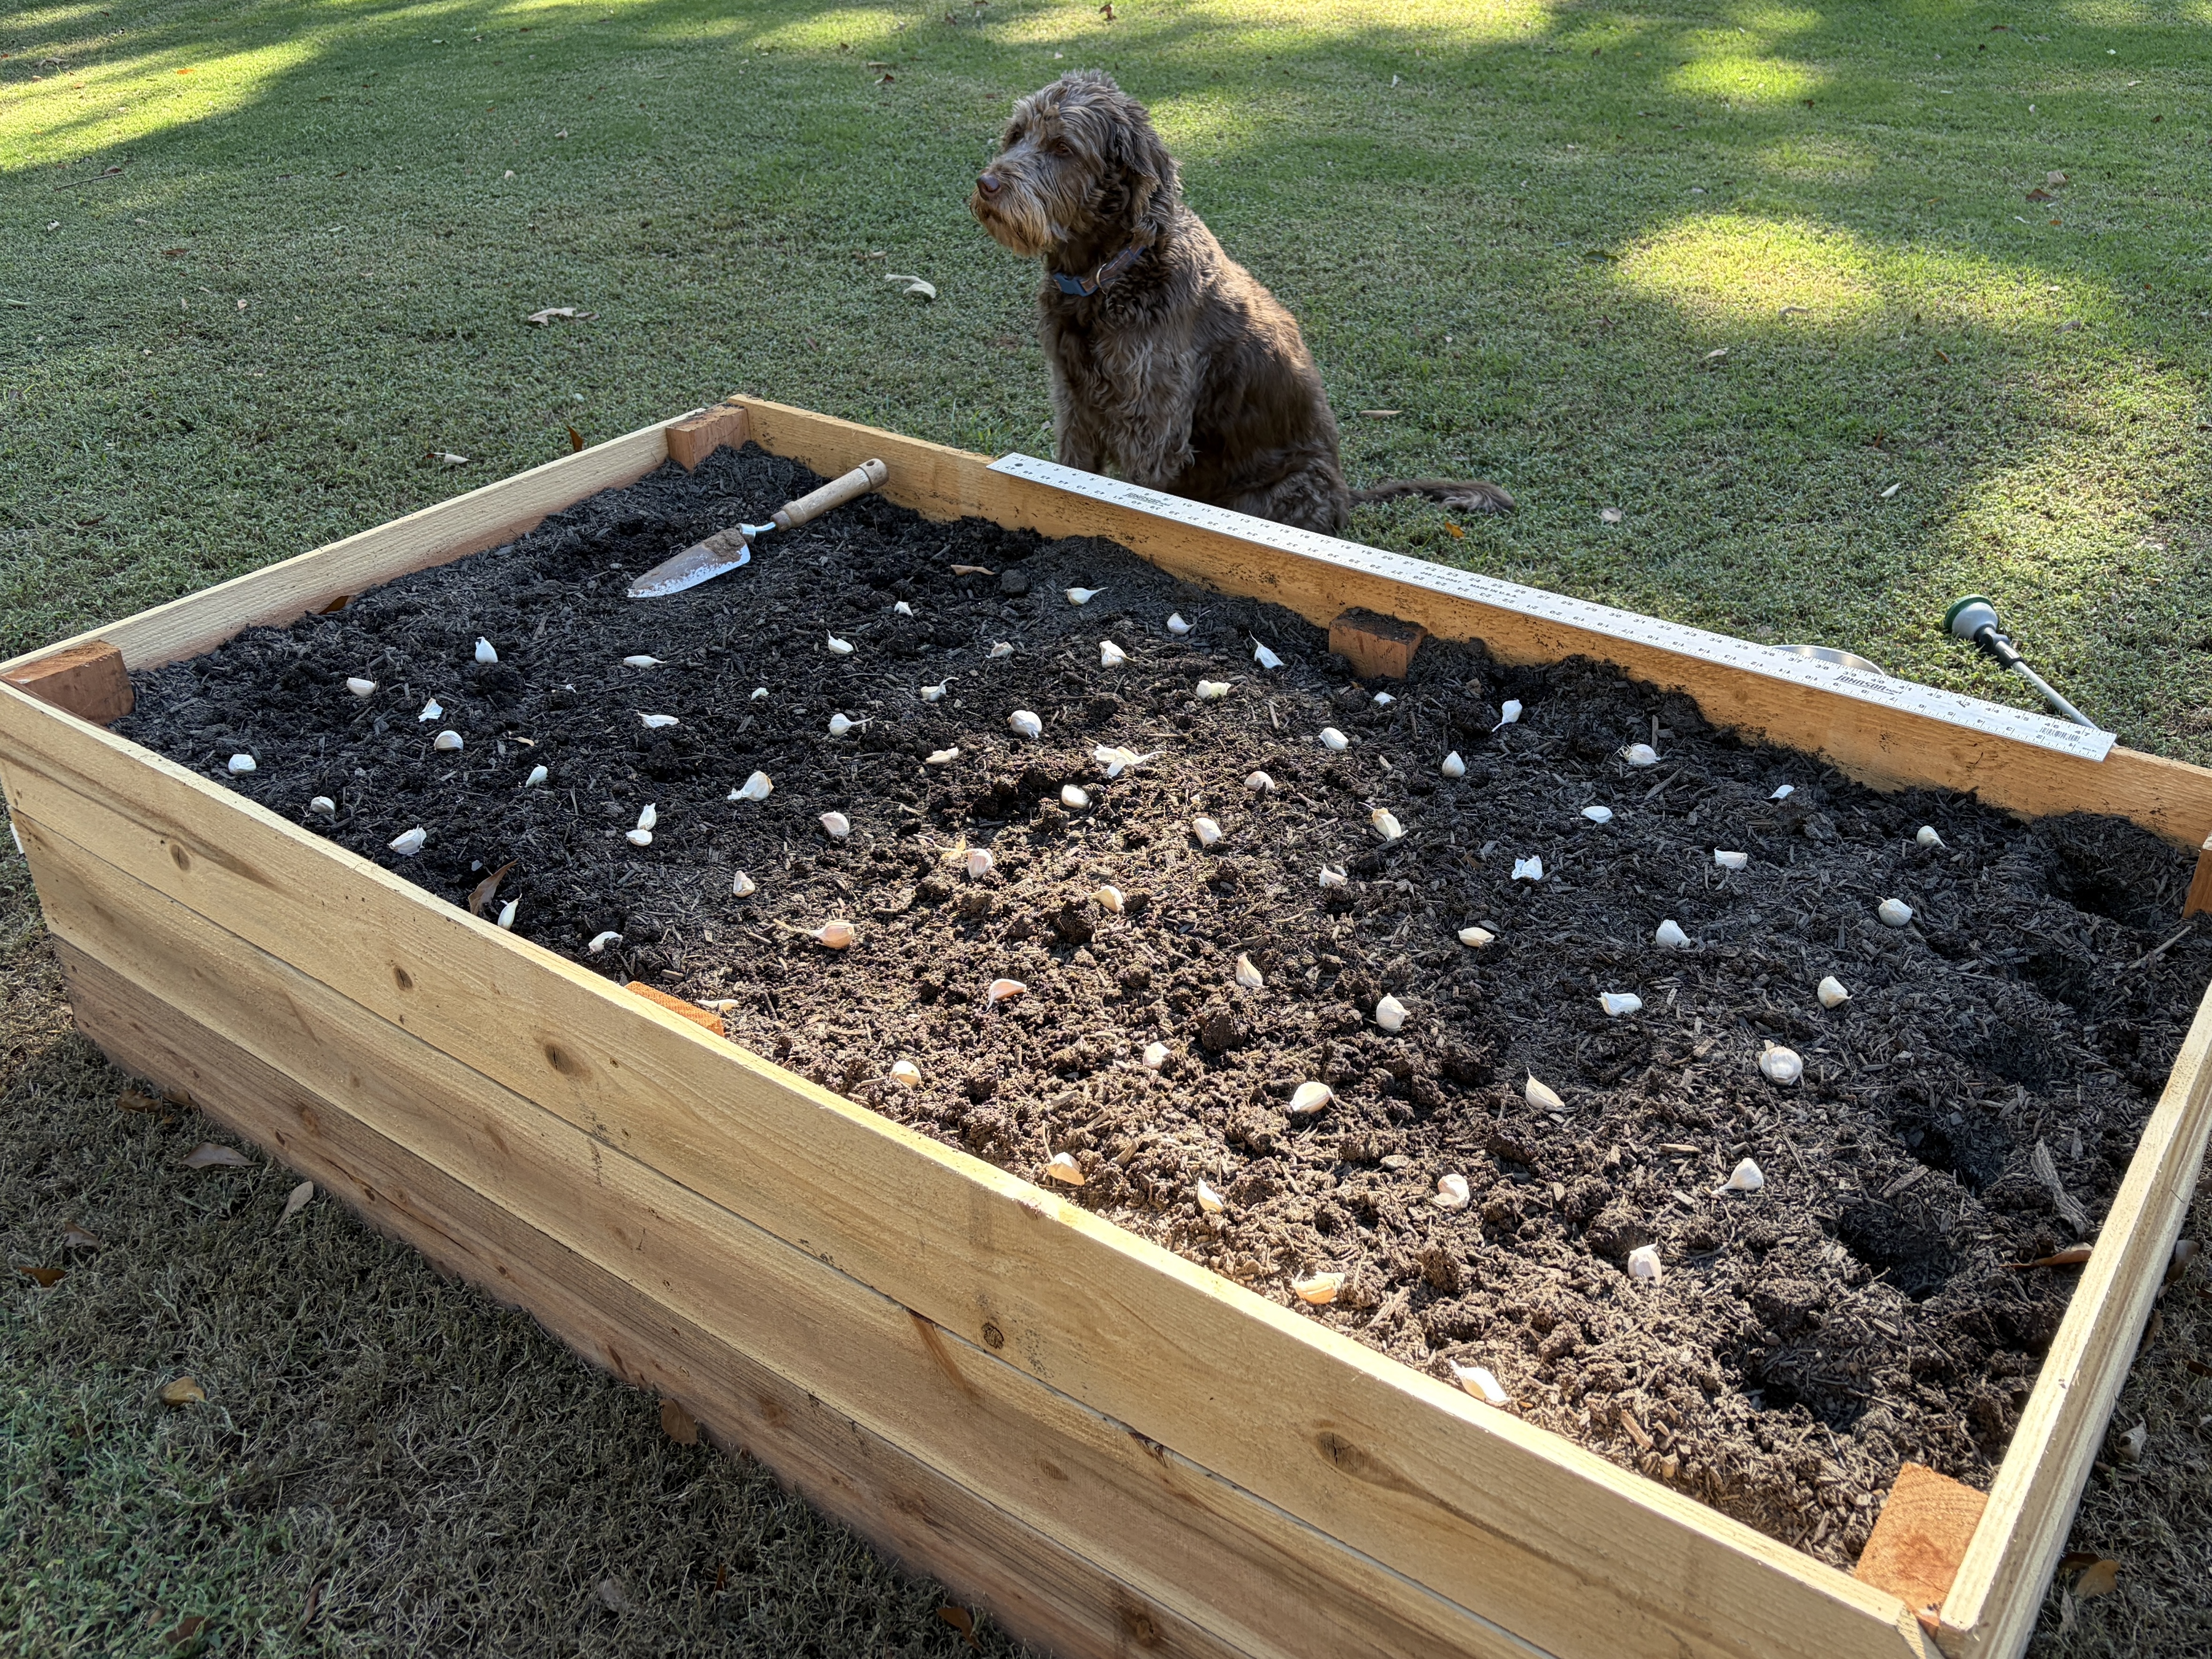
Raised garden bed with garlic cloves laid out for fall planting, a trowel, a ruler, and a brown dog sitting behind it. Learn how to plant garlic in the fall

How to Plant Garlic in the Fall in the South

Spend some time talking with experienced vegetable gardeners, and they’re likely to give you a similar piece of advice: only grow what you actually eat. After all, why bother to grow peas if no one in your household likes to eat them?

Nearly every global culture eats garlic in their cuisine. However, for some reason, most home gardeners don’t grow it. After talking with experienced gardeners in my area and researching the best ways to grow garlic in the South, I’m sharing some basic tips to plant and grow garlic this fall.

Learning how to grow garlic isn’t complicated. With a few guidelines, you can learn how to plant garlic in the fall.

This article contains affiliate links. If you purchase through these links, I may earn a commission at no additional cost to you. This article is not sponsored by any of the growers mentioned.

Why Grow Garlic in Your Garden

If you ask me about my vegetable garden plans in March, you’ll probably get a very enthusiastic response. After being cooped up inside over winter, I’m always eager to get the ball rolling for my spring and summer veggies.

On the other hand, if you came back and asked me about my garden again in August, I might sound a little burned out. Weeks of watering, controlling weeds and pests, and daily harvesting leave me more than ready for a break.

Since garlic planting arrives around the time when I’m tired of the garden chores, it’s a good thing that garlic isn’t as demanding as tomatoes or squash. After giving my garden beds a rest for a few weeks in early fall, I’m able to plant garlic and do a bit of basic tending until it’s ready to harvest the following summer.

Many gardeners consider garlic to be a low-maintenance plant. Beyond maintaining appropriate moisture level and applying a nitrogen fertilizer in the spring, it doesn’t require daily supervision.

Many of the bugs and animals that are attracted to our summer gardens find garlic to be undesirable. With fewer pest problems during the longest part of its growing season, it only requires intermittent checking to make sure the plants are healthy.

Garlic is a crop that can easily store for many months if it has been cured properly. This makes it an excellent crop to consider this fall. Before you start, the most important thing to know is which growing zone you’re in.

Growing Zones and Garlic Varieties

Garlic is planted in mid to late fall. It loves to grow in cold weather. In fact, garlic requires a process called vernalization to form the individual cloves of garlic within the bulb. It’s important to know how many days your area gets of cold weather below 40 degrees, which can be found by determining your growing zones. (To find your growing zone, click HERE.)

In addition to cold temperatures for vernalization, it’s good to know the number of daylight hours and air temperatures typical for your growing zone. Once you determine your growing zone, you’ll be able to decide which varieties of garlic to plant and when you should plant them.

Growing zones 3-7

Cooler growing zones often see the most success with hardneck varieties of garlic. Generally, garlic is planted about two weeks before the first frost dates in these zones, but gardeners should compare recommendations for specific varieties in their exact zone. Hardneck varieties of garlic grow hard stems that form scapes or flowers in warm weather. Hardneck garlic sometimes has a stronger, spicier flavor. After harvesting, it can usually be stored for 3-6 months.

Growing zones 8-10

Warmer climates usually grow softneck varieties of garlic but sometimes see favorable results with hardneck varieties as well. Planting times vary in these growing zones, with some as early as October, and others through mid-December. If you’re planning to grow garlic in these warmer zones, you’ll need to check if your growing zone requires steps for extra chilling time.

In contrast to hardneck varieties, softneck varieties of garlic have soft stems. Softneck garlic is often milder and sweeter. These are the varieties that you may have seen pictures of garlic bulbs braided together. After a proper curing time, softneck garlic can be stored for up to 12 months.

Two metal bowls containing separated garlic cloves, labeled Inchelium Red and Southern Selection softneck.
I purchased Inchelium Red and the Southern Selection softneck assortment from Southern Seed Garlic.

Whether you’re using hardneck or softneck garlic, you can order it online or purchase it from many reputable companies. This year I ordered from Southern Seed Garlic. Another option for seed garlic is Eden Brothers. Once you know your growing zone and which kind of garlic you’re going to plant, you’ll need to follow a few steps to get a healthy garlic harvest.

How to Plant Garlic in the Fall

I usually tend to be a rule breaker when it comes to gardening. However, when it comes to garlic, there are a few guidelines that are important when considering how to plant garlic in the fall.

Garlic cloves laid on the soil beside a ruler to measure spacing before planting.
  • Find the right garden spot – Garlic should be planted in well-draining soil with full-sun exposure. Choose a spot that won’t stay wet or dark throughout the day. Another consideration when selecting a spot is to avoid one that recently grew anything from the onion family, which may inhibit proper garlic growth.
  • Garlic takes several months to grow. Select an area of your garden that you won’t need for any other crops during that time.
  • Prepare your soil – Garlic prefers soil that drains well and allows it to properly form bulbs. If your soil is clay or compacted, consider amending it with loamy or composted material, which will help with drainage and nutrients.
  • When you’re ready to plant, gently separate your garlic bulb into individual cloves, but don’t remove the papery peel from the clove. Cloves should be planted with the root side down and the pointy end skyward. In general, garlic cloves do well being planted 6 inches apart and 1-3 inches deep. However, check your supplier’s recommendations for the varieties you’re planting.
  • Once your garlic cloves have sprouted, you can apply a loose layer of mulch around the sprouts, such as shredded leaves or pinestraw. Mulch will keep your soil temperature and moisture regulated, as well as preventing weeds.
  • Harvesting your garlic depends on your growing zone and the variety you’re growing. Your garlic is ready to harvest when one-third to one-half of the leaves have died back.
  • The final step to keeping garlic in your pantry for months to come is to cure it. Before adding newly harvested garlic to your pantry storage, leave it for two to three weeks in a warm, shady, ventilated place.
Illustration showing a garlic clove planted pointed tip up and root end down, with its papery covering left intact.

Why We Chose a Raised Bed for Garlic

When we added garlic to our garden, we decided it was best for our situation to use a raised bed. A raised garden bed can be an ideal way to grow garlic for several reasons.

Many areas of the South don’t have ideal soil for growing garlic. Soil with too much clay can prevent proper drainage and keep bulbs from correctly forming. Soil with too much sand may dry out too quickly. By using a raised bed, you’ll be able to control the quality of the soil and the moisture level for your garlic.

Since garlic can take several months to mature, we recently added a dedicated raised garden bed just for the garlic. We used a method called hügelkultur, which allows organic matter to gradually break down and enrich the soil.

Many gardeners choose to plant garlic directly in the ground. However, garden boxes can solve common problems gardeners experience when growing their own garlic.

If you’d like to learn how to easily and cheaply build your own raised garden boxes, check out our guide HERE.

Chances are that some of your favorite recipes call for fresh garlic. When you grow your own garlic, it’s simply a quick trip to the pantry, instead of a car ride to the grocery store.

With a little planning and a bit of patience, you can learn to grow your own garlic this fall.

Individual garlic cloves arranged across the soil surface in a wooden raised garden bed.
Lay out the cloves to check spacing before planting them at the recommended depth.

Check out these other reader favorites:

Raised garden bed with garlic cloves laid out for fall planting, a trowel, a ruler, and a brown dog sitting behind it. Learn how to plant garlic in the fall
Learn How to Build a Raised Garden Bed Cedar raised garden beds filled with vegetables, with mulched paths and arched wire trellises.

How to Build a Raised Garden Bed with Cedar Fence Pickets

Most people don’t think about starting a garden in October. When we look around at nature in the fall, we see dying leaves and flowers, plants going dormant to protect themselves from the cold, and fewer hours of daylight.

However, when I decided to plant garlic this fall, I realized I needed an additional garden bed dedicated to growing it for the next nine months. Many people have asked me over the years how to build a raised garden bed, and for the first time I’m sharing the simple process I use for building one.

If you’ve wanted to try gardening in raised beds, these steps will guide you through a straightforward, affordable way to begin. With this method, you’ll build a cedar raised bed that is approximately 3 feet wide by 6 feet long.

We’re using our new cedar raised bed for garlic plants, but you can use a bed like this to grow almost any kind of garden vegetable that is suitable for your growing zone.

This post contains affiliate links. If you make a purchase through one of these links, I may earn a commission at no additional cost to you.

Why Use Raised Garden Beds?

Raised beds aren’t a requirement for gardening in your yard. However, there are several reasons why many gardeners choose to use raised beds rather than planting directly in the ground.

The most common reason a gardener might choose to use a raised bed is because of the quality of their soil. In the South, some people struggle with red clay soil, which is known for poor drainage and restricting root growth. Other gardeners find that they have poor-quality soil, and using a raised bed allows them to improve the growing conditions by using the soil of their choice inside the beds.

We like the neatly manicured look that raised beds create in our garden. We can easily step through and around our beds without walking through dirt.

Regardless of whether you need raised beds for a specific reason, or you simply like the look of them, an important thing to consider is where to put them.

Where to Put a Raised Garden Bed

If you’ve decided to use raised beds for your garden, there are a few things to consider about where to place them.

Most vegetables and pollinator flowers like to grow in full sun. If you have an idea of what you’re going to grow, do a little research to see what kind of sun exposure you’ll need. In most cases, you’ll want to avoid using a spot that gets too much shade.

For the type of garden bed that you’ll find in this article, you’ll need a relatively flat spot. Our yard is already flat, so we didn’t need to do any preparation to the ground beforehand. However, if your yard is sloped or uneven, you will need to do some prep work to even it out first.

We like raised beds because they make gardening more convenient for us, so it’s important that you don’t place your garden bed in an inconvenient spot. Make sure that you can easily get to it with water and gardening tools.

If you’re using more than one raised bed, consider how to place them in relation to each other. Allow enough space to walk between them and to reach into them. Consider if you’ll need to have enough space to maneuver a wheelbarrow between garden beds. We spaced our raised garden beds 3 feet apart from each other and 3 feet away from the fence, which allows plenty of space for our needs.

Abby Smolarsky working with cedar fence pickets and a cordless driver while assembling a raised garden bed.

Why We Chose Cedar Fence Pickets

The internet is full of creative ideas for ways to build raised garden beds. In the past, we’ve used kits from the store, and one year we even used concrete blocks. We’ve seen other people who repurposed animal water troughs or corrugated metal for garden beds.

For our garden beds, we decided to use untreated, dog-ear cedar fence pickets. We chose these for several reasons. One reason we like to use these is because they’re similar to the wood used in many garden bed kits, but they’re more affordable.

Other benefits of using cedar fence pickets are that cedar is naturally resistant to decay and insects. Some people consider it safer for growing food than pressure-treated wood, and cedar is a lightweight wood that is easier to work with than other species.

We utilized the full six-foot length of the cedar fence pickets, and we did not cut off the dog-ear ends. The finished dimension of our boxes are 3 x 6 feet and 16 ½ inches high.

Combining the cedar fence pickets with one cedar 2x4x8 per bed, cost of wood ends up being around $55.73 per garden bed.

Materials and Tools for One Raised Garden Bed

You will need the following materials to build one raised garden bed:

Cut List

  • Leave six of the fence pickets uncut
  • Cut three of the fence pickets in half, approximately 3 feet long each
  • Cut the 2x4x8 into six even pieces, each approximately 16 inches long

How to Build a Raised Garden Bed

1. Measure and Cut the Wood

Set aside six cedar fence pickets for the two long sides. These will remain their full 6-foot length, including the dog-ear ends.

Measure and cut the remaining three pickets in half to create six approximately 3-foot boards for the short sides.

Cut the cedar 2×4 into six approximately 16-inch pieces, allowing for the small amount of wood removed by the saw blade. Four pieces will become corner supports, and two will support the middle of the long sides.

We used a circular saw, but a handsaw will also work.

2. Assemble the Two Short Sides

Lay three short boards on a flat surface with their long edges together, forming a panel approximately 3 feet wide and 16 ½ inches high.

Position a corner support at each end, with its broad face against the boards. Keep the supports aligned with the ends of the boards and just below the top edge.

Using 1 ⅝-inch wood deck screws, drive two screws through each board into each corner support. Each short board will have four screws, for a total of 12 screws per short side.

Repeat to assemble the second short side.

Inside corner supports joining three horizontal rows of cedar fence pickets in an empty raised bed.
The corner supports sit inside the bed, with the long-side pickets overlapping the short-side ends.

3. Assemble the Two Long Sides

Lay three full-length pickets on a flat surface with their long edges together. Position a support at the midpoint of the panel, with its broad face against the boards and just below the top edge.

Drive two screws through each picket into the middle support, using six screws for this step.

Repeat to assemble the second long side.

Top-down diagram showing a long-side picket overlapping a short-side end, with both screwed into an inside 2×4 support.
The support’s broad face meets the short side; its narrow face meets the long side.

4. Join the Sides to Complete the Bed

Stand the panels upright with all supports facing the inside of the bed. Position the long sides so their ends overlap the ends of the short boards.

Attach each long picket to the narrow face of each corner support using two screws at each end. Together with the two screws already securing it to the middle support, each long picket will have six screws.

Repeat at all four corners to complete the box. The finished bed measures approximately 3 feet by 6 feet and 16 ½ inches high.

Diagram showing placement and method to assemble a cedar raised garden bed.
Enlarge to show detail.

How We Filled Our Raised Garden Bed

Once you’ve built the box for your raised garden bed, you’re not quite ready to use it.

The internet is full of just as many opinions on how to fill a raised bed as there are ways to build one. We’ve come up with a method for filling a garden box that has resulted in healthy growth and productive harvests for our plants.

We like to use a hügelkultur-inspired method of filling a garden box. First, we lay down a layer of plain brown cardboard as a base to block existing grass and weeds. On top of the cardboard, we create a layer of old sticks, small tree limbs, and logs we gathered from our property. This is followed by a layer of old leaves, and the final layer is a mixture of garden soil and compost.

We ended up using six 2-cubic-foot bags of soil and one 1-cubic-foot bag of compost per garden box. If you use this method to fill your boxes, the amounts you use for each layer will depend on what you’re able to gather from your yard. We spent about $57.79 on dirt and compost per box.

Whether you’re learning how to build a raised garden bed out of necessity or because you simply like the look of them, the steps in this article provide a straightforward and affordable way to get started.


Check out these other reader favorites:

Learn How to Build a Raised Garden Bed Cedar raised garden beds filled with vegetables, with mulched paths and arched wire trellises.
Fall decorating on a mantel with a pheasant figurine, pumpkin on a grapevine wreath, large pinecones, wooden candlesticks, and a gilt mirror.

A Collected Approach to Fall Decorating

As I arrange the pumpkins on the stairs outside of our front door, I wonder if it’s possible for them to bake as they sit outside. The calendar may say that fall has officially arrived, but the weather here in the Deep South is late to the party.

I can feel beads of sweat gathering on my forehead as I place each pumpkin exactly where I want it on the stairs. It’s a meager attempt to make it look like fall, even though it doesn’t feel like it yet.

Over the years I have accepted that Fall in the South doesn’t look like it does in movies like Good Will Hunting and Practical Magic. Fall reveals itself a little slower and more subtly down here.

Summer tries to linger a little longer in the South. So, I stopped dragging dozens of fall décor bins up from the basement, and I adopted a collected approach to fall decorating. A collected approach to fall decorating is a more natural way of letting a Southern home move seamlessly into the season.

Abby Smolarsky arranging orange, cream, and blue-green pumpkins on the steps outside her black front door.

This post contains affiliate links. If you make a purchase through one of these links, I may earn a commission at no additional cost to you. As an Amazon Associate I earn from qualifying purchases.

Letting Your Home Move into Fall

Fall in my home often feels like a time of transition. Summer has kept me busy with gardening and traveling, and our holiday calendar for the next few months is already filling up.

Despite the warm weather, I am ready to nestle down in my home for the season. I’ll do some fall decorating, but a complete room overhaul is unnecessary when careful thought is put into seasonal additions.

For my husband and me, our home is our retreat where we can withdraw from the hectic world after a long day. We like our things, collected and curated, and we prefer not to put them all away to make room for décor that is only brought out for a few weeks.

During the fall, I’ll leave most of our furniture and collections out where they’re normally styled. With a few thoughtful additions, our everyday things transform into part of the seasonal décor.

Traditional dining room with wood furniture, collected wall plates, a floral tablecloth, and a pumpkin centerpiece surrounded by dried hydrangeas.

Making Fall Decorating Feel at Home

As a lover of all things old and worn, I naturally gravitate towards a muted color spectrum. The traditional colors of Halloween would be garishly out of place in our home. In spaces filled with worn rugs, old books, and patinated copper, bright orange and black would feel out of character.

In our collected home, fall colors are successfully incorporated with existing décor when they reflect what is happening outside in nature. Instead of bright orange tones, I lean into softer terracotta colors that can be seen in dried grasses and leaves. Rather than using black, I prefer to use rich browns often associated with autumn sticks and pinecones. Each collected home is different, and the seasonal colors you choose should complement your existing décor.

Handmade clay jack-o’-lanterns on silverplate trays beside a blue-and-white ginger jar with rust velvet ribbon, a brass lamp, and autumn flowers.

With a collected approach to fall decorating in mind, I decorated a drop-leaf table that sits in the bay window of our living room. I left our oversized blue and white ginger jar and a thrifted lamp in their normal places, and I added a few touches to make this space feel like fall.

Two handmade terracotta pumpkins crafted by a local artisan are placed onto silver trays we’ve collected over the years. The pumpkins are rustic and even show marks from the potter’s hands where they formed the stems. When placed onto silver trays, the pumpkins are transformed into pieces of art that belong beside our other antique furnishings.

Behind the pumpkins, a piece of burnt orange velvet ribbon makes the ginger jar feel like it’s included in the season. This color was thoughtfully selected to bridge the color of the terracotta pumpkins with the existing pieces on the table.

Rather than using an “instead of” style of decorating for fall, I aim to use my favorite and familiar things in new ways.

Using Familiar Things in New Ways

When I shop for seasonal décor, I find myself evaluating each piece for the different ways it can be used throughout the year. I’m not attempting to participate in minimalism or deprive myself of decorating in a decadent way. Rather, it brings interest and joy into my life when I think of creative ways that pieces can be repurposed.

Pheasant feathers arranged in a silverplate sugar bowl beside a turtle shell, stacked vintage books, a small radio, and a framed photograph.

As collectors, we have things in our home that can be used in ways we never thought of. A shawl can be turned into a table scarf, or perhaps a collection of frames can be filled with family photos from a pumpkin patch.

This year I purchased small grapevine wreaths that can be used in spring to symbolize a bird’s nest, and in the fall, they became pedestals for tiny pumpkins to rest upon.

Limelight hydrangeas that filled our backyard with a bright, refreshing ambiance over the summer are now dried and used in vases and wreaths in our fall dining room.  A creamer and sugar set found at a local estate sale became vessels for pheasant feathers, which are then tucked into small vignettes.

In a collected home, items can be brought together and reimagined in new ways each season. As our spaces evolve and change over time, the way we integrate these pieces into our seasonal décor is constantly changing.

Framed photograph of a child at a pumpkin patch beside dried hydrangeas in a brown glass vessel tied with blue velvet ribbon.

Finding Your Own Collected Approach

This year when you decorate for fall, consider using pieces you already have in your home and adopting a collected approach for styling your seasonal décor alongside them.

By restyling what you already have, repurposing new decor in creative ways, and making selections that complement your existing decor, your collected home will be beautifully decorated for the fall season.


Looking for fall decor seen in our home or pieces that can be seamlessly added to your collected fall decor? Find these and more in my Amazon storefront.

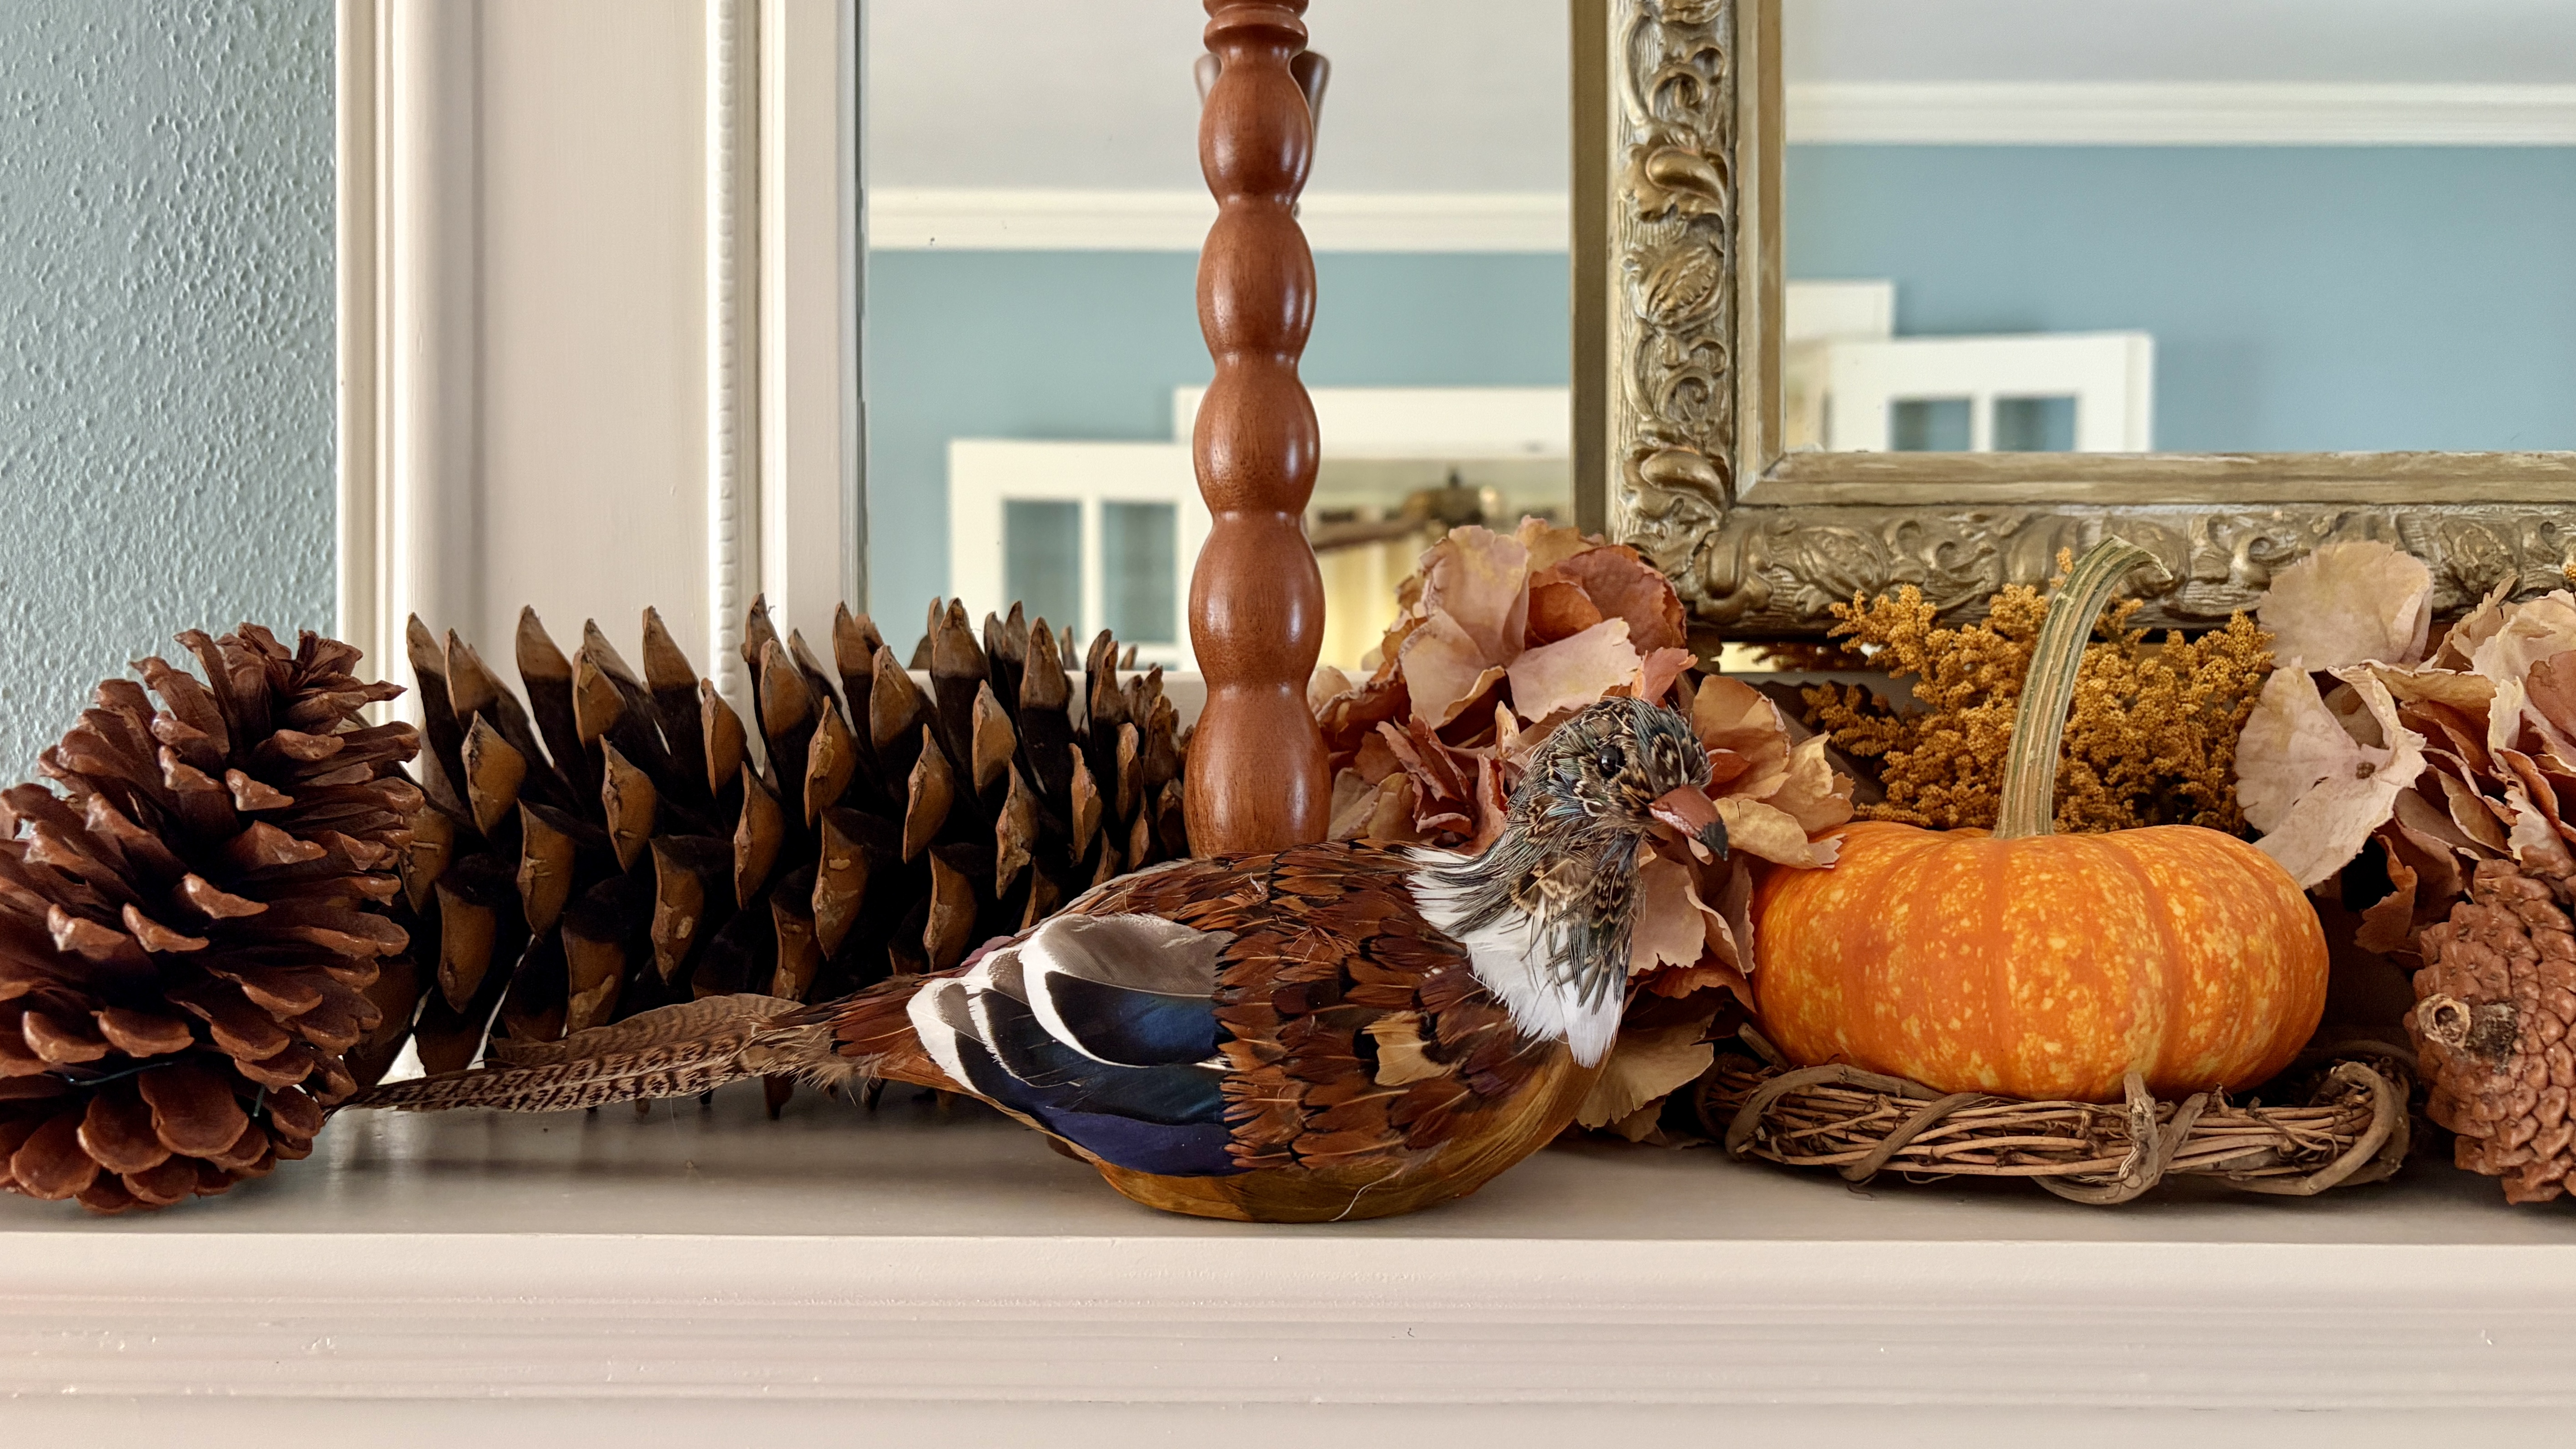
Small pumpkin resting on a grapevine wreath beside a pheasant figurine, large pinecones, dried flowers, and wooden candlesticks on a mantel.
Watercolor paintings in progress with brushes, books, and art supplies beside a window.

The Return of the Analog Life: Why We’re Looking for Reasons to Log Off

America is seeing a return of the analog life, and you may be surprised at who is leading the way.

As someone born on the tail end of Generation X, I remember life before and after the dawning of the digital age. My freshman year of high school, we took a class called Keyboarding as a graduation requirement. This class taught us typewriter skills on, what else, a typewriter. But by the time I graduated high school, we were exclusively using a desktop computer for typing and word processing.

My kids are both members of Gen Z. They weren’t alive during the time when “car phones” were rare. For most of their lives, anything they might want to buy could be ordered with a tap on their phones.

And while Gen Z grew up with more technology at their fingertips than any generation before them, they are the generation that is leading the way to intentionally using less of it.

Abby Smolarsky typing on a vintage typewriter inside a Savannah bookstore.
Using a typewriter in a Savannah bookstore brought back memories of learning to type before computers became commonplace.

The Growing Desire for an Analog Life

I recently participated in Pinterest Presents. During this presentation, Pinterest shared that their research shows an astounding 40 percent of respondents from Generation Z wish that social media did not exist.

I’ve seen this firsthand with my own Gen Zers. My kids sometimes remove social media apps from their devices, and they’ll go for long periods of time without checking them on their laptops.

Gen Z is turning screen time limits on their phones, and they’re some of the first to put them away at restaurant tables.

My son and daughter have commented on how their generation consumes social media content, but they don’t share social media content as much as older generations. Their Instagram profiles are sparse, and they’ll rarely post anything to Facebook.

When Gen Z uses Pinterest, searches for “things to do instead of scrolling” have increased 350 percent. The generation that has always had an Apple device within reach has recognized that technology has begun to replace many of the ordinary activities that once filled our days. By making everything convenient, life became a little less interesting.

When Convenience Removed the Doing

Remember when your grandmother made bread? The smell of baking bread filled the house. With some pantry ingredients and a bit of time, your family could have warm homemade bread on the dinner table.

Today, we can buy bread instead of baking it. Grandma isn’t in the kitchen showing us how to knead the dough, and in turn, we’re not sharing stories while the dough rises.

When I was a kid, the bottom shelf of our family bookshelf was dedicated to a complete set of encyclopedias. When I got bored, I would go and take one of the volumes to the sofa and flip through it for hours.

With the “S” encyclopedia, I could learn about space, Spain, Shakespeare, and the Sphinx all in one afternoon. Today, we ask Google, find the answer in seconds, and often remain on the phone to check a message, read the news, or scroll through something unrelated.

Advances in technology have made our lives easier. These conveniences save us time, but they do not always help us use that time well.

What if the doing was part of the value? By making everything convenient, we have forgotten that there is value in time and experiences.

Participation Offers Something Efficiency Cannot

Every year during the first week of April, I plant my summer garden. I kneel beside my garden bed and poke holes every couple of inches into the soft dirt. As I drop a seed into each hole, I know it will be months before any of this food is ready to harvest.

Over the next few weeks, I patiently wait to see which seeds germinate and which ones are duds. I water my garden beds early in the morning while several kinds of birds sing in the nearby trees. I attach my growing tomatoes to their trellises, and they release their unmistakable perfume into the air where I have rubbed their stems.

When friends and family visit, I tell them, “Come, let’s go see what’s growing in the garden.” As we walk through, I invite them to fill bags to take home. I point out the growing watermelons and say they’ll have to come back when they’re ready.

It would’ve been so much easier to just buy tomatoes from the grocery store. But think of all I might have missed out on.

If I skipped all this all this time-consuming work, I wouldn’t have had the satisfaction of nurturing these plants from seed to fruit. I would’ve missed the birdsong and scents that belong to the garden in the morning.

Most importantly to me, I would’ve missed out on the opportunity to share my garden with friends and family. The connections to people, stories, and experiences would’ve been lost.

Abby Smolarsky holding a basket of homegrown tomatoes in her raised-bed garden.

The Goal is Not Simply to Use Your Phone Less

It’s been nearly 20 years since the first modern smartphone was released. What did we do with our free time before swiping to the next screen?

In doctors’ offices we would read a book or do a crossword puzzle. I even remember my mom bringing her cross-stitch projects with her while she waited for my brother and me during our music lessons.

Now, if a parent tells their child to get off their phones, they might say, “But what do you want me to do instead?” Perhaps the answer is not to spend our lives trying to resist the phone. Instead, we should build our lives to be interesting enough that we sometimes forget to reach for it.

Setting screen time limits is a good first step to creating boundaries. Many people may not even be aware of how much time they’re spending on their phones, instead of engaging in meaningful activities and conversations.

It’s important to find hobbies and interests to hold your attention and occupy the time that you would’ve wasted online. Not only will this be a better use for your time, but it will make your life more interesting.

The more interests we develop, the more reasons we have to participate in our own lives.

What an Analog Life Can Look Like

So, what does an analog life look like in our ordinary lives? It’s not taking a trip back in time to the dark ages or Little House on the Prairie. Instead of romanticizing the past or adopting an old-fashioned lifestyle, look for ways to actively participate in your life.

For some people, enthusiasm and fulfillment come from spending their time making something. Perhaps you might enjoy watercolor painting, restoring a car, repairing a broken radio, or arranging some flowers.

Others find that tending things brings joy to their lives. Activities like beekeeping, caring for animals, or gardening require regular attention, but they also give us the satisfaction of watching something thrive under our care.

One of my favorite ways to invest my time is learning. Reading physical books, researching family history or local history, and becoming knowledgeable about antiques are examples of ways we can follow our curiosity beyond a quick internet search.

Others find meaning in gathering with people. If this describes you, activities like hosting a dinner, joining a club, or visiting friends are things to do instead of scrolling.

Analog living shouldn’t feel like a punishment. The point is to make more time for the people and activities you genuinely enjoy.

Abby Smolarsky arranging orange and rust-colored flowers beside a kitchen window.

Analog Living Does Not Require Rejecting Technology

This isn’t a call to reject technology completely. Technology isn’t something to be feared or hated. The question is, can we find a way to use technology to transform ideas into a life well-lived?

I enjoy using my phone to document life and share it with my readers and social media followers. I regularly share recipes, gardening, and projects that I’m working on around our house. I don’t share my life to simply be entertainment. My hope is that what I share inspires you to bring more interest and enjoyment into your own life.

If you’ve seen a recipe on my website that intrigues you, spend the afternoon baking it for yourself. If you’re inspired by seeing a gardening reel on my Instagram, go outside and plan your next garden.

Technology is most useful when it leads us toward connection, creativity, or action, rather than becoming the destination itself.

Watercolor paintings in progress with brushes, books, and art supplies beside a window.

Find a Reason to Go Offline

It’s interesting that Gen Z is leading the way to analog living. They don’t know what life was like before the internet. They aren’t yearning to return to a past they weren’t a part of.

What Generation Z has identified is that convenience and connection are not the same as fulfillment. Our phones can become distractions that disconnect us from people and life’s meaningful activities.

We often hear the phrase, “older and wiser,” but maybe this is a case where that doesn’t apply. From Baby Boomers to Gen Alpha, I encourage you to follow Gen Z’s lead and skip convenience every now and then.

Now is the time to stop simply saving ideas to your Pinterest boards and make them happen. As Dolly Parton sang, “You better get to livin’.”


Looking for a place to begin?

Sometimes a new interest starts with the right tools. If you are hoping to encourage a hands-on hobby for someone you love, I gathered screen-free activity gifts for men, women, teens, children, and preschoolers in one easy-to-shop guide.

Screen-free activity gifts for men, women, teens, kids, toddlers, and preschoolers

Watercolor paintings in progress with brushes, books, and art supplies beside a window.
Creating a heritage home with antique furniture, collected artwork, traditional furnishings, and pieces chosen to last

Creating a Heritage Home That Lasts for Generations

In 1880, British designer William Morris said, “Have nothing in your houses that you do not know to be useful or believe to be beautiful.” I think this statement could be taken one step further by adding, “or could last a lifetime.”

My favorite new podcast, The Sentimental Twist, has two ladies who talk a lot about things they’ve learned or inherited from their mothers and grandmothers. One of the hosts has a dining table that was her grandmother’s. The other host talks a lot about recipes that her mother used to make.

Creating a heritage home with antique furniture, collected artwork, traditional furnishings, and pieces chosen to last
Our living room has been collected slowly over time. With the exception of one piece, every piece of furniture in the room was purchased secondhand.

These are practices that truly resonate with me, and you’ll find them repeated throughout the Belle Antiquarian website. I believe in creating a heritage home that is centered around things that are useful, beautiful, and could last a lifetime, as well as traditions that bind us to the ones we love.

A Heritage Home Doesn’t Have to Be Inherited

My own story, however, doesn’t begin with inherited heirlooms and traditions. I don’t own my grandmother’s pearls; mine were a gift from my husband. My family’s traditional meals are ones that I have made every year since my husband and I were married, but I never ate them as a child. The antiques in my home were originally purchased by someone else.

A heritage home does not have to be inherited; it can be created by intentionally choosing what is worth keeping, establishing traditions worth continuing, and building a legacy that can be passed on to the generations that follow.

Traditional living room with antique china cabinet, blue and white china, upholstered sofa, patterned rug, and brass lamp
Our treasured collection has slowly come together over the years. A sofa from an estate sale, china cabinet from a thrift store, rug from an auction, and various other things we’ve collected over the years.

Creating a Heritage Home in an Age of Fast Decor

With the rapid onset of “fast fashion” in recent years, we’ve also seen an increase in fast decor. There has been a shift from purchasing items because of quality construction and durability to things that can be cheaply purchased, and then discarded, with each new trend.

Something that I have encouraged on Belle Antiquarian over the years is to decorate your home for the seasons by gathering items from your home and garden that reflect the seasons as they change, rather than purchasing something new for each one.

For example, a chinoiserie bowl can hold glass ornaments at Christmas, floating camelia flowers at a dinner party, or dyed eggs at Easter.

It is beautiful, useful, and can last a lifetime. It could have been a gift from your grandmother, or a Saturday morning antique store find. It’s the tradition of using it and passing it on that changes it from an ordinary object in your home into a treasured piece in a heritage home.

Blue and white chinoiserie bowl displayed on a silver tray beside a ginger jar and brass lamp
This chinoiserie bowl changes with the seasons, holding everything from Christmas ornaments to camellias and Easter eggs.

Choosing Furniture and Décor That Will Last

Some advertisers and influencers would have you believe that your seasonal décor must be on-trend. Unfortunately, some trends only last for a short time. In a heritage home, not only will pieces work in the same season each year, but they’ll be worth passing on to the next generation as well.

It becomes important to evaluate each item beyond its aesthetics. Many beautiful things are not made to last. Materials like solid wood, marble, and many metals have been used for centuries. Looking for these materials when you purchase a piece for your home will give it the best chance for longevity.

Open drawer showing Knapp joint construction on an antique wood table
The distinctive Knapp joints on this antique table are evidence of the craftsmanship that has allowed well-made furniture to remain useful for generations.

We recently painted the living room in our 1939 Colonial Revival home. As my husband and I were putting all the furniture and décor back into the room, we realized that there was only one piece of furniture in the room that we bought new. Everything else was purchased secondhand.

One piece that we’re still lacking is a coffee table. My husband has offered to take me to a variety of furniture stores to buy one, but I’ve noticed a change in the quality of some furniture in recent years. As I’m looking for a table, I’m keeping quality construction, durable materials, and timeless style in mind.

When we finally buy our coffee table, I don’t ever want to buy another one. Timeless pieces are less likely to be replaced due to changing trends, so it’s important to me to find a coffee table that is worth keeping.

Slow Decorating: Build a Home Over Time, Rather Than Buying a Look

Since I haven’t found the right coffee table for our home yet, that space will remain empty. I’m not interested in filling the void with something until I find one that I want to keep forever.

Your home is a work in progress. The story of your furnishings can be one that takes years to evolve. Whether it’s a piece of art to hang over the fireplace, a lamp for an end table, or a rug for a guest room, there is no reason to rush simply to fill an empty space.

Antique wood secretary desk with open writing surface, family photographs, books, blue and white cups, and brass desk lamp
This corner of the living room is sentimental and functional. This secretary that we found on Facebook Marketplace is filled with antique books, photos of my grandparents, and found objects like feathers and shells.

Be the Beginning

When I think about The Sentimental Twist podcaster talking about her grandmother’s table, I feel a longing for family heirlooms in my own home. Inheriting an attic full of furniture is a gift. But to be honest, the reality is that very few people have that experience.

A family’s heirloom dining room table is certainly one to be treasured; however, the true beauty is that it was made to last through years of Thanksgiving meals where hands were held during the blessing.

Mounted pheasant above an antique china cabinet styled with vintage books, copper bowl, and blue and white china
This pheasant is one of our newest additions. After years of searching for just the right one (at just the right price), my husband found this one in an antique store.

If you’re like me, and you don’t have a box full of your mom’s recipes or a piece of furniture from your ancestors, you can be the one to create a heritage home. As you build your home around you, consider what William Morris (and I) said, “Have nothing in your houses that you do not know to be useful or believe to be beautiful [or could last a lifetime].”

Maybe one day your family’s traditions and treasures will all be traced back to you.

Check out these other reader favorites:

Garden Basil Gin Fizz with lemon and fresh basil on a wooden board

A Garden Basil Gin Cocktail for Easy Summer Entertaining

When most people consider what time of year they like to entertain, they probably think of the holidays. We gather at Thanksgiving with elaborate meals and celebrate at Christmas with our favorite decorations on display. However, I think that summer gives us more opportunities to entertain friends.

Entertaining guests in summer can be more casual and approachable. With longer daylight hours and warmer temperatures, it’s easy to extend an invitation that feels special and effortless for everyone.

This summer, a basil gin cocktail made with fresh herbs from the garden has become part of my formula for keeping it simple.

The Easiest Summer Invitation

My favorite way to entertain in the summer is to send a text after lunch that says, “Hi, we’re having cocktails and playing cards after dinner. If you feel like joining us, we’ll be in the garden around 7:00.”

Garden Basil Gin Fizz with lemon and fresh basil on a wooden board
A Garden Basil Gin Fizz made with basil from the garden, fresh lemon, local honey, gin, and club soda.

This type of invitation takes the pressure off if the recipient has other plans. It says, We’re already going to be outside, and there’s a seat for you if you’d like to join us.

On the other hand, this type of summer entertaining eases the burden on the host as well. I don’t need to worry about my house being spotless if guests are joining us outside. And if they’re arriving after dinner, I don’t need to worry about providing a whole meal.

When I talk to people about hosting in their homes, I frequently hear the same hesitations. People worry about the amount of time it takes to get their home cleaned and ready for guests. They worry about being judged on the size of their home or on their décor. Some people are concerned about the cost of entertaining, whether they’re spending money on food or other items in their home.

I’d like to encourage you to simplify your expectations for both hosting and being a guest. The most important thing is to create a moment for connection. Don’t let the pressure of perfection keep you from extending an invitation.

Make It Simple, but Make It Special

Although hosting guests in the summer is easier, I still want it to be meaningful. One way I do this is by creating a signature cocktail of the season. This summer, I created my Garden Basil Gin Fizz.

I like to serve my signature summer cocktails with a big bowl filled with a crunchy snack. Something like popcorn, or my favorite Trader Joe’s bar mix, can easily be served with nothing but a paper napkin.

Garden Basil Gin Fizz cocktails with popcorn, snack mix, playing cards and garden flowers
Summer entertaining can be as simple as a couple of cocktails, something crunchy to snack on, and a deck of cards.

If my guests respond to the text and say that they’ll try to join us, I say, “Great! I’m serving my signature Garden Basil Gin Fizz cocktail and a crunchy snack. If there’s something else you’d like, feel free to bring it with you!”

If you want to take it a step further by creating a special environment for when you host guests in the summer, you can easily do so by burning some citronella candles or plugging in a strand of clear, outdoor Christmas lights.

It doesn’t have to be complicated for you to host a special evening that creates memories with your friends, neighbors, and loved ones.

A Garden Basil Gin Fizz

One reason why I love my Garden Basil Gin Fizz, a basil gin cocktail, is because it combines fresh herbs from my garden with the flavors of local honey and bright, summery citrus. My husband has assigned himself the job of getting the basil leaves for the cocktails. With a quick trip out of the kitchen side door, he’s back with a handful of basil for me to muddle.

Fresh basil leaves being picked from the garden for a basil gin cocktail
Fresh basil from the garden gives the Garden Basil Gin Fizz its bright, herbal flavor.

For this cocktail, I decided to use a honey syrup instead of a traditional simple syrup. After testing several versions, we really love the depth that the honey syrup adds in this cocktail. Honey syrup has quickly become one of our favorite ways to use local honey, and we try to keep a little jar in the refrigerator just for my signature summer cocktails.

You may remember that last summer I shared a recipe for my Summer Garden Sangria. I love to have a signature summer cocktail because it’s easier to keep track of which ingredients I need if I’m inviting guests over. The Garden Basil Gin Fizz combines ingredients that I keep on hand, like basil and honey syrup, with just a few others that I can easily remember to stock over the summer, like lemons, club soda, and gin.

Gin, club soda, lemons, fresh basil and local honey syrup for a basil gin cocktail
Gin, fresh lemon, garden basil, club soda, and honey syrup made with local honey are all you need for a Garden Basil Gin Fizz.

Garden Basil Gin Fizz Recipe

If you’d like to make one for your own summer evening, the recipe is simple.

Garden Basil Gin Fizz with fresh basil and lemon in a gold-rimmed Collins glass
Abby Smolarsky

Garden Basil Gin Fizz

A refreshing summer gin cocktail made with fresh basil, lemon, local honey, and club soda.
Prep Time 5 minutes
Total Time 5 minutes
Servings: 1 cocktail
Course: Drinks
Cuisine: American

Ingredients
  

  • 8-10 fresh basil leaves, plus a sprig for garnish
  • 2 oz. gin
  • ½ oz. freshly squeezed lemon juice
  • ¾ oz. honey syrup, made with local honey
  • 2-3 oz. club soda, according to taste
  • Ice
  • Lemon wheel or slice, for garnish, optional

Equipment

  • cocktail shaker
  • cocktail strainer
  • Collins or highball glass

Method
 

  1. Add the basil leaves and honey syrup to a cocktail shaker. Gently muddle the basil just enough to bruise the leaves and release their oils.
  2. Add the gin, lemon juice, and ice. Shake well until thoroughly chilled.
  3. Strain into an ice-filled Collins or highball glass.
  4. Top with 2 ounces of club soda, or more to taste.
  5. Garnish with a fresh basil sprig and lemon wheel, if desired. Serve immediately.

Notes

To make honey syrup: Combine equal parts local honey and hot water and stir until the honey is completely dissolved. Allow to cool before using. Store covered in the refrigerator for up to two weeks.
No muddler? Use the handle of a wooden spoon to gently press the basil leaves. Avoid crushing or shredding them, which can give the cocktail a grassy flavor.
Bring out the basil aroma: Gently clap the basil garnish between your palms before adding it to the glass. This releases its aromatic oils and makes the basil more noticeable as you sip.
Make it your own: The character of the cocktail will change slightly depending on the gin and honey you use. A local wildflower honey is especially nice here because its floral character complements the gin and fresh basil.
Garden Basil Gin Fizz being strained from a cocktail shaker into an ice-filled glass
After shaking the gin, lemon, honey syrup, and fresh basil with ice, strain the cocktail over fresh ice.

An Invitation is Enough

Some of my favorite summer evenings have been spent in the garden with a deck of cards, a cool drink, and the laughter of friends and neighbors.

Playing cards during a casual summer evening with cocktails and snacks in the garden
Some of the best summer evenings need little more than a deck of cards, a cool drink, and good company.

I love inviting friends and family into my home during the holidays, but when summer comes around, there are so many possibilities to entertain in easy ways.

It doesn’t have to be a signature cocktail, either. Maybe watermelon slices on a Sunday afternoon or popsicles on the porch are more your speed. The most important thing is creating time to connect with each other.

If the fear of imperfection has kept you from hosting friends, just remember to keep it simple. The hardest part of hosting this summer will be hitting the send button on a text.


A Few Things I Keep on Hand for Easy Summer Entertaining

I’ve gathered a few of my favorite things for easy summer entertaining in one place. These are the kinds of simple things I like to keep on hand so that when an impromptu invitation turns into cocktails in the garden, getting ready doesn’t require much preparation.

Affiliate disclosure: This collection contains affiliate links. As an Amazon Associate I earn from qualifying purchases at no additional cost to you.

Shop My Outdoor Summer Entertaining Collection


Check out these other reader favorites:

Original sleeping porch in a 1939 Colonial Revival home with vintage furnishings and screened windows

The Southern Sleeping Porch: What This Historic Room Still Teaches Us About Home

Beneath the canopy of a Japanese cherry tree, the sleeping porch in our 1939 Colonial Revival home is a magnet for all who visit. An overstuffed down sofa and a collection of houseplants are the first things to draw someone in. Once inside, a cross breeze from the open louvered windows is what keeps them from leaving.

When I tell guests that we spend most of our free time sitting out on the sleeping porch, they look confused. “Do you mean the sunroom?” “No,” I respond, “this is an original sleeping porch.”

Although sleeping porches have largely disappeared from modern homes, they reveal a steadfast truth: the places we set aside for quiet, reflection, and everyday routines shape not only how we use our homes but how we experience our lives.

The Sleeping Porch in Southern History

Around the turn of the twentieth century, sleeping porches began to rise in popularity, particularly in the American South. Unlike front porches, which were often spaces for hospitality and socializing, sleeping porches were private spaces for retreating, seeking solace from hot summer temperatures, and sleeping.

Air conditioning wasn’t commonplace in homes until the late 1960s, so sleeping porches were designed to maximize airflow. Normally, at least two sides of the porch would be fitted with screened windows, usually of a louvered style.

Porches were built on second levels or higher on the corners of houses. At this location in a house, the air would be cooler, and a cross breeze could be created from opening windows on multiple walls.

Exterior of a 1939 Colonial Revival home with an original second-story sleeping porch
Located on the second floor, sleeping porches were typically positioned to capture breezes from multiple directions before residential air conditioning became common.

As well as creating a space for comfortable sleeping on hot days, sleeping porches were thought to help fight diseases like tuberculosis. At the time, air flow and circulation were believed to help patients recuperating from their sickness.

Sleeping porches in the South were considered utilitarian spaces. Furnishings and decoration would have been kept to a minimum, and the porch would have commonly been outfitted with multiple beds.

Sleeping porches are sometimes confused with sunrooms. A sunroom is more open and integrated into the home. Windows in a sunroom are often fixed or are more traditional looking than the slanted cantilever windows found on a sleeping porch. A sleeping porch is more secluded and private than a sunroom. A sunroom would traditionally have had seating and entertaining spaces, and a sleeping porch would have had beds and nightstands.

Open cantilever windows on a historic Southern sleeping porch designed for natural ventilation
Louvered windows open outward to create cross ventilation, helping sleeping porches stay cooler during warm Southern summers.

Today, due to modern air conditioning and medical advances, sleeping porches are no longer commonly found on floor plans. Oftentimes, older homes that originally had sleeping porches are renovated to use these spaces in other ways.

More Than a Historic Home Feature

The sleeping porch was the space in our house that I was most excited about. Immediately after signing the papers, we drove over and ripped the carpet off the porch floor.

For weeks beforehand, I could imagine sitting there with the windows open enjoying fresh air and a breeze.

Rather than thinking of the porch as an obsolete space that needed to be renovated, I considered the idea that it represented something valuable that could translate into modern living.

If sleeping porches were historically places to seek a reprieve from the heat and retreat at difficult times of the day, why not find a way to use the space to achieve similar results today?

In our home we have turned the sleeping porch into a space that shapes our daily habits.

How Rooms Shape Daily Habits

In modern floorplans, designs are often developed to consider traffic patterns and how to increase flow between rooms.

Looking at a floor plan on paper, it’s easy to see how spaces in today’s homes continuously flow into each other. The kitchen is often connected to the dining room, which is connected to the living room. In open floor plan houses, there is often little to no physical separation of rooms.

Because the rooms in modern houses are so connected, it can be difficult to find a space to truly disconnect and relax. With constant distractions and stimulation, many people have forgone pastimes and hobbies and replaced them with screens.

In our home, our daily routine is that we go to the sleeping porch when we get up in the mornings. After stopping at the coffee pot to fill up a cup, we immediately head to the porch to sit down. I can’t think of a morning when it hasn’t been my ritual to sit with the dogs and watch as people walk by as I sip my coffee.

After dinner, when the sunlight is just right, I return to the porch to pick up a book or work on a hobby. These habits of retreating to our porch have shaped our daily routines.

Watercolor painting supplies arranged on a desk inside a historic sleeping porch
A quiet corner for watercolor painting reminds us that meaningful rooms encourage creativity as much as comfort.

It’s not uncommon to hear of someone turning a spare bedroom into an extra closet or enclosing a screened-in porch to enlarge a kitchen. But consider if we looked at our overall well-being and imagined how we might use a space like an old sleeping porch to enrich our everyday lives.

Reimagining the Sleeping Porch Today

While our sleeping porch does have a small television, it rarely gets used. Instead, we have created a space that intentionally fosters an environment for analog activities.

Reading corner on a sleeping porch with books, coffee, binoculars, and houseplants
Books, coffee, birdwatching, and quiet conversation have replaced the porch’s original purpose while preserving its role as a place of retreat.

Instead of scrolling through Pinterest for hours, you’ll find a stack of Martha Stewart books, recent issues of Southern Living and Garden & Gun, and even a pair of binoculars to watch the deer and birds outside of the windows.

I have brought in some of our favorite pieces of art and even created a space to do watercolor painting.

A 1920s china cabinet is filled with thrifted finds and miscellaneous treasures from our travels, which are good for sharing stories and remembering old times. There’s even a basket of vintage quilts if someone wants to open the windows to take a nap or enjoy chilly weather.

Vintage china cabinet displaying collected treasures inside a historic sleeping porch
Collected objects, thrifted finds, and vintage quilts give the porch a sense of history while encouraging everyday use rather than formal display.

The sleeping porch in our 1939 home is no longer used as a regular sleeping room to get relief from the heat. Instead, we have created a retreat from the busyness of daily life and the constant noise from screens.

Finding a Retreat in Any Home

It was certainly inspiring to find that our house had a room like a sleeping porch that we could use to create a retreat for our family. However, you don’t need to have an old porch or live in a historic home to have a space like this of your own.

Unused spaces like a formal living room or a sitting area adjacent to a primary bedroom can often be transformed into your family’s version of a sleeping porch. By making small changes like removing a television or adding a stack of books, you can slowly begin to create an environment that encourages your family to detach from their phones and laptops.

A small table for puzzles under a window or a box full of old photos can magically turn a previously unused room into a retreat and space to reflect or connect with your loved ones.

Sleeping porches aren’t the only things that have disappeared from homes over the years.

Today, families are living in a constant state of motion in their own homes. We are bombarded with noise from phones, laptops, and televisions. We have lost the daily rituals of connecting to each other over conversation or sitting in silence for reflection.

When our grown kids or guests come to stay, they are drawn to our sleeping porch. It’s a space where we instinctively slow down and talk to each other. In this small space, tucked to the side of the house, human connection and well-being are the first priorities, not notifications and emails.

Consider how you can set aside a space in your own home to create rituals for quiet reflection and activities that enrich the experiences of everyday life.


Create Your Own Retreat

Whether your retreat is a historic sleeping porch, a quiet corner of the living room, or a favorite chair beside a window, thoughtfully chosen pieces can help create a space that encourages reading, creativity, conversation, and quiet reflection. I’ve gathered a collection of timeless furnishings, books, and accessories inspired by our sleeping porch to help you create a retreat of your own.


Check out these other reader favorites:

Original sleeping porch in a 1939 Colonial Revival home with vintage furnishings and screened windows
The original sleeping porch in our 1939 Colonial Revival home has become our family’s favorite place to read, create, and slow down.
Abby holding a slice of homemade Southern tomato pie on a blue willow plate in her kitchen.

Southern Tomato Pie: Why This Summer Classic Still Belongs on the Southern Table

Gardening is perceived as a relaxing activity. Seed packets tell you when to plant and when to harvest. It seems so simple.

Talk to a gardener, though, and they’ll tell you otherwise. Leaf-footed bugs or lady beetles posing as lady bugs can ruin your whole day. Then there’s that moment of panic when twenty green tomatoes ripen all on the same day.

If I had it my way, one or two tomatoes would ripen each day, just enough for my daily tomato and pimento cheese sandwich for lunch. As nature would have it, it’s feast or famine.

In the South, when someone says, “What am I going to do with all of these tomatoes?” they’re likely to be asked if they’ve made a tomato pie yet.

Homegrown summer tomatoes ripening on a kitchen windowsill before being used to make Southern tomato pie.
Peak tomato season often means more tomatoes than can be eaten fresh, making Southern tomato pie a delicious solution.

A Dish Born from Summer Abundance

I planted seven varieties of indeterminate tomatoes in my garden this year. With names like Big Beef, Better Boy, and Park’s Whopper, my expectations were set high for some nice slicing tomatoes.

When planting my young seedlings at the beginning of April, my mouth salivated thinking of thick slices of tomatoes, salted and peppered, between two slices of Sunbeam bread skimmed with some Duke’s mayo. A Southern summer sandwich delight.

Fresh chives being harvested from a backyard garden for Southern tomato pie with garden herbs.
Fresh herbs picked just before cooking bring brightness to this classic Southern tomato pie recipe.

The reality is that seven tomato plants were far more than I needed. (I think this is where the term “your eyes are bigger than your stomach” comes from.) My kitchen windowsill is now lined with various shades and sizes of red tomatoes waiting for their final destination.

This is not a phenomenon unique to me. With a long growing season in the South, farmers markets across the state draw a crowd of shoppers each Saturday morning looking for homegrown tomatoes… and there will be an abundance of them.

Obvious solutions to the problem of too many tomatoes include homemade salsa, fresh pasta sauce, and even canning tomatoes. But there is nothing more Southern than a tomato pie on the dinner table or at a church potluck.

Carrying freshly picked homegrown tomatoes into the kitchen in preparation for making Southern tomato pie.
Every Southern tomato pie begins long before the oven is preheated, often with a basket of tomatoes gathered from the garden.

The Tradition Behind Southern Tomato Pie

The South is a region that reveres tradition and heritage. When it comes to food, those traditions have long crossed social and economic lines. Whether served in a farmhouse or a fine home, Southern tables have been set with many of the same dishes for generations, including tomato pie.

Southerners pass along recipes as though they are heirloom quilts or sterling silver teapots. A perfected recipe for cheese straws or benne wafers will suddenly get a name added to them, Betty Ann’s Cheese Straws or Janet’s Benne Wafers.

Brides are often given recipe cards at bridal showers for traditional meals they may want to serve in the future. A recipe for Southern tomato pie may be tucked into the ribbon of a wrapped pie plate. A new pie plate and a recipe to fill it with is a treasured gift.

Once you’ve made a tomato pie, it’s easy to see why this dish has endured on Southern tables for generations.

Many of the ingredients in the recipe are within reach of the kitchen. Simply by opening the kitchen door, I have all the herbs and tomatoes I need. A handful of tomatoes, a few basil leaves, and a snip of chives were all collected from a single garden bed in my backyard.  

Other ingredients like pie crust, mayonnaise, and cheese are commonly found in the refrigerator or freezer. By using pantry staples and garden produce, it’s easy to pull together a delicious dinner or something to bring to a gathering.

Hospitality in the South is an opportunity to share heirloom recipes. Your next gathering is a chance to show why tomato pie has endured on Southern tables for generations.

Adapting a Classic for Today’s Table

While tomato pie is standard on many Southern summer tables, it’s not one that should be thrown together all willy-nilly.

As a child, I wasn’t a fan of tomato pie. I tried one that wasn’t very good, and no one could get me to try it again for years. When I was young, the problem I had with that particular tomato pie was the amount of mayonnaise. And considering that mayonnaise is a key ingredient, that was tricky.

Another issue that many tomato pies have is a watery, soggy filling. No one wants to eat tomato soup in a pie shell.

Fresh tomato slices draining on paper towels before assembling Southern tomato pie.
Removing excess moisture helps create a pie with distinct tomato layers and a crisp crust.

I tested and refined my recipe using classic ingredients, while updating them for modern palates. Combining fresh herbs and a perfect ratio of mayonnaise and cheese, I’ve created a tomato pie recipe that is lighter in texture, holds its structure, and maintains the identity of a traditional Southern tomato pie.

Southern Tomato Pie with Garden Herbs

After testing and refining this recipe throughout tomato season, this is the version I’ll be making whenever my kitchen windowsill begins to fill with ripe summer tomatoes.

Southern tomato pie with one slice removed, showing layers of ripe tomatoes, cheese, and fresh herbs.
Abby Smolarsky's avatarAbby Smolarsky

Southern Tomato Pie with Garden Herbs

A classic Southern tomato pie made with ripe summer tomatoes, sharp cheddar, Parmesan, fresh garden herbs, and a creamy cheese filling. This refined version celebrates the flavors of peak tomato season while producing a crisp crust and slices that hold together beautifully.
Prep Time 35 minutes
Cook Time 1 hour 8 minutes
Additional Time 2 hours
Total Time 3 hours 43 minutes
Servings: 8 servings
Course: Main Course
Cuisine: Southern

Ingredients
  

Crust
  • 1 refrigerated 9-inch deep-dish pie crust
  • 3-4 Tbsp finely grated parmesan cheese (for the crust barrier)
Filling
  • About 2 ½ pounds ripe slicing tomatoes, (approximately 4-5 medium tomatoes), cut into ¼-inch-thich slices
  • 1 tsp kosher salt, divided
  • ½ cup mayonnaise, we use Duke's
  • 2 Tbsp full-fat sour cream
  • ¾ cup freshly shredded sharp cheddar cheese
  • ¼ cup finely grated Parmesan cheese
  • 1 tsp Dijon mustard
  • ¼ cup sweet onion, very thinly sliced
  • 1 Tbsp chopped fresh basil
  • 1 Tbsp chopped fresh chives
  • ½ tsp fresh thyme leaves
  • ¼ to ½ tsp ground black pepper
  • pinch Cayenne pepper

Equipment

  • 9-inch deep-dish glass pie plate
  • Baking sheet
  • Parchment paper
  • Pie weights or dried beans
  • Cooling rack
  • Paper towels
  • Mixing bowl
  • Small offset spatula or the back of a spoon

Method
 

Prepare the Tomatoes
  1. Arrange the tomato slices in a single layer on paper towels. Spring with ¾ teaspoon of the kosher salt.
  2. Let stand for 30 minutes.
  3. Turn the tomato slices, blot with fresh paper towels, and let stand an additional 15 minutes.
  4. Pat the tomatoes dry once more immediately before assembling the pie.
Blind Bake the Crust
  1. Preheat the oven to 400 °F
  2. Fit the pie crust into a 9-inch deep-dish plate and crimp the edges as desired.
  3. Place the pie plate on a rimmed backing sheet. Line the crust with parchment paper and fill completely with pie weights or dried beans.
  4. Bake for 18 minutes.
  5. Carefully remove the parchment paper and weights.
  6. Return the crust to the oven and bake for 5 more minutes, or until the bottom looks dry and just begins to turn light golden.
  7. Immediately sprinkle the 3-4 tablespoons of Parmesan cheese evenly over the hot crust and allow it to melt.
  8. Reduce the oven temperature to 350 °F
Prepare the Filling
  1. While the tomatoes drain and the crust bakes, combine the mayonnaise, sour cream, cheddar cheese, ¼ cup Parmesan cheese, Dijon mustard, onion, basil, chives, thyme, remaining ¼ teaspoon kosher salt, black pepper, and Cayenne in a mixing bowl.
  2. Stir until well combined.
  3. Leave the filling at room temperature while assembling the pie.
Assemble the Pie
  1. Arrange a layer of tomato slices over the prepared crust.
  2. Using a small offset spatula or the back of a spoon, spread a thin, even layer of the cheese mixture over the tomatoes.
  3. Repeat the layers until all of the tomatoes have been used.
  4. Finish with the remaining cheese mixture, spreading it evenly over the top of the pie.
Bake
  1. Keeping the pie on a baking sheet, bake at 350 °F for 45 minutes, or until the filling is bubbling around the edges and the top is lightly golden.
Cool
  1. Transfer the pie to a cooling rack.
  2. Allow the pie to cool for at least 1 hour before slicing. For the cleanest slices, allow 75-90 minutes of cooling time. The pie will still be pleasantly warm while the filling finishes setting.

Notes

Tomato Tips
Use ripe but still firm slicing tomatoes. Overripe tomatoes contain more moisture and may produce a softer filling.
Properly salting, draining, and blotting the tomatoes is essential for preventing excess moisture.
Ingredient Tips
Use full-fat sour cream. Reduced-fat and fat-free sour cream contain more water and may affect the texture of the filling.
Freshly grate the cheddar cheese for the best flavor and melting.
Fresh herbs are recommended for the brightest flavor.
Serving
Southern Tomato Pie is best served warm after it has had sufficient time to cool and set. The filling should be creamy and cohesive, with tomato slices that remain distinct and a crisp, flaky crust.
Serve with a simple green salad, cucumber salad, fresh fruit, or seasonal Southern vegetables for a light summer meal.
Storage
Cover and refrigerate leftovers for up to 3 days.
Reheating
For the best texture, reheat individual slices in a 325°F oven or toaster oven until warmed through. Microwaving is not recommended because it softens the crust.
Nutrition
Nutrition information is automatically calculated and should be considered an estimate.
Southern tomato pie with one slice removed, showing layers of ripe tomatoes, cheese, and fresh herbs.
A crisp crust, distinct tomato layers, and fresh garden herbs make this refined version of a Southern classic.

Serving Southern Tomato Pie at the Summer Table

There’s a sense of pride that comes with setting the table with a meal made from ingredients you grew. Whether you’re making tomato pie for a casual brunch after church or serving a cherished tomato pie recipe to your garden club, this pie will disappear in minutes.

If you’re coming to my house for lunch in the summertime, there’s a good chance that you’ll be served tomato pie. A slice of tomato pie on a blue willow plate, paired with fresh cucumbers and onions and slices of peaches, is one of my favorite summertime meals.

More Than a Recipe

Tomato Pie isn’t simply a dish Southerners eat in the summer. Like deviled eggs at Easter or chicken mull in the fall, tomato pie is a tradition that endures.

As I was writing this article, I invited a friend to be my official taste-tester. I knew I had perfected the recipe when she said, “Oh my. This is it – this is summer on a plate.”

I sent her home that afternoon with a grocery sack of heirloom tomatoes, a half-eaten tomato pie, and the recipe written down on a piece of notebook paper.

Like Betty Ann’s Cheese Straws and Janet’s Benne Wafers, my friend has named this Abby’s Tomato Pie.


This article contains affiliate links. I may earn a small commission at no additional cost to you. The simple tools and timeless serving pieces used throughout this feature are part of my everyday summer kitchen. I’ve linked many of them in my LTK collection for readers who’d like to explore them further.

Abby holding a slice of homemade Southern tomato pie on a blue willow plate in her kitchen.
A recipe worth sharing begins with tomatoes from the garden and ends around the table.

Check out these other reader favorites:

Southern dining room decorated in Americana style with traditional furnishings, layered textiles, vintage flags, and collected antiques

Americana Style in the Southern Home: Decorating with Tradition, Comfort, and Character

As America approaches its 250th anniversary, patriotic decorating is appearing everywhere from retail displays to magazine covers. Yet some of the most enduring expressions of Americana are not seasonal at all. They are the everyday objects that tell the story of a place, a family, and a nation.

The latest edition of my favorite magazine is telling me that Americana style is back. There is a resurgence of patriotic themes and symbols in retail spaces this year.

But true Americana style is not found on an aisle of Hobby Lobby. It’s an enduring design perspective that doesn’t need to be changed out with the seasons. At its core, Americana style reflects a distinctly American approach to home, one rooted in comfort, tradition, individuality, and a connection to place.

Traditional Southern living room with Americana-inspired summer decorating, blue and white porcelain, patriotic bunting, and layered textiles
Americana style often blends traditional furnishings, family collections, and seasonal patriotic touches into spaces designed for everyday living.

More Than Flags and Fireworks

Our little town is having a decorating contest to celebrate America’s semiquincentennial anniversary this summer. Participants are encouraged to decorate their homes or businesses with red, white, and blue for the 4th of July. Throughout town, buntings and flags are being used in various ways to celebrate the season.

As I sat outside one evening after decorating our own home for the contest, I heard a lady walking by remark to her friend that she loved anything Americana. People often associate patriotic symbols with Americana, but those are only one expression of the design style.

Americana style isn’t limited to the era or architectural style that a home was built in. Homes ranging from historical to newly built traditional homes can be decorated through the lens of Americana style characteristics.

The Characteristics of Americana Style

At the heart of Americana style is a reflection of the people who live there. It’s a design perspective that is built around characteristics shaped by the lifestyle of American people.

Americana style adapts traditional lines in furnishings to more softened edges with comfort in mind. Formal floor plans in Americana homes become more approachable because the function of these spaces has been adapted for everyday modern living rather than special occasions.

It’s common in Americana style for both soft and hard furnishings to be made from durable materials. Hardwood construction, combined with elements such as leather, brass, or canvas, are characteristics of Americana style furniture. Linen, wool, and various types of cotton weaves in fabrics reflect the materials sourced from American lands.

Classic patterns and textiles are layered in a manner that welcomes everyday living. Instead of holding beautiful finishes at arms-length, Americana style homes are hospitable and inviting.

As each space reflects the family within, Americana style homes characteristically feature personal collections that are often shaped by the specific place the home is found in.

Traditional bedroom featuring blue and white textiles, antique furnishings, layered rugs, and Southern Americana decorating
Americana style is often expressed through traditional furnishings, heirloom pieces, and layered textiles collected over time.

A Style Shaped by Place

Americana style encompasses a group of styles that are specific to the regions they represent. America has never had one singular decorating style. Each region reflects local influences, climates, and cultures of the people living there.

Southwestern Americana style is largely influenced by the climate of the region with color palettes that are inspired by desert sunsets. Soft furnishings and art are heavily influenced by Native American patterns, the landscape, and Colonial Spanish equestrian themes.

Coastal Americana designs are heavily influenced by maritime life. Artwork, color schemes, and soft furnishings mirror the colors of water and the ecosystems dependent upon it.

Furnishings for Mountain Americana homes are usually in natural wood tones, and it’s common for them to have roughly hewn edges and visible construction.

Here in the South, homes are traditionally designed with hospitality in mind. Homes feature both formal and casual gathering spaces, and additional entertaining spaces are created by using the garden or front porch as an extension of the home.

In Southern Americana homes, rooms are often designed around heirloom pieces of furniture because these homes place a significant emphasis on heritage and tradition.

Regardless of which regional style of Americana design is found in a home, the strongest designs reflect the traditions of the people who live in them.

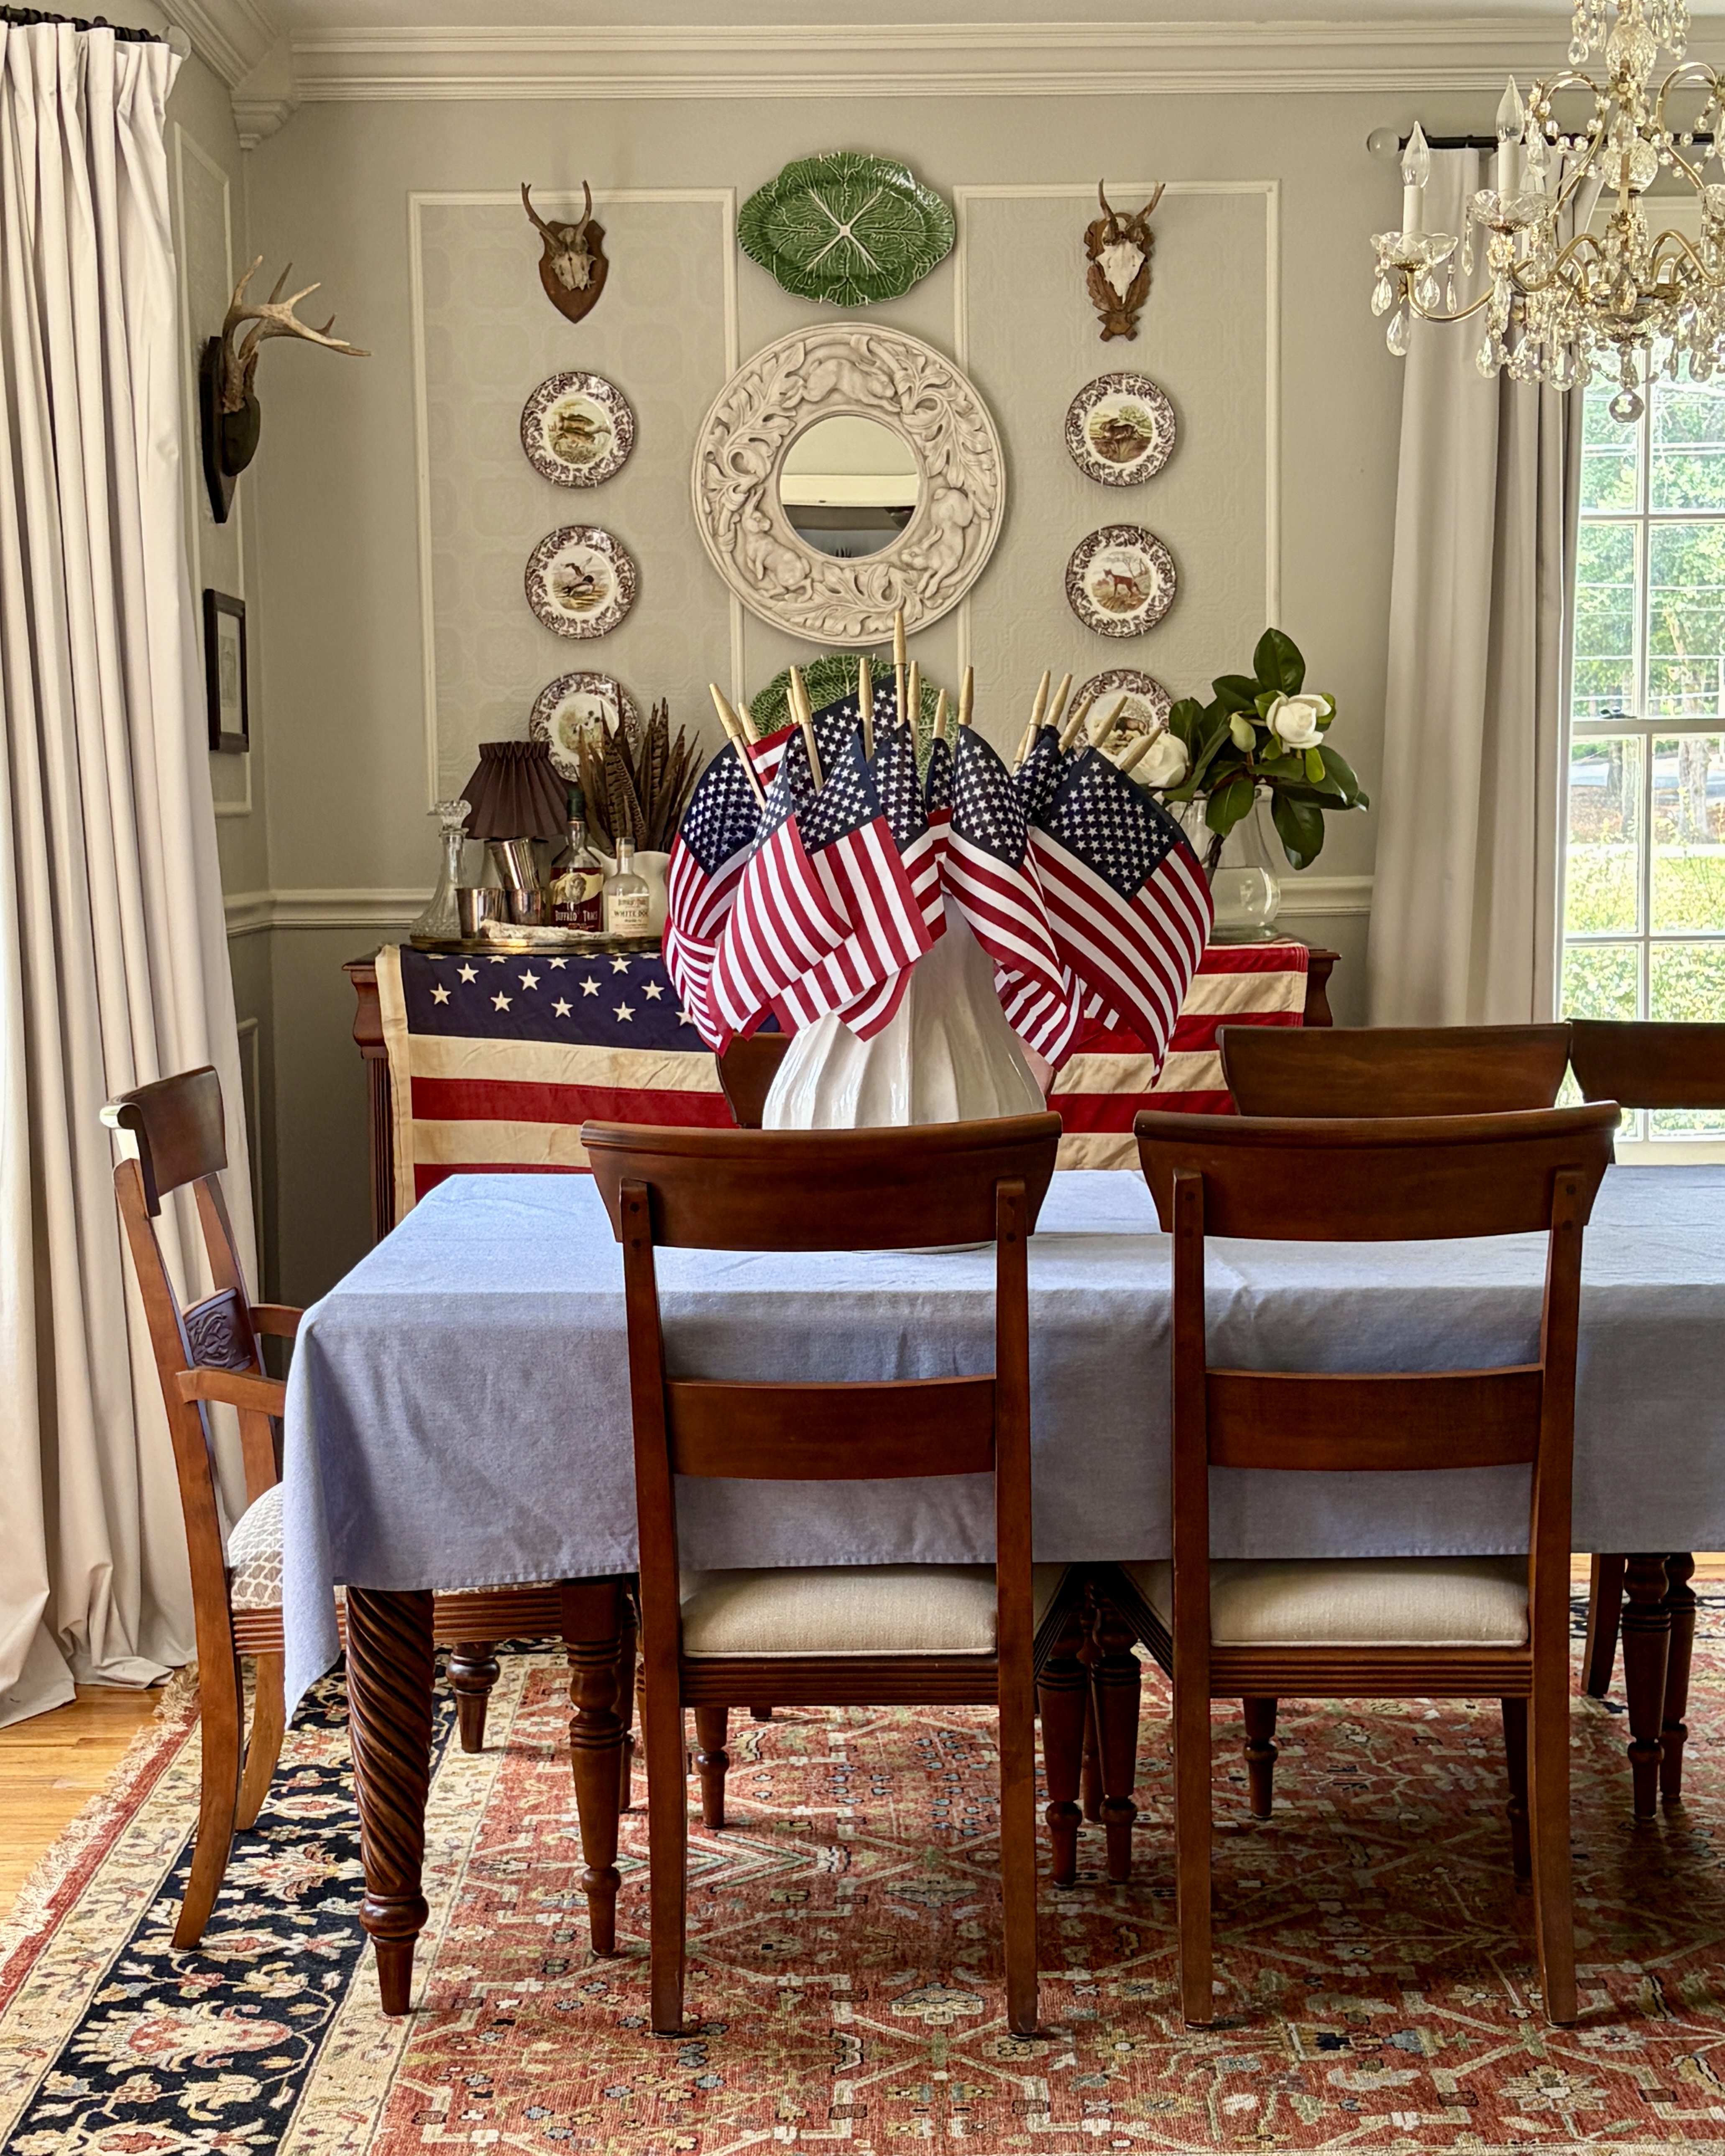
Southern Americana decorating featuring a vintage American flag, sporting art, game plates, and collected decorative objects
Regional expressions of Americana often draw inspiration from local traditions, landscapes, and cultural influences.

The Role of Tradition in the American Home

When I travel, I like to tour historic homes that have been opened to the public. In Savannah, the Green-Meldrim House is a wonderful example of historic Southern Americana Style. In Santa Fe, the Palace of the Governors features classic Southwest Americana style.

I enjoy integrating vintage and antique pieces into my home, but Americana style doesn’t require us to cling to outdated traditions or live in the past. The modern role of tradition in American homes is to reflect on the history of the region, while moving forward with traditions of people currently living there.

Rather than focusing on strictly using pieces in our homes that fall under a specific design label, use the characteristics of Americana as a jumping point to create character in your home over time.

The most successful Americana designs combine treasures discovered over time and new pieces that will stand the test of time.

Implementing an Americana style in your home may begin with a collection of books on your coffee table, a china cabinet passed down from a grandmother, or a favorite recipe you share with your friends every year on the 4th of July.

Patriotic mantel display with family artwork, American flags, blue and white porcelain, and collected heirloom accents
Collections gathered over time often become some of the most meaningful expressions of Americana style.

Seasonal Americana Décor for Summer

Shortly before Memorial Day, I begin to decorate our home for summer. Since I’ll leave these “decorations” out until mid-July, I tend to steer clear of decorative pieces that feel trendy.

I don’t want to feel like I’m putting a patriotic costume on my house for the summer, so I usually begin by choosing items from each room that will have a summer aesthetic when they’re gathered together.

Baskets of seashells that my children have collected over the years are placed next to a stack of vintage books about American government and history. A small white ironstone pitcher holds blue hydrangeas from my garden with a little flag tucked inside as a nod to the season.

Southern dining room decorated in Americana style with traditional furnishings, layered textiles, vintage flags, and collected antiques
A Southern Americana interior combines traditional furnishings, collected objects, and seasonal patriotic accents without losing its timeless character.

Outside we have hung red, white, and blue buntings from the railings on the top floor. Flowerpots have been filled with red, white, and blue annual flowers.

The way we have decorated the outside of our house could have been from 1980 or 2026; it is timeless and restrained. Americana style has endured through the ages.

Why Americana Style Endures

As America prepares to mark 250 years, the enduring appeal of Americana style may lie in its ability to honor the past while continuing to adapt to the present.

Today, Americana style reflects the people living inside each home. Because America is a melting pot of people, Americana designs allow room for individuality and collections from personal life experiences.

Implementing this design style into a modern home is an act of layering unique perspectives and experiences in home décor, while combining it with a sense of place that echoes the culture and the landscape of the region.


Other Belle Antiquarian reader favorites:


This section contains affiliate links. I may earn a small commission at no additional cost to you.

To read more about Americana style, check out these recommended books:

Wide view of a Southern garden in late spring with growing vegetables and flowers in Georgia

A Southern Garden in Late Spring

If a Southerner is going to give you their opinion on something, it’s going to be the weather. If it’s too cold, we’ll cry, “I wasn’t made for this!” But, on certain days when the weather feels just right, we’ll sigh and say, “If only the weather was like this all the time.”

Many of those “perfect days” of Southern weather happen in late spring.

While the weather at this time of year is perfect, my garden leaves me a little impatient. It is a period of waiting for the next big show.

The seeds in both the vegetable and flower gardens have all been sown. Plants are growing their vines, stems, and leaves until the early weeks of summer give us pops of color from zinnias and tomatoes alike.

This article contains affiliate links. If you purchase through these links, I may earn a small commission at no additional cost to you. Thank you for supporting Belle Antiquarian.

Birdbath surrounded by flowers and pollinator plants in a Southern garden during late spring
A garden is never just about the plants. Water, pollinators, and wildlife all play a role in late spring.

The Vegetable Garden Requires Patience

You may have heard the expression, “a watched pot never boils.” I think a better saying would be, “a watched tomato never ripens.”  During late spring, the tomatoes in my vegetable garden are lingering in their own space-time continuum. The vines are loaded with handfuls of green tomatoes that can’t be rushed to reach their full ruby-colored potential.

Clusters of green tomatoes growing on the vine in a Southern vegetable garden during late spring
Tomatoes spend much of late spring suspended between promise and harvest, testing the patience of gardeners eager for the first tomato sandwich of summer.

As I look from the kitchen window, I can see yellow flowers on my zucchini and cucumber plants. Big flowers on the zucchini invite a whole host of pollinators to join the party at once, while the small flowers on cucumbers only have room for one bee at a time.

The pollinators are working and having their feast in my garden, but my vegetable feast won’t begin for a few more weeks.

While I wait, I’m closely watching the colors of the leaves on my young vegetable plants. I’ll take clues from them to see if the soil needs fertilizing or amending. On many mornings I trudge to the garden carrying my largest watering can. It’s full of diluted fish fertilizer or calcium, food for my young tomatoes.

I’m bribing them with, “Tomatoes, if I do this for you, what will you do for me?” And I hope the reply will be more tomatoes than I can eat or give away.

Cucurbit bee gathering pollen from a cucumber flower in a Southern vegetable garden
While gardeners wait for vegetables to ripen, pollinators are already hard at work among the blooms.

In addition to feeding the growing plants, I also watch for signs of unwanted bugs, and I take preventative measures to keep them at bay for the rest of the season. When the sun goes down, an eerie purple glow from my black light flashlight scans the plants up and down for the dreaded tomato hornworm.

Pampering these vegetable plants now means that in a few weeks my patience will pay off as I take a bite of my first tomato sandwich of the summer.

The vegetable garden requires surprisingly little equipment, but there are a handful of tools, fertilizers, and amendments I reach for throughout the growing season.

Recommended vegetable garden supplies including tools, fertilizers, and garden essentials
Click the image to browse the vegetable garden tools, fertilizers, and supplies I use throughout the growing season.

A Season Between Blooms

While I wait for my vegetables to grow, the flowers have a time of transition, too. Early spring gives the South flowers with soft and delicate blooms. In summer, flower varieties have transitioned to hardier and sturdier stems that can withstand the heat that settles in at the hottest part of the day.

Unopened zinnia flower bud developing in a Southern cut flower garden during late spring
The first zinnia blooms of summer are still forming in late spring, building anticipation for the season’s brightest display of color.

The peonies, which bloom in early spring in the South, have come and gone weeks ago. The tiny pink blooms on my Peggy Martin roses and the fuzzy, purple alliums have finished their shows as well.

In late spring, my flower gardens will not only be a source of blooms to bring indoors, but they will also attract important pollinators.

Spires of salvia and lavender dance and sway as the bees crawl from flower to flower for their next treat. Hummingbirds flit in and out of gladiolus flowers.

During this time, the zinnias and dahlias are still growing their stems. Flower buds are beginning to form, and anticipation builds for when they decide it is time for a chorus of color.

As the flower garden begins its summer display, these are a few of the tools and containers I use for harvesting, arranging, and enjoying blooms indoors.

Recommended flower garden supplies for growing, cutting, and arranging blooms
Click the image to browse the flower garden tools, harvesting supplies, and floral essentials featured in this article.

Learning to Wait

After the long and dark months of winter, spring brings new growth and excitement. But it also requires a great deal of waiting and patience.

Gardener harvesting gladiolus stems in a Southern flower garden during late spring
Gardening requires both patience and participation, rewarding careful attention with flowers to bring indoors and moments spent outdoors.

It’s a good thing the weather is so ideal in the South during late spring, because I spend a lot of time checking on the gardens.

I drink my morning coffee hovering over my pepper plants like a helicopter parent. I’ll take another stroll through the rows in the evening after dinner. Have the seeds germinated since I last stared at the dirt six hours ago?

Gardening is both about myself and something bigger than myself. I am nurturing these plants with water, food, and protection. But I’m also connecting to the earth as a whole.

These days of perfect late spring weather in the South are fleeting with every rotation of the Earth. And while we often wish these perfect days could last forever, would we really want them to?

Soon the mild temperatures of late spring will give way to the humid heat that is necessary for a watermelon to ripen and a dinner-plate dahlia to unfurl in summertime.

Afterwards, shorter days will trigger the reds, oranges, and yellows of autumn leaves.

Each season requires patience for what is still to come and an appreciation for what is here now, because neither lasts forever.

The sun, the dirt, and the pollinators are all reminders that it’s never just about the little seeds we sow in spring.


Other Reader Favorites: