
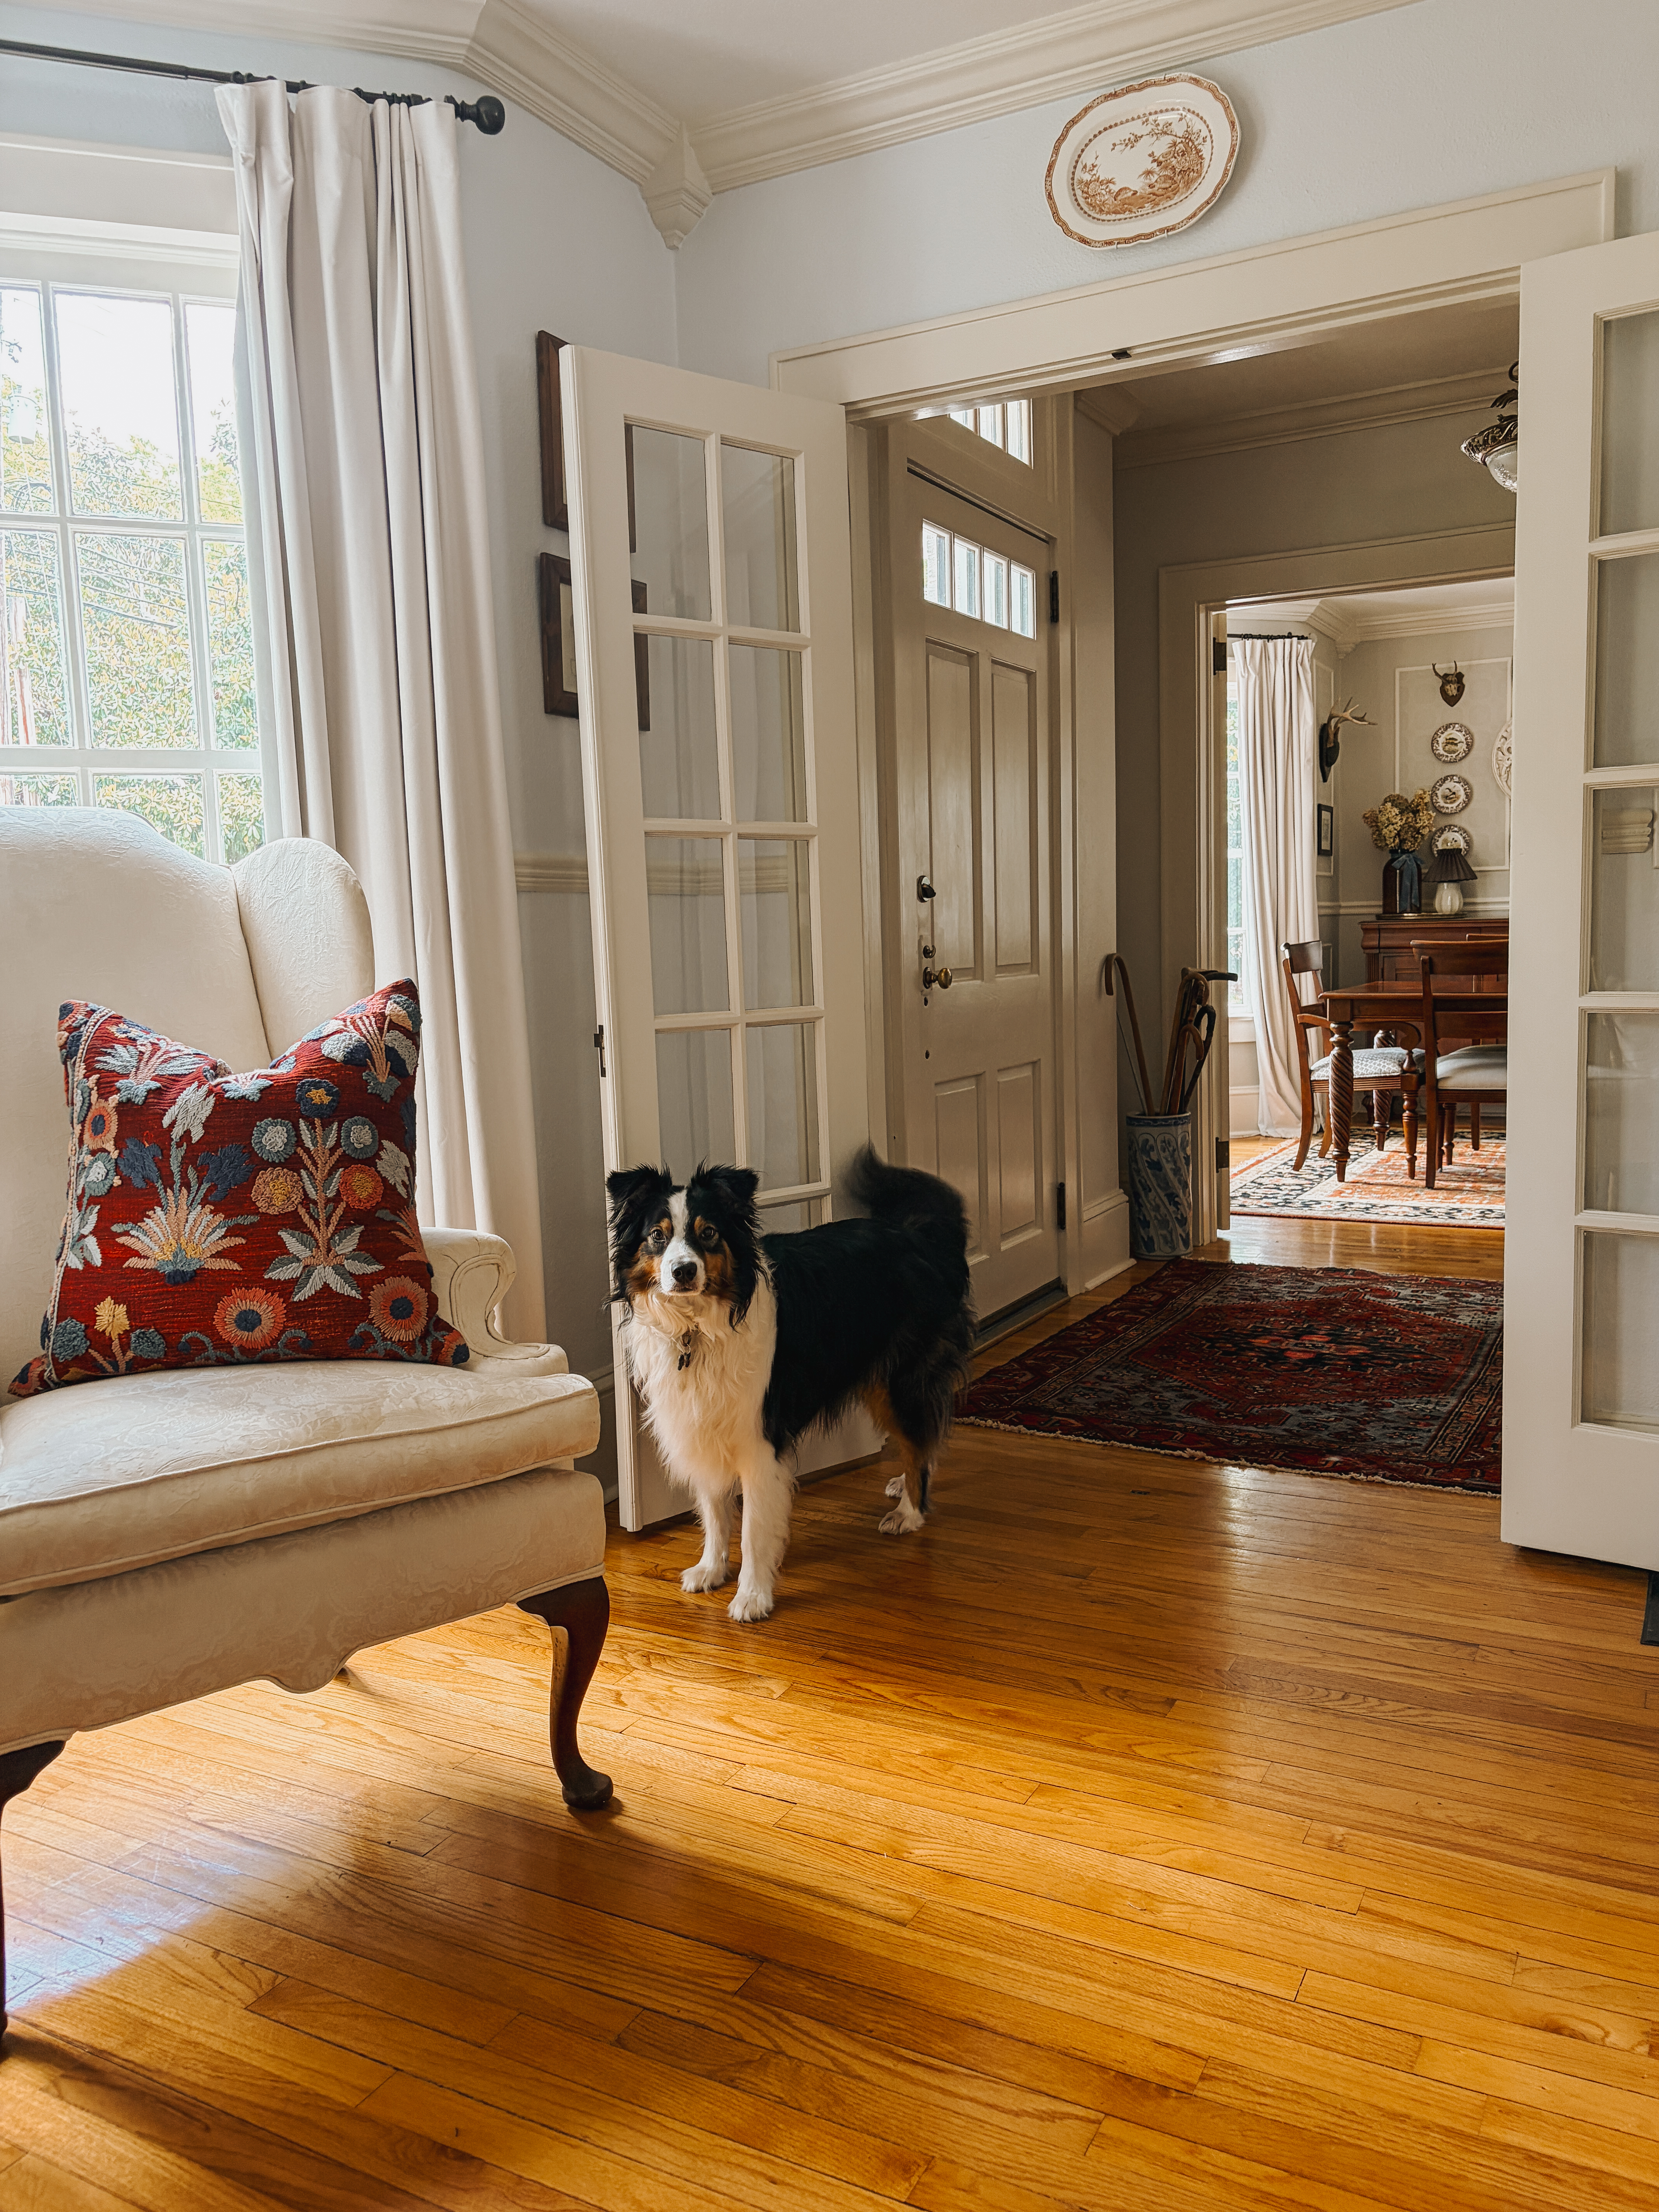
Traditional home design with connected rooms, layered rugs, and warm natural materials.

Traditional Home Design: Five Foundational Elements That Last

The highest compliments I have gotten as an interior designer were when my grown kids asked me for advice when decorating their own homes. Even when they were very small, I took them with me to go sourcing antiques for our home and my retail spaces.

Over the years they absorbed the importance of quality construction and materials. They know that if you buy a quality piece of furniture or decor, that you may not ever have to replace it in your lifetime.

People often confuse traditional home design with being old-fashioned. On the contrary, timeless home design is created by using classic elements that never go out of style.

The homes that stay relatable throughout the decades often have less to do with trends and more to do with the decisions that shape them over time.

What Defines Traditional Home Design

Labels are used frequently when talking about interior design. Contemporary, minimalist, and traditional are all terms you’ve likely seen online and in magazines. So, what exactly is traditional home design?

The word traditional is used to describe decor that often has a European influence. Traditional home decor often emphasizes symmetry.

Other elements that are trademarks of traditional interior design are layering of fabrics and patterns, curved and ornate wood carvings, and pieces that have been collected over time.

Spaces with traditional home design are a reflection of who lives there. At the heart of traditional home design is an understanding that rooms should feel visually balanced before they are ever fully decorated.

Proportion and Scale in Traditional Interior Design

If you’ve ever walked into a room and felt something about the decor was amiss, but you couldn’t put your finger on what it was, it was probably because something was off with the proportions or scale in the room.

Traditional dining room with carved wood table, patterned rug, and collected wall decor.
Traditional interiors often rely on proportion, natural materials, and collected details that feel layered over time rather than purchased all at once.

After moving into a new house, a friend told me, “I love this sofa so much, but no matter where I put it in the new living room, it just doesn’t look right.”

The problem wasn’t finding the right space for it, and there was nothing wrong with the sofa itself. The issue was that the sofa was purchased to fit in her last house, and it was entirely too big for her new space.

In traditional decor, designers often use the 2/3 rule of scale and proportion. This rule gives a pleasing sense to the eye as you take in the space as a whole. Large rooms can handle larger pieces of furniture, and in turn, smaller spaces need furniture on a smaller scale.

When scale is handled well, a room feels comfortable almost immediately, even if the viewer can’t explain exactly why.

Materials that Shape Timeless Home Design

The most successful traditional designs use materials that could have either been installed yesterday or one hundred years ago, and it’s difficult to know which it is.

Many of the materials associated with traditional homes share two qualities. First, they’re made of something found in nature, like wood, stone, linen, or leather. Second, they’re crafted from something man-made that can stand the test of time, like brass, copper, bronze, or nickel.

Choosing materials that are often found in traditional home decor will result in a timeless home design. As a bonus, these are often superior materials that not only withstand trends, but also physical wear and tear.

Over time, these materials also help create continuity throughout a home, allowing rooms to feel connected rather than separate from one another.

Creating Continuity in Traditional Home Decor

I remember watching the television show Trading Spaces, where neighbors would swap houses to redecorate one room with the help of a designer. As seasons went on, the designs became wild and unrealistic for everyday living.

The room reveals on the show often featured an outlandish space that the designer used to showcase their own creativity, instead of the tastes of the homeowner. As a result, these new rooms never blended with the rest of the house.

Traditional home design showing continuity between adjoining rooms with layered artwork and warm wood tones.
One of the defining characteristics of traditional homes is the sense of continuity between rooms rather than dramatic shifts in style or color.

In traditional homes, rooms are rarely treated as isolated spaces. Whole house color palettes create a smooth flow without disruptive color changes.

Using uninterrupted flooring finishes and repeating decor elements throughout homes also  creates continuity in traditional home decor. Traditional homes are often memorable not because of a single room, but because the entire house feels connected in both design and purpose.

Functional Layouts in Traditional Homes

In traditional interior design, floorplans have dedicated spaces for each living function. Rooms are designed to fulfill a purpose in the home, and the purposes of adjoining spaces are considered for how they relate to each other.

A kitchen will be designed for optimal workflow, but the kitchen design will also consider the placement and decor of the dining room, since the two often function in tandem.

In a classic home design, a living room layout will function to encourage conversation, and a bedroom layout will be designed to be peaceful and relaxing.

While decorating styles may shift over time, the ways people gather, cook, rest, and converse remain remarkably consistent.

A Collected Sense of Time in Traditional Homes

I love watching renovation shows on TV that surprise the homeowners with a brand new, completely styled room that they always fall in love with at the end. But the truth is that’s not always reality.

Traditional bedroom with antique wood bedside table, patterned textiles, layered artwork, and soft lamp lighting.
Traditional homes often feel collected rather than perfectly coordinated, with furnishings, artwork, and personal objects accumulated gradually over time.

Some people hire an interior designer to redo an entire room in their home. But there are far more people who call designers for help with one thing: draperies for a bedroom, a new sofa and loveseat with custom fabric, or flooring.

As you are making changes to your home, you’re also picking up a piece of art here and there, a basket to hold throw blankets in the living room, or a secretary desk to organize books and stationery in the corner of a study.

Classic home elements aren’t just beautiful; they tell a story that’s been written over time. Perhaps this is why traditional homes rarely feel finished all at once; they are shaped gradually through years of living.

Vintage books and blue-and-white ceramics styled on built-in shelving in a traditional home.
Collected interiors rarely feel overly matched; instead, they reflect years of retained books, furnishings, and meaningful objects.

How to Apply Traditional Home Design in a Real Home

Traditional homes tend to resist short-lived trends in favor of choices that remain appealing over time. In recent years there was an explosion of popularity in barn doors and vinyl plank flooring. These were new and exciting ways to decorate a home, but they weren’t enduring. Classic home decor is beautiful in any era, regardless of what is trending on the internet.

Traditional homes rarely feel assembled all at once, which is one reason perfectly matched furniture suites can feel overly uniform. Unmatched pieces can beautifully complement each other for a more collected look.

The most important thing to remember when creating a home with classic pieces is to go slowly. It’s okay if rooms are incomplete while you search for the right pieces to tell your home’s story.

Why Traditional Home Design Endures

As trends move faster online, interiors have also become more vulnerable to cycles of rapid consumption and replacement.

With instant access and saturation of influence on the internet, home furnishings and décor have become disposable. Composite materials and cheap construction mean that many things purchased today won’t be around in ten years.

Timeless home design endures because of quality craftsmanship and materials that last a lifetime. Traditional interior design considers functionality and cycles of everyday living, not what savvy influencers tell you is trending. Homes built slowly and thoughtfully often remain relevant far longer than those shaped by rapid cycles of consumption.


Check out these other reader favorites:

Traditional home design with connected rooms, layered rugs, and warm natural materials.
Traditional homes are often memorable not because of a single room, but because the entire house feels connected in both design and daily living.

Hallway with black interior doors and white trim

Painting Interior Doors Black: What I Learned from Painting 11 Doors

When I first decided to paint the interior doors in our home black, not everyone was convinced.

My mother’s initial response was, “What made you decide to do that?” After studying them for a moment, she conceded that the change might simply take some getting used to.

I understood her hesitation. Painting a white door black is not a quiet decorating decision. It changes the way the doors relate to the walls, trim, hardware, and everything else in the room. Once I started, however, I committed fully. By the time the project was finished, I had painted 11 interior doors.

The black doors gave the rooms definition and made ordinary paneled doors feel more substantial. I loved the effect, but I underestimated how much time and physical effort the project would require.

I originally shared a few of those lessons in 2013. Now, with the benefit of having lived with the doors for years, I can answer the more important questions: Did they show dirt? Did they chip or stick? Did I regret painting them? And would I do it again?

The short answer is that the finish held up remarkably well. I never needed to repaint or touch up the doors, and I continued to enjoy them for as long as we owned the house.

This article contains affiliate links. If you make a purchase through one of these links, I may earn a commission at no additional cost to you. As an Amazon Associate I earn from qualifying purchases.

Are Black Interior Doors a Good Idea?

Black interior doors can give a room architectural definition, particularly when paired with traditional millwork and contrasting trim. They draw attention to something that might otherwise disappear into the wall and can make a relatively ordinary door feel more considered.

They are also a commitment. A dark door has much more visual weight than a white one. Before painting every door in the house, consider how the color will look from adjoining rooms and down long sightlines.

In our home, the black doors created a consistent thread through the common areas. They made the rooms feel more finished, and the contrast worked especially well against the lighter walls and trim.

If you are uncertain, begin with one door in a contained area and observe it throughout the day. Black paint can look quite different in morning light, afternoon sun, and artificial light. A sample painted on a board is helpful, but seeing the color vertically and beside the existing trim is even better.

White front door before painting beside the same door painted black
The interior face of our front door before and after painting. Against the white trim and sidelights, the black gave the entry a much stronger focal point.

True Black or a Softer Black?

One of the things I would change is the exact color.

I chose a true black, but later found myself wishing I had used a softer black or very dark charcoal. At the time, I was particularly drawn to Dragon’s Breath by Benjamin Moore.

A true black creates crisp, dramatic contrast. A softer black can feel more nuanced and may be easier to incorporate into a traditional room filled with wood, aged metals, textiles, and antique furnishings.

Before choosing a color, compare several samples against:

  • The wall color
  • The trim
  • The flooring
  • The door hardware
  • Nearby wood finishes
  • Fabrics visible from the doorway

Undertones matter. Some blacks lean blue, brown, green, or gray, and those differences become more visible when the paint covers an entire door.

Should You Paint Both Sides of the Door?

This was one of the practical decisions I had to make across the house.

For doors in the common areas, I painted both sides. I wanted them to read as black doors, not as white doors that happened to have one black face.

For bedroom doors, I painted only the side facing the hallway or common area. This gave the hallway a consistent appearance without requiring the black to become part of each bedroom’s color scheme.

There is no rule that every side of every door must match. Consider where the door leads and how it appears when it is open and closed. A door can participate in the design of one room on one side and a completely different room on the other.

The edge color also requires some thought, especially when the two faces are different colors. Look at which edge is visible when the door is open and decide which room’s finish it should visually belong to.

I Left All 11 Doors Hanging

I considered removing the doors, but ultimately painted every one while it remained on its hinges.

Leaving them in place meant I did not have to move, support, store, and rehang 11 doors. It also allowed me to work on both sides without waiting for one face to dry before turning the door over.

I carefully protected the hinges before painting. I also recommend removing the doorknobs rather than trying to paint around them. Taping around a knob may appear faster, but painting neatly around it takes time, and removing most interior hardware is relatively straightforward.

That does not mean leaving the door hung is always the right choice. Removing a door may make sense if it needs extensive repair, if the existing finish requires specialized preparation, or if the painter can work more comfortably with it supported horizontally. The weight of the door and your ability to rehang it safely should also be considered.

For my project, leaving the doors in place was the more practical choice.

The Tools I Used

I used a foam roller on the flat portions of the doors and an angled brush on the recessed and detailed areas.

The foam roller helped cover the larger surfaces efficiently, while the brush gave me control around the panels, molding, hinges, and edges. The combination was more practical than trying to paint the entire door with a brush.

A smooth door generally requires a roller cover intended to leave a fine finish. A heavy-nap roller can create more visible texture, particularly under paint with noticeable sheen.

Before-and-after comparison of a hallway with white interior doors painted black
The same hallway before and after I painted the doors black. Repeating the color throughout the space gave the hallway greater depth and definition.

Basic Supplies for Painting an Interior Door

You do not need an enormous collection of tools, but good applicators and careful preparation make a visible difference.

Everything you need for preparing and painting interior doors, including smooth-finish rollers, angled brushes, painter’s tape, floor protection, and touch-up storage:

Preparation Depends on the Existing Door

The correct preparation is not the same for every door.

A clean, sound, previously painted surface may need relatively little preparation. A stained, varnished, glossy, factory-finished, peeling, or damaged door may require a different cleaning, repair, deglossing, and priming process.

“Paint and primer in one” does not eliminate every need for a separate primer. A bonding or stain-blocking primer may still be necessary over slick finishes, bare wood, repaired areas, wood that may bleed through the finish, or surfaces with uncertain adhesion.

Follow the directions for the specific primer and paint system you choose. If you are unsure what coating is already on the door, consult the paint manufacturer or a knowledgeable paint retailer before beginning.

A Safety Note for Older Homes

Homes built before 1978 may contain lead-based paint. That does not mean every painted door or layer of paint contains lead, but it does mean that older coatings should not be casually sanded, scraped, or otherwise disturbed.

If a door may have older paint beneath its current finish, determine the appropriate lead-safe procedure before beginning surface preparation. The Environmental Protection Agency provides current information about lead-safe renovation and painting practices.

Lead-safe Renovation and Painting Practices

Always follow the ventilation and protective-equipment instructions provided by the manufacturers of the cleaner, primer, paint, or deglosser you use.

How I Painted the Paneled Doors

Paneled doors are easier to paint neatly when the work follows the construction of the door rather than moving randomly across the surface.

The general approach is to begin with the recessed details and panels, then work outward across the horizontal rails and vertical stiles. Work in manageable sections and smooth the paint while it is still wet enough to blend.

For my doors, I used the angled brush where the foam roller could not reach and rolled the larger flat areas. The goal was an even finish without leaving heavy paint in the corners of the panels.

Thin, controlled coats are preferable to one thick coat. Heavy paint is more likely to collect in recessed areas, create drips, and remain soft longer.

My doors required approximately three coats on each painted side, even though I had used primer. That was my experience with the particular doors, color change, and paint I used. Another project may require fewer or more coats.

Choose Paint for Durability, Not Color Alone

The original version of this article made a sweeping comparison between two paint brands. Looking back, the more useful advice is to choose the right product for the job rather than relying on the brand name alone.

The Behr paint I selected did not give me the application experience I wanted for this project. I had used the brand successfully for other purposes, including furniture projects, but I would have chosen a different product for these doors.

Today, I would look for a durable interior coating specifically suited to trim, doors, or cabinetry and compare its requirements for:

  • Surface preparation
  • Primer
  • Application method
  • Recoat time
  • Blocking resistance
  • Washability
  • Full curing time

Semi-gloss has traditionally been used on doors and trim because it is durable and easy to clean, but it is not the only possible choice. Depending on the paint line, satin, pearl, or another trim-appropriate finish may provide sufficient durability with less visible sheen.

Remember that a higher sheen can make brush marks, roller texture, dents, and other surface imperfections more noticeable.

Dry Paint Is Not the Same as Cured Paint

This is one of the easiest parts of the project to underestimate.

Paint may feel dry to the touch while remaining soft underneath. Recoat time, light-use time, and full curing time are not interchangeable.

If two newly painted surfaces press together before the coating has hardened sufficiently, the paint may stick. This is known as blocking and commonly occurs around doors, windows, and frames.

My doors did not stick, but I was careful about allowing the paint to harden. Consult the product label or technical data sheet for the recommended recoat and curing times. Temperature, humidity, ventilation, coat thickness, and the particular paint formulation can all affect drying.

Avoid assuming that a door can return to completely normal use merely because the surface no longer feels wet.

Black paneled interior door with white trim in a traditional kitchen and dining area
Years after I painted the doors, the black finish still looked clean and gave the kitchen and dining area greater definition.

How the Black Doors Held Up

This is the question I can answer much better now than I could when I originally published the article.

The doors held up very well during the years we lived in the house.

They did not:

  • Stick
  • Chip
  • Scuff noticeably
  • Fade
  • Become difficult to clean
  • Require repainting
  • Require touch-ups

They also did not show dirt any worse than the white doors had.

Black surfaces can reveal pale dust, while white surfaces can make darker smudges and grime more noticeable. In ordinary use, I did not find the black doors more troublesome to maintain.

That long-term performance is one of the reasons I still consider the project successful, even though painting 11 doors was considerably more work than I expected.

What I Would Do Differently

If I were approaching the project again, I would make three changes.

First, I would give more consideration to a softer black or deep charcoal instead of choosing a true black immediately.

Second, I would select a paint formulated specifically for a smooth, durable finish on doors and trim. I would pay close attention to its blocking resistance and curing instructions.

Finally, I would plan the project more realistically. Painting 11 doors involves a great deal of bending, kneeling, reaching, and holding a brush. My hand and knee were both quite sore by the time I finished.

This was not a quick weekend transformation, at least not at that scale. Breaking the work into smaller groups of doors would have made the process more manageable.

Would I Paint Interior Doors Black Again?

Yes, in the right house.

Black interior doors can add depth, rhythm, and architectural presence to a traditional home. I would not automatically paint every door black, nor would I choose the color without considering the adjoining rooms. But when the architecture, light, and palette support it, black can make even an ordinary paneled door feel intentional.

Although I underestimated the labor, I never regretted the finished result. The doors performed well, were easy to live with, and gave the house a distinction it had not had before.

Black paneled front door with white trim and traditional paneled wainscoting
The black front door created a strong focal point against the white trim and paneled wainscoting in our entry.

Frequently Asked Questions

Do black interior doors show dirt and fingerprints?

Mine did not show dirt any worse than white doors. The experience may vary with the sheen, lighting, household, and exact color, but maintenance was not a problem in our home.

Should you paint both sides of an interior door black?

Not necessarily. I painted both sides of doors in the common areas. For bedrooms, I painted the hallway-facing side black and left the bedroom-facing side light. Consider how each side relates to its room.

Do you have to remove a door before painting it?

No. I painted all 11 doors while they remained hanging. Removal may be helpful for certain repairs, finishes, or working methods, but it is not always necessary.

What kind of roller should you use on a door?

I used a foam roller on the flat surfaces and an angled brush on the detailed areas. Choose a roller designed to leave a smooth finish and confirm that it is compatible with the paint you are using.

What sheen is best for an interior door?

Semi-gloss is a traditional choice, but a durable satin, pearl, or other trim-appropriate finish may also work. Compare the manufacturer’s durability, cleaning, and application guidance rather than selecting by sheen alone.

How many coats of paint do black doors need?

My doors needed approximately three coats per painted side, even with primer. Coverage varies according to the starting color, paint, primer, door material, applicator, and thickness of each coat.

How long should you wait before closing a painted door?

Follow the instructions for the exact paint you use. Dry-to-the-touch time is not the same as full curing time, and closing the door too soon may cause the painted surfaces to stick.

Are black interior doors timeless?

Black doors have a long history in traditional interiors, but no color choice is universally timeless. Their longevity depends on how well they relate to the architecture, trim, flooring, hardware, and rest of the house. Used thoughtfully, they can feel far more architectural than trend-driven.


Continue Reading

If you’re making thoughtful changes to your home, you may also enjoy: