Old-fashioned refrigerator pickles made with fresh cucumbers and onions

How to Make Old-Fashioned Refrigerator Pickles in Weck Jars: A Southern Summer Staple

This recipe is part of my Old Fashioned Summer Saturdays series, a weekly look at timeless summer traditions, seasonal recipes, and vintage-inspired living. This week, we’re in the garden, putting those homegrown cucumbers to good use with a classic refrigerator pickles recipe…no canning required!

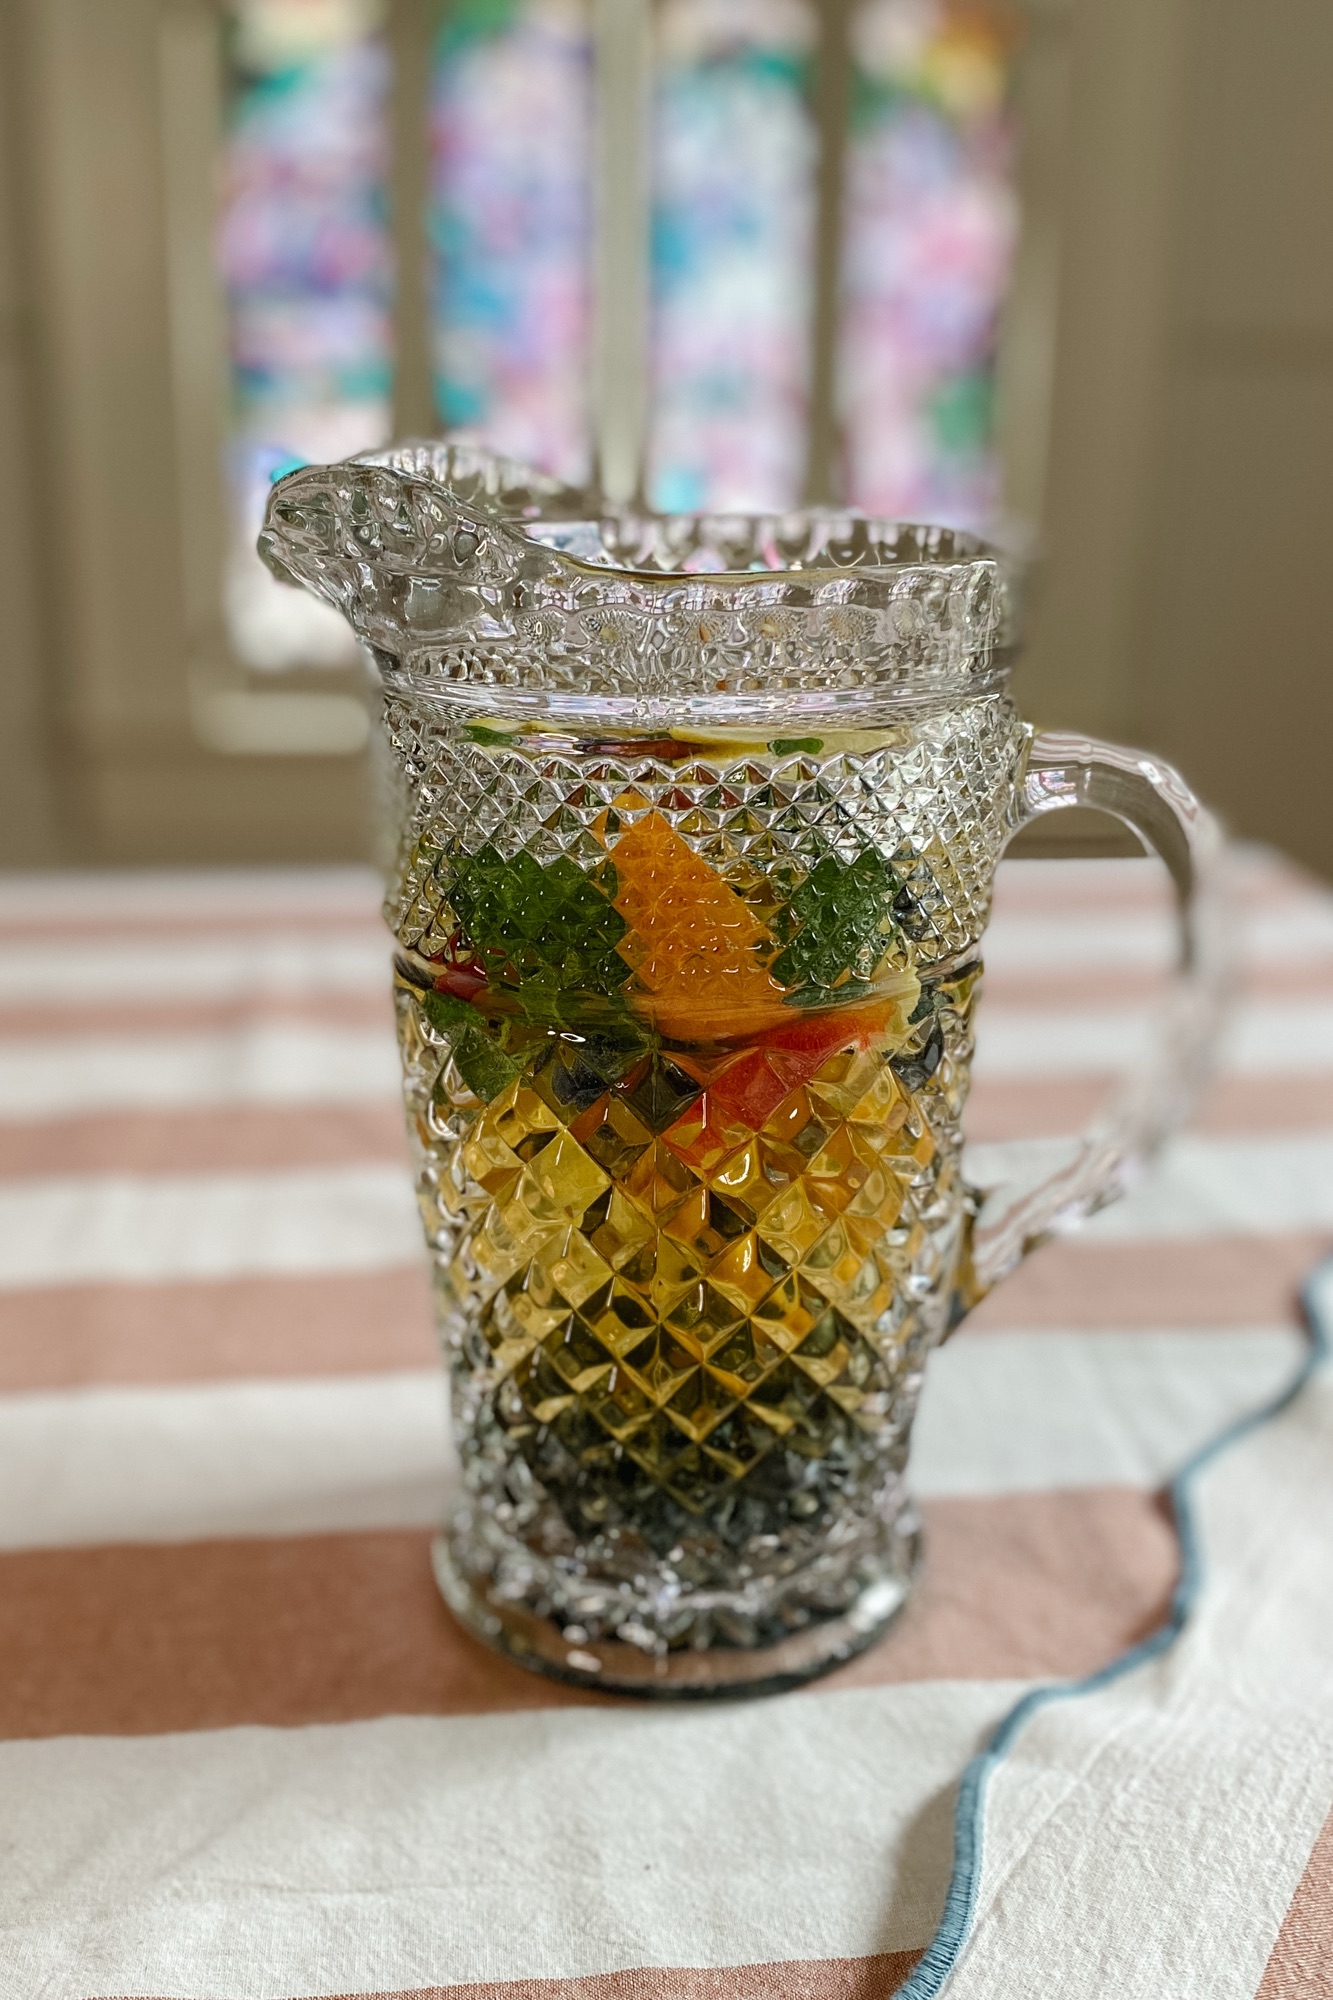
If you’ve ever grown cucumbers in your garden, you know how quickly they multiply. This easy refrigerator pickle recipe is my favorite way to preserve them without needed a canner, water bath, or any special tools. It’s fast, crisp, and full of flavor. Whether you’re a beginner or a seasoned gardener, you’ll love this vintage-inspired method.

Why I love this method:

  • No canning, no fuss. Plus it’s a great way to use homegrown produce.
  • This is a modern take on a timeless tradition.
  • There are no daunting tasks.
  • This recipe is easily adaptable and hard to mess up!

Supplies You’ll Need (affiliate links)

Recipe (keep reading for more details)

Old-fashioned refrigerator pickles made with fresh cucumbers and onions
Abby Smolarsky | Belle Antiquarian

Old-Fashioned Refrigerator Pickles

A no-canning refrigerator pickle recipe using fresh cucumbers and classic Southern flavors. Crisp, sweet-tangy, and easy to make; no special equipment required.
Prep Time 14 minutes
Additional Time 2 days
Total Time 2 days 14 minutes
Servings: 4 servings
Course: Side Dish
Cuisine: American, Southern

Ingredients
  

  • 4 medium cucumbers, thinly sliced
  • 1 Vidalia onion, thinly sliced
  • 2 cups white vinegar
  • 1 cup granulated sugar
  • 1 Tbsp kosher salt
  • 1 tsp mustard seeds
  • 1 tsp celery seeds
  • ½ tsp black pepercorns
  • ½ tsp crushed red pepper flakes
  • ½ clove of garlic per jar, peeled

Equipment

  • Clean mason jars or Weck jars
  • Sharp knife
  • Cutting board
  • Measuring cups and spoons

Method
 

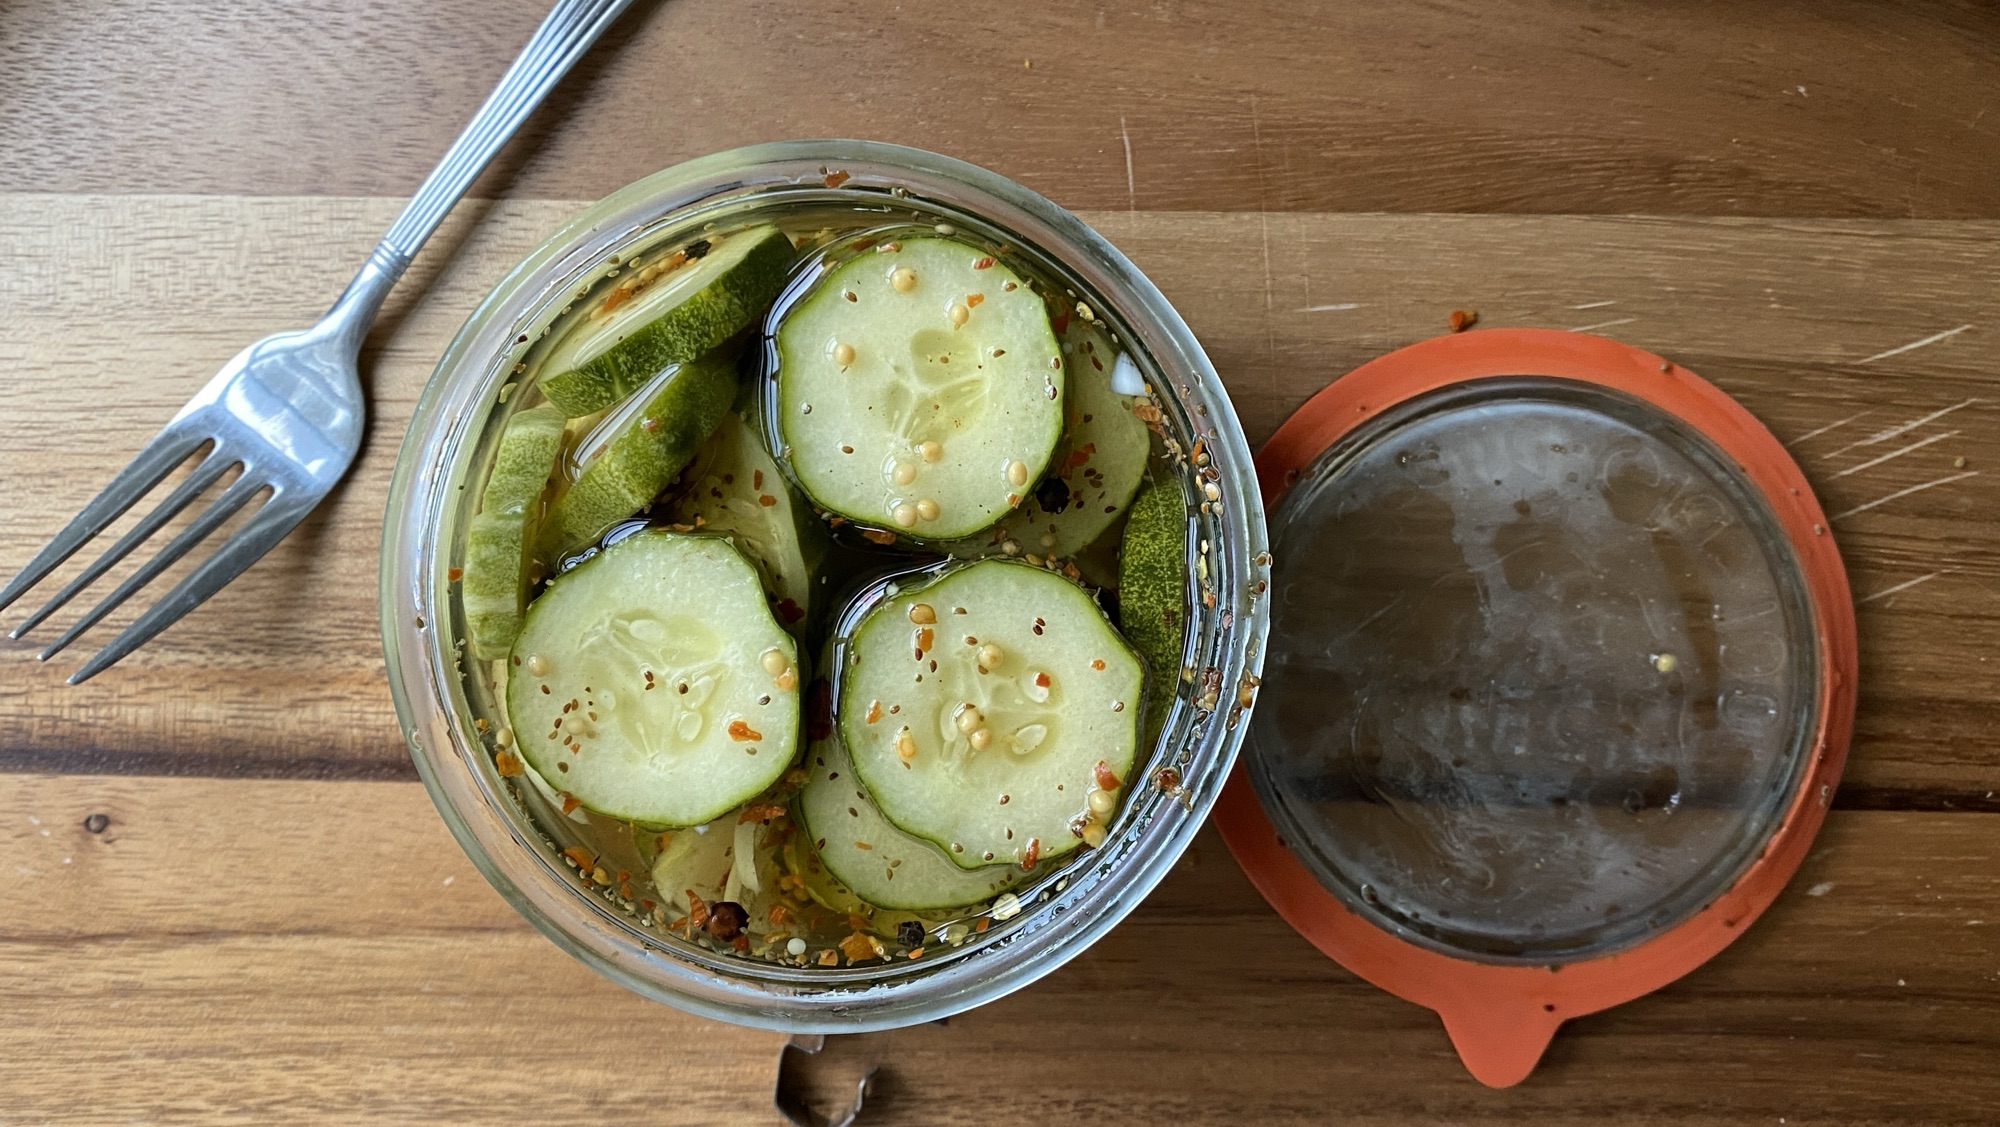
  1. In a large bowl or measuring cup, whisk together the vinegar, sugar, salt, mustard seeds, celery seeds, black peppercorns, and red pepper flakes until the sugar and salt dissolve.
  2. Add the sliced cucumbers and onion to the brine, stirring to coat evenly.
  3. Place ½ garlic clove into each clean jar.
  4. Transfer the cucumber mixture into the jars, pressing gently to remove air bubbles and ensure the vegetables are fully submerged.
  5. Seal the jars tightly to refrigerate for at least 24 hours; for best flavor, allow 48 hours before serving.
  6. Shake the jars gently every few hours during the first day to distribute the seasonings evenly.

Notes

This is a small batch recipe and will typically fill 2-3 jars. If you have additional cucumbers or jars, simply prepare more brine to fully cover the vegetables. 

How to Customize Your Pickles

There is no end to the flavor combinations that you can create. Today I used radishes and cool-jalapenos (Yep, they’re a thing) to some of the jars for a few different flavor combinations. If you have a lot of extra okra, then you could pickle okra instead of cucumbers. Don’t have a Vidalia onion on hand? Use a red onion, or even swap out the white vinegar for apple cider vinegar. This recipe is very flexible!

Storage Tips

Wait about 48 hours for these pickles to achieve their peak flavor, but don’t wait too long to enjoy eating them. Since they don’t have preservatives or an airtight seal, they need to be enjoyed within a month. Keep them stored in the refrigerator, and always use a clean utensil when serving them to avoid contamination.

Whether you’re overrun with cucumbers or just looking for a way to savor summer, these easy pickles are a delicious and practical solution. If you give this recipe a try, tag me on Instagram or pin this post to save it for later! (Looking for the exact tools and products that I used? Find them HERE.)

Explore More from Old-Fashioned Summer Saturdays

This article is part of my Old-Fashioned Summer Saturdays series, where I share timeless inspiration for warm-weather living. Be sure to check out these reader favorites:

Timeless Red, White, and Blue Decor Ideas for the Porch
Heirloom Tomato Dreams
Classic Summer Whites: Timeless Linen Dresses and Southern Style Staples
Simple Garden Joys
Creating a Cozy Summer Reading Spot
Old-Fashioned Strawberry Shortcake Cake
Blue and White China for Summer Entertaining

You can subscribe here to receive new articles, seasonal inspiration, and vintage-style favorites delivered right to your inbox.

A colonial revival home decorated for the summer with red, white, and blue buntings hanging over the windows

Timeless Red, White, and Blue Decor Ideas for Summer Porch Styling

Welcome to the first post in my Old-Fashioned Summer Saturdays series, where each week I’ll share simple, nostalgic, and meaningful ways to celebrate the season at home. From time-honored recipes to classic garden scenes, this series is all about the slower pace of summer and the beauty of tradition.

There’s something so heartening about red, white, and blue bunting waving gently in the breeze. For me, decorating for summer is more than just patriotic; it’s personal. This year, as we honor Flag Day and the birthday of the United States Army, I’m reminded of my husband’s service and the pride that lives in the rhythm of our everyday life.

Here are a few timeless ways I decorate our home’s exterior for summer. Classic touches that honor tradition and transition seamlessly from Memorial Day through Independence Day.

A woman walking up the steps towards the doorway to a colonial revival home that is decorated for summer

1. Classic American Bunting

Hang red, white, and blue bunting across porch railings, below windows, or above entryways. Choose cotton or canvas styles with a vintage feel for a more authentic look.

2. Small Garden Flags or Stake Flags

Line your front walkway or flower beds with small American flags. It adds a layered look and creates a warm, welcoming lath.

3. A Seasonal, Patriotic Wreath

Create or purchase a wreath that includes hints of Americana. Think navy ribbon, white hydrangeas, or tiny vintage flags. Wreaths can be understated and transition easily into mid-summer.

A woman hanging a patriotic wreath on a black front door of a colonial revival home.

4. Grouped Vintage-Inspired Decor

Display red, white, and blue vintage containers, like enamelware, watering cans, or milk jugs, on porch steps or tables. Fill them with fresh flowers or ferns for a charming touch.

5. Timeless Lighting

String cafe lights or place solar powered lanterns near your seating area. Add a soft glow for evening porch sitting during warm weather nights.

Decorating for Flag Day and Beyond

If you’re looking to create a home that feels patriotic without being overly done, focus on balance. Mixing textiles with plants and keeping a restrained color palette lets your decor feel thoughtful, not theatrical.

Want to bring this look to your home?

Check out my curated list of red, white, and blue home accents that work all season long.

This is just the beginning of what I hope will be a summer full of simple pleasures and old-fashioned charm. I’ll be sharing a new post every Saturday, from garden stories to vintage recipes and everything in between. Until then, I hope this inspires you to dress your home in a way that feels meaningful and full of heart.

Stay tuned, and happy summer.

A colonial revival home decorated for summer with red, white, and blue buntings, American flags, and flowers

Explore More from Old-Fashioned Summer Saturdays

This article is part of my Old-Fashioned Summer Saturdays series, where I share timeless inspiration for warm-weather living. Be sure to check out these reader favorites:

Simple Garden Joys
Heirloom Tomato Dreams
Classic Summer Whites: Timeless Linen Dresses and Southern Style Staples
Refrigerator Pickles—A Southern Summer Staple
Creating a Cozy Summer Reading Spot
Old-Fashioned Strawberry Shortcake Cake
Blue and White China for Summer Entertaining

You can subscribe here to receive new articles, seasonal inspiration, and vintage-style favorites delivered right to your inbox.

vintage glass pitcher with a beautiful southern sangria

Southern Garden Sangria: A Vintage-Inspired Summer Sip

Southern summers invite slow afternoons, porch swings, and a glass of something cold in hand. This Southern Sangria is my take on a warm weather classic, inspired by vintage garden parties, worn recipe cards, and the kind of fruit-filled drinks inspired by old-fashioned fruit punches and garden-party entertaining.

This article may contain affiliate links. If you purchase through these links, Belle Antiquarian may earn a small commission at no additional cost to you.

Why This Southern Sangria Feels Special

This isn’t the overly sweet sangria you may have had at a chain restaurant. This version is subtle, fragrant, and anchored by summer’s best fruits.

The addition of peach schnapps adds a soft floral note that pairs beautifully with ripe peaches, blueberries, and a handful of mint that I grow out on my sleeping porch.

And while you can absolutely serve it in a mason jar, I love to pour it into these vintage inspired glasses. It turns even a weeknight sip into something memorable.

Fresh summer fruit perfect for a southern garden sangria

Southern Garden Sangria Recipe

This is a simple sangria to prepare, with just a bit of time needed for the flavors to come together. Once it’s chilled, it’s ready to pour and serve.

Fresh summer fruit perfect for a southern garden sangria
Abby Smolarsky, Belle Antiquarian

Southern Garden Sangria

A vintage-inspired Southern garden sangria made with dry white wine, peach schnapps, bourbon, fresh peaches, blueberries, lemon, and mint. Light, fragrant, and perfect for summer entertaining.
Prep Time 15 minutes
Chill 2 hours
Total Time 2 hours 15 minutes
Servings: 6 servings
Course: Drinks
Cuisine: Southern

Ingredients
  

  • 1 bottle dry white wine, such as dry Riesling
  • ½ cup peach schnapps
  • ÂĽ cup bourbon
  • 1 ripe peach, sliced
  • ½ cup fresh blueberries
  • ½ lemon, thinly sliced
  • 1 handful fresh mint
  • Sparking water or club soda, to top
  • Ice, for serving
  • Additional mint or edible blooms, for garnish, optional

Method
 

  1. In a large pitcher, combine the white wine, peach schnapps, and bourbon.
  2. Add the sliced peach, blueberries, lemon slices, and fresh mint. Stir gently.
  3. Refrigerate for at least 2 hours, or overnight for more developed flavor.
  4. Just before serving, top with sparkling water or club soda.
  5. Serve over ice in glasses. Garnish with additional mint or edible blooms, if desired.

Notes

For a lighter version, add more sparkling water just before serving. Use seasonal fruit such as strawberries, plums, or blackberries depending on what is fresh.
Alcohol note: This recipe contains alcohol and is intended for adults 21 and older.

Entertaining Tip: Serve It in Something Beautiful

Once everything is chilled and ready, this is where I like to slow down a bit and think about how it will be served.

The glass truly matters. Pull out the vintage stemware, even if it’s only for yourself. Here are a few favorites you can find online:

vintage glass pitcher with a beautiful southern garden sangria

Make It Your Own

This sangria is forgiving. Use what’s in season or growing near you. Swap the peaches for plums, or the blueberries for strawberries. Add a splash of rose instead of white wine. The beauty is in the mix.

More Summer Recipes and Garden-Inspired Ideas

If you find yourself lingering a little longer over summer meals and simple gatherings, there are a few more ideas you may enjoy.

From fresh herbs clipped just before dinner to desserts meant for warm evenings on the porch, these are the kinds of recipes and traditions that make the season feel full.

ingredients for a southern sangria using many items fresh from the garden

How to Create a One-of-a-Kind Father’s Day Gift from the Antique Store

If you’re looking for a thoughtful Father’s Day gift that’s as unique as Dad, head to your favorite antique store. With a little creativity and a touch of nostalgia, you can create a meaningful gift that feels personal, useful, and memorable.

Step 1: Start with a Container

Look for a piece that can hold the other items—a vessel that becomes part of the gift itself. Think beyond traditional gift baskets. Great choices include:

  • A vintage wooden toolbox
  • A retro tin
  • An enamel dishpan
  • A metal tray
  • A wooden crate or drawer

Step 2: Find a Feature Antique

This is the item that gives the gift its character. Try to find something with history or a bit of charm that fits Dad’s interests. A few ideas:

  • A cocktail shaker for the home bartender
  • An old fishing lure or gear for the outdoorsman
  • A vintage pen for the journaler or writer
  • Records from his favorite artist
  • A metal sign for his garage or workshop

Step 3: Add Something New

Tie it all together with a small, new item that complements your finds. This bridges the gap between vintage charm and modern practicality. Try:

  • A bottle of bourbon
  • A new set of grill spices
  • A local coffee blend
  • A gift card to a tool or record store
  • A fresh notebook
Cigar Box + Vintage Shaker + Bartenders Book + Whiskey

Gift Combinations to Inspire You:

  • Bar-Inspired: Metal tray + antique shaker + favorite bourbon
  • Fishing Fan: Tackle box + vintage lures + local bait shop gift card
  • Grill Set: Old ammo box + cast iron branding iron + spice rubs
  • Coffee Crate: Vintage tin + enamel mug + fresh ground beans
  • Writer’s Box: Wooden cigar box + vintage pen + new leather journal

The beauty of this idea? It supports small businesses, gives new life to old treasures, and creates a gift that can’t be duplicated.

So this year, shop with heart. Celebrate Dad with a gift that’s built on history, thoughtfulness, and a little antique magic.

Styled garland showing how to dry whole oranges and use them in natural Christmas decor.

How to Dry Whole Oranges for Christmas Decor

When I think of Christmas, I am reminded of fragrant oranges, spicy cloves, and warm cinnamon. For many years I have dried and preserved orange slices to use as Christmas decor. (See this article from 2020.) This year I decided that I would learn how to dry whole oranges, instead of just slices. Today I am sharing the simple steps to drying whole oranges.

The steps for drying whole oranges are very simple, but they are somewhat time-consuming. Today I am sharing the basic things you need to know about how to dry whole oranges. I chose to only dry half a bag of oranges. I wish I had done the entire bag! While it is a little lengthy to dry whole oranges, they turned out really well. I found other spots in the house that I would’ve placed more whole, dry oranges. Next year I’ll put the entire bag into the drying process.

Step One

Turn your oven on to the lowest temperature. My oven’s lowest temperature is 170*. My oven has convection bake and regular bake. I found that convection bake was more effective than the regular bake.

Step Two

Using a small paring knife, you will begin to cut into the orange rind from pole to pole. Don’t quite go all the way to the end/pole. Leave 1/4 of rind on each end of your cut. You’ll want to make sure your cut goes all the way into the pith/rind through to the orange flesh. However, once you start drying them, if you notice that you didn’t get all the way through to the orange flesh, you can take it back out of the oven and cut deeper before putting it back in.

You can see how I didn’t cut deep enough on this orange. You can cut deeper and put it back into the oven to finish drying.

Note: I experimented on one of my oranges to see if I could cut a design other than basic stripes. This doesn’t work as well. Using the method I described above, the oranges will develop gaps and vents, exposing the inner part of the fruit to be dried out. You can experiment as well, but in my experience, basic slits are best.

You can’t see them, but the slits into the orange are there.

Step Three

Once your oranges are cut, you need to decide how you want them to be placed into the oven. My oven is new, so I decided to line a cookie sheet with parchment paper and place them on top. Some people place them directly onto the racks. Other people place them onto metal cooling racks that have been put into a cookie sheet. A friend told me it would not affect drying time. You decide what’s best for you!

I used tongs to turn the oranges every couple of hours. If you notice a cut didn’t go all the way through, take it out to cut deeper before putting it back in again.

Step Four

Next you will leave the oranges in the oven to dry out until the rind is hardened and you believe that the fruit inside is dried out. I had been warned that this would take a long time, and it certainly did. On the first day, I dried them in the oven from 7 am to 7 pm. I didn’t want to leave the oven on overnight, so I took them out. The next day I dried them for another four hours. The third day, I dried them for the entire day again. All in all, I think this was about 24 hours of drying time. Which is why I wished I had dried the entire bag at once.

After Your Oranges are Dried

You can use your dried oranges in garlands, wreaths, or hanging on your Christmas tree. I have tucked dried oranges into my fireplace garland, along with pomegranates, feathers, holly berries, and pine cones. I added ribbon that resembled the colors of dried oranges and pomegranates.

When I dry orange slices, I will save them in an airtight bag to use for multiple years. Before I use dried slices again the next year, I inspect them to make sure there is no mold or anything undesirable on them. Since it is not possible to see inside and inspect whole oranges, I won’t be saving the dried whole oranges to use again next year.

Using natural elements in Christmas decor creates a rich and vibrant ambiance. Since a bag of oranges is relatively inexpensive, you really only need some time to create Christmas decor using whole dried oranges. Have you dried oranges before? Slices, or whole oranges? I’d love to hear your feedback in the comments below. Or, post a photo on Instagram and tag me so that I can see your dried oranges.

Merry Christmas!

Creating a Cozy Holiday Experience for Guests

It’s less than twenty days until Christmas, and touches of holiday spirit can be felt in nearly every room in our home. One of the things we love most about the holidays is welcoming our friends, family, and neighbors into our home to celebrate the season with us. It’s important to us that our guests experience the contagious holiday excitement, while also feeling at ease. We truly want them to make themselves at home when they come through the door.

I recently had the opportunity to talk with Kierra Todd with Redfin.com. Kierra asked me how we ensure a comfortable experience for our guests during the holidays. One way I do this is by mixing natural elements with conversation pieces. Today I am sharing our dining room decorated for a Christmas gathering. The vintage and antique Christmas decor we’ve collected over the years has started many conversations while gathered around the table with guests. And by collecting and foraging from our yard for decor, we ground the space and bring commonality.

Interior designer Abby Smolarsky at Belle Antiquarian, highlighted, “By mixing natural elements and conversation pieces, guests will feel the excitement of the season. In the dining room, guests will see magnolia and holly from our yard, as well as a tree sparkling with collected antique ornaments. It’s the perfect mixture for putting people at ease.”

Redfin.com

In the South we are blessed to have quite a few plants to forage at Christmastime. Our property boasts several magnolia species, abundant holly trees, and evergreen. I gather clippings and wire them together to adorn tables, buffets, and fireplace mantels throughout the house. Tucked here and there you will see some of my favorite pheasant feathers. My wonderful neighbor, Claire, gave me a bag of long-leaf pine cones that she had collected, which were the perfect finishing touch. Each region will have vegetation that can be brought inside for decor. If you don’t have anything in your yard, try asking a friend or neighbor if you can come clip a few things to add to your decor. Be sure to bring a basket, sharp clippers, and gloves to protect your hands from pointy leaves like holly.

Vintage and antique Christmas decor are among my favorite things to look for while treasure hunting. Throughout my years of selling antiques, I have collected some unusual and special ornaments. It’s fun to gaze and watch them sparkle on our dining room tree while gathered for a special meal. Part of the reason these ornaments are so special is because they were collected slowly over time and in various places. They each hold a story or memory, and they have kept the conversation flowing at the Christmas table on more than one occasion. It’s okay to start small with one or two baubles and add to them as the years go by. They’ll become part of your story as well.

The dining room feels festive, but also approachable. It’s doable. Anyone can gather foliage from their yard and bring it inside. Everyone can pick up a vintage ornament here and there. It’s how we share our space with the people we care about, sharing a little bit of our lives with theirs.

I’m honored to be featured on Redfin for this special holiday article. You can find the whole article and many more tips HERE.

No matter if you live in an apartment in Miami, FL, a rental home in Tuscaloosa, AL, or a
house in Bakersfield, CA
, this guide will walk you through essential steps to declutter and clean your home, add festive touches, prepare for guests, and set the stage for holiday entertainment, ensuring your home is ready to impress and delight all season long.
Prepare Your Home for the Holidays: 7 Tips for a Festive Season | Redfin

Thanksgiving in Our New Historic Home

Thanksgiving is just a few weeks away, and this will be our first year celebrating in our “new” historic home. I want to give a house update and share our Thanksgiving table with you.

Click the photo to shop these items.

We’ve been working hard to settle in and make our house feel like home. All of the moving boxes have been unpacked. Many of them had been in storage for four years, and thankfully we’ve only had two items broken. Our kitchen renovation is finished, and we’ve restored the flooring in several rooms. We’ve restored many of the original iron railings, and the rest will have to wait for warmer weather this spring. Outside, we’ve planted hundreds of perennials, including boxwoods, hydrangeas, and peonies, to name a few. If all goes well, there will be blooms throughout the yard from spring through summer next year.

Click the photo to shop these items.

We’re also researching the proper way to reglaze our original, working, sixteen pane windows. We’ll start the slow process of reglazing them when weather turns warmer. This is considered a maintenance task, and if we do it correctly, it won’t need to be done again for decades.

Click the photo to shop these items.

As we’re nearly the holiday season, we’re also preparing to host out-of-town guests. Several guest spaces have been completed to make them comfortable during their stay. Unfortunately, a custom sofa that we ordered in September still hasn’t arrived, which is creating stress as Thanksgiving draws near.

Click the photo to shop these items.

In spite of the lack of living room seating, there is a place for everyone at the dining room table. We’ll treasure the times spent with our friends and loved ones this season. We will be gathered around the table to enjoy delicious food and each others company. I’ve included a few photos of our Thanksgiving table this year. You will notice that there is a Christmas tree up in the dining room. There are a few reasons for this, which I can talk about in a future article, but let’s just say the turkey still tastes the same with the tree up!

To find the sources for everything I used to set our Thanksgiving table, you can visit this post in my LTK shop.

Happy Thanksgiving!

Transform Your Dining Room on a Budget

This article contains affiliate links and ads. You can find many of the pieces I feature by clicking on the links at the bottom of this article.

I’m happy to finally share the details on our dining room refresh. Months before our kitchen renovation began, we started on our dining room. This was a low cost project that we completed over a long weekend. With some paint, new draperies, an estate sale find, and collected antiques from the storage bins, I created a dining room that we look forward to hosting holiday dinners in.

The homeowner that did all of the major renovations on our home in the early 2000s painted it a sherbet green with a lighter shade of green on the ceiling. The seller we purchased it from didn’t make any changes to the dining room at all. Every room was kept exactly the way it was when they bought the house, right down to where the nails in the wall were. It was important to me to make this OUR home, and painting is an easy way to do that without changing the style and architecture of a historic home.

One of the changes we made with the biggest impact was to paint the ceiling. If you’re considering painting your ceilings a lighter shade of the wall colors, pause and think twice. Not necessarily because of resale value, but think of how you want people to feel while they’re in your home. If you’re wanting a dramatic effect and an artistic environment, then go for it! But if you want people to feel relaxed and settled, it’s not for you. It’s distracting and chaotic if it’s not done properly.

We painted our walls with Benjamin Moore “Revere Pewter,” and the ceiling is “White Dove.” The trim is Behr “China White.” The trim was already painted for us, and I like how it works with the Revere Pewter. China White reminds me of the color of antique ironstone dishes.

When we sold our last house three years ago, we sold most of our furniture, including the dining room table, chairs, and china cabinet. The rental house we were moving to didn’t have a dining room, and the dining set was looking a little dated, so we sold it on Facebook Marketplace. After we bought this house, I found an estate sale that was selling an Ethan Allen dining set for less than 1/10th of the retail cost. It’s currently on the Ethan Allen website, and the total cost for the table, 8 chairs, and buffet would’ve been over $11,000. We paid around $1,000. It’s worth it to check out estate sales!

I featured the drapery and hardware on an Instagram post several months ago. The drapery and hardware ended up being a source of frustration. The bay windows in our house do not match the measurements of modern bay windows. Modern bay windows have a larger center window with a smaller functional window on each side. Our original historic bay windows have a smaller center (functional) window, with a larger stationary window on each side. The drapery and hardware for our bay windows were custom made to fit them. And unfortunately, they were removed by the seller. I ended up finding hardware and drapery that I preferred, but it was time and money that we weren’t expecting to spend.

The other items in the room, like plates, pitchers, and artwork, are things that I’ve collected over the years. It was a little like Christmas opening all of my boxes that had been in storage for three years, and we’ve only had one broken crystal glass so far!

I’m lucky to have two pieces of artwork by my twin brother, Tyrus Lytton, displayed in our dining room. He painted a portrait of our daughter when she was two or three, and I found a frame online that complemented the antique mirror on the other side of the doorway. He also painted a small watercolor of our house. (Side note: my brother normally does large scale art installations all over the world. I’m very proud of him and thankful to have some of his artwork on a smaller scale.)

Below you can find a list of sources for the items that I used in our dining room. Some of the pieces are antiques, but I have linked similar ones that I found online. Click on the word to be taken to the source where you can find them.

P.S. There are also a few side-by-side- before and after photos below.

As you can see, a little paint and some new draperies can make a big impact. I’m curious if you’ve ever purchased a house and had items removed that were supposed to stay. Let me know in the comments if you’ve experienced that, too!

Until next time,

Abby

Hot Beverage Station/Coffee Bar

This post includes affiliate links and ads. You can find all of the exact pieces that I feature by clicking the links.

One of the reasons I wanted a really neutral kitchen color scheme is because I absolutely adore color. That sounds contradictory, but by having a neutral background I can decorate with all of my lively, colorful accessories and change them out seasonally. In today’s article I am featuring my new hot beverage station/coffee bar, which I have accessorized with colorful antique plates and a red antique rug.

One side of our kitchen had a blank space that I needed to make functional. We considered adding a base cabinet there during our renovation, but there were a few issues. There are a door, window, and HVAC vent all along that wall. I knew I would find the perfect piece to use as a coffee bar and hot beverage station. And I did!

THIS gorgeous oak sideboard allows the HVAC vent to flow, while also giving me “counter” space to use for my *stunning* electric tea kettle and coffee maker. Ken and I were a little unsure about ordering a piece of furniture online. The reviews were really good, but we live in the country, and we weren’t sure about it making it here in one piece. Still, it arrived quickly and packaged extremely well to protect all of the wood. The legs did need to be attached, but we did that together in about ten minutes. The shelf underneath provides extra storage that would be good for cookbooks or a basket like this one. The plate rate that I’m using above the sideboard is an antique piece that I found, but I found a couple of other options HERE and HERE.

Not only do I have more counter space to use as a coffee bar, but the 4 drawers and 2 doors are very deep. I have room to store my tea bag organizers, coffee grounds, filters, and mugs and glasses. I’m protecting the sideboard surface under the coffee maker with a silicone mat. This keeps me from worrying about spills on the beautiful wood.

The only one who loves my red antique rug more than me is Annie. I found a really similar rug that I know you’ll love, too.

Want to find almost everything that I’ve pictured and featured? You can do so in 3 different ways: click the links above in the article, click HERE for my LTK shop, or click HERE for my Lowe’s Storefront.

Our 1939 Kitchen Remodel

I’m excited to be working directly with Lowe’s Home Improvement to share many of the kitchen selections I used during my recent kitchen remodel. As a Lowe’s affiliate, I get a commission on the links I share in this article.

We lived in our 1930s home for several months before beginning the remodel, and we were surprised to discover how much we enjoyed it not being an open floor plan. It’s really nice having spaces with dedicated purposes and doors we can close off when we want to. I had originally considered knocking down the wall in between the kitchen and the breakfast room, but decided to use the existing work triangle that a former homeowner had established. (We’ll update the breakfast room in a few months with built-in seating and storage.)

In photos the kitchen is deceptively small. It’s actually quite functional at about 20 feet by 10 feet. After deciding to keep the existing work triangle, my focus shifted to adding countertop work surfaces, removing and updating the tile countertops and backsplash, and removing and replacing a very early version of laminate flooring. The oven and dishwasher were completely broken, so we needed to update those as well.

After selecting and purchasing all of the materials myself, I hired a general contractor to coordinate all of the demo and installation, as well as to build us another lower countertop. We had a thorough inspection before buying our home, but we still held our breath during the demo process. There’s never a guarantee that we wouldn’t uncover problems when we started the remodel. Thankfully, we didn’t have any surprises!

I chose to shop with Lowe’s for most of our materials because they offer a 10% discount to military veterans. Since Ken is an army vet, we qualified for their savings. The floor tile I selected has a marble look with both warm and cool tones. It’s waterproof, chemical and stain resistant, pet-friendly, and has a limited lifetime warranty. (Spoiler alert: I used this same tile in the sleeping porch remodel that I’ll feature in a future article.) It’s just an overall great product for high traffic areas. Coincidentally, I had originally picked out a tile from a specialty tile store. On my way to pay for the tile, I happened to stop at Lowe’s to look at grout colors, and I found this floor tile. It was an almost *exact* match. That stop into Lowe’s saved me over $1,000. (I chose Mapei grout in alabaster for both the floor tile and backsplash.)

The countertops and backsplash were both the same, outdated, early 2000s tile. The fruit basket design over the range was not the type of history that I’m trying to preserve. yikes. I understand how budgets are limited, so I encourage everyone to wait and save for solid surface countertops than to install something impractical or trendy. At one time, these tile countertops were in fashion. The backsplash is another amazing Lowe’s find of travertine subway tiles. Due to it being a natural product, color can definitely vary, but I was pleased to find that each of the boxes I purchased had both warm and cool tones in it. For my countertops I selected leathered granite in “Arctic White” for my countertops. The slab I picked, again, has warm and cool tones in it.

So those are all of the pretty, fun things to pick out, but we definitely had some functionality issues with the kitchen. I don’t know how the sellers were eating, cooking, or cleaning. The dishwasher leaked; the oven didn’t work; and the faucet wouldn’t stay on for more than 60 seconds. I ended up picking out an induction range that I have fallen in love with. Water boils faster than the gas stove that I used for years. The dishwasher is a silent dream of a work horse. The sink and faucet fit in perfectly with the size and style of our kitchen.

The transformation is pretty remarkable. I kept costs down by keeping the existing layout and not moving electrical and plumbing. The most expensive part of my remodel was adding a lower cabinet for pots and pans. (The former homeowners used furniture there.)

Buying my materials from Lowe’s saved us thousands of dollars. You can find all of the Lowe’s products that I mentioned in this article in my Lowe’s storefront. Finally, how’s this for a before and after?

Since the remodel has been finished, I’ve added an antique rug and a hot beverage station that I’ll be sharing in a future article. In the meantime, I share real-time progress every day on my Instagram stories. Please come over and follow me there – I’d love to meet you.

See you soon,

Abby