Patterns & Patina: How to Layer Like a Southerner

Have you ever found yourself admiring someone’s personal style, whether in their home or wardrobe, and wondered why it feels so sophisticated? Perhaps you were inspired to create a similar outfit or room in your home and ended up feeling like yours just wasn’t on the same level of style. Today we’re discussing how mixing patterns and patina creates a personal style in your wardrobe and home that tells a story, adds character, and creates a timeless collected look.

Welcome back to our fall series Falling for Home: A Weekly Autumn Journal. If you’re just joining us from Google, Pinterest, or Instagram, I invite you to browse through the other articles in the series, which can be found linked at the end of this article.

Patterns: Mixing with Confidence

In the South we never miss an opportunity to dress something up. Whether it is a specially wrapped gift, a room in our home, or ourselves, we find opportunities to express our personality and present it to the world on a visual platter.

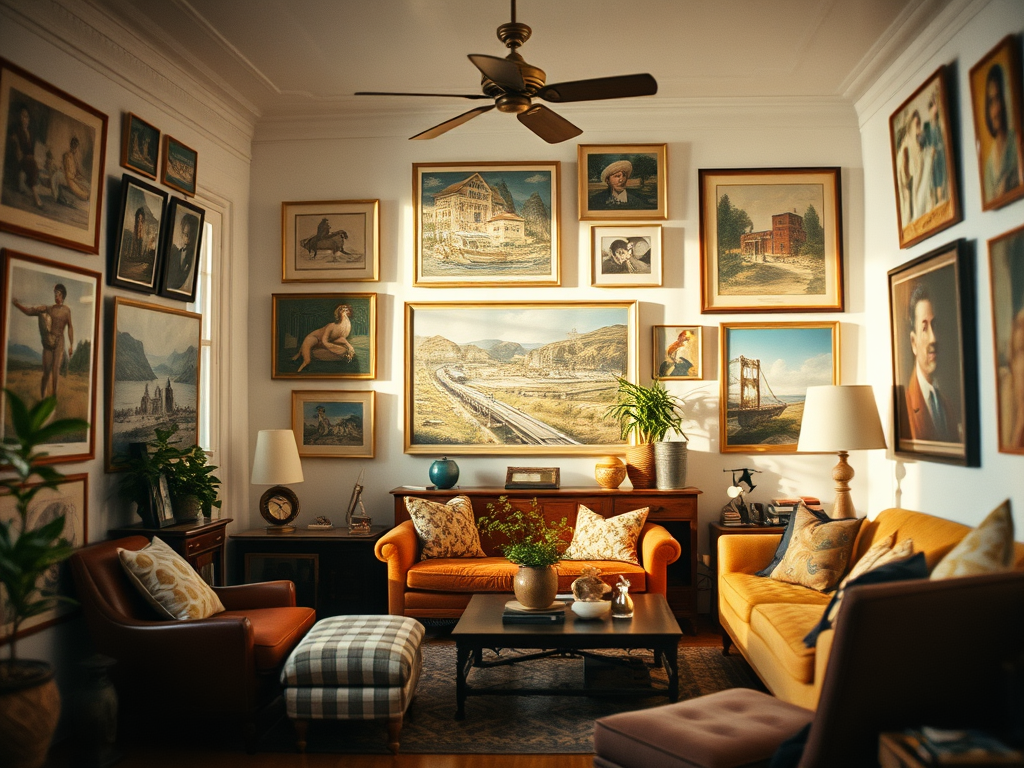
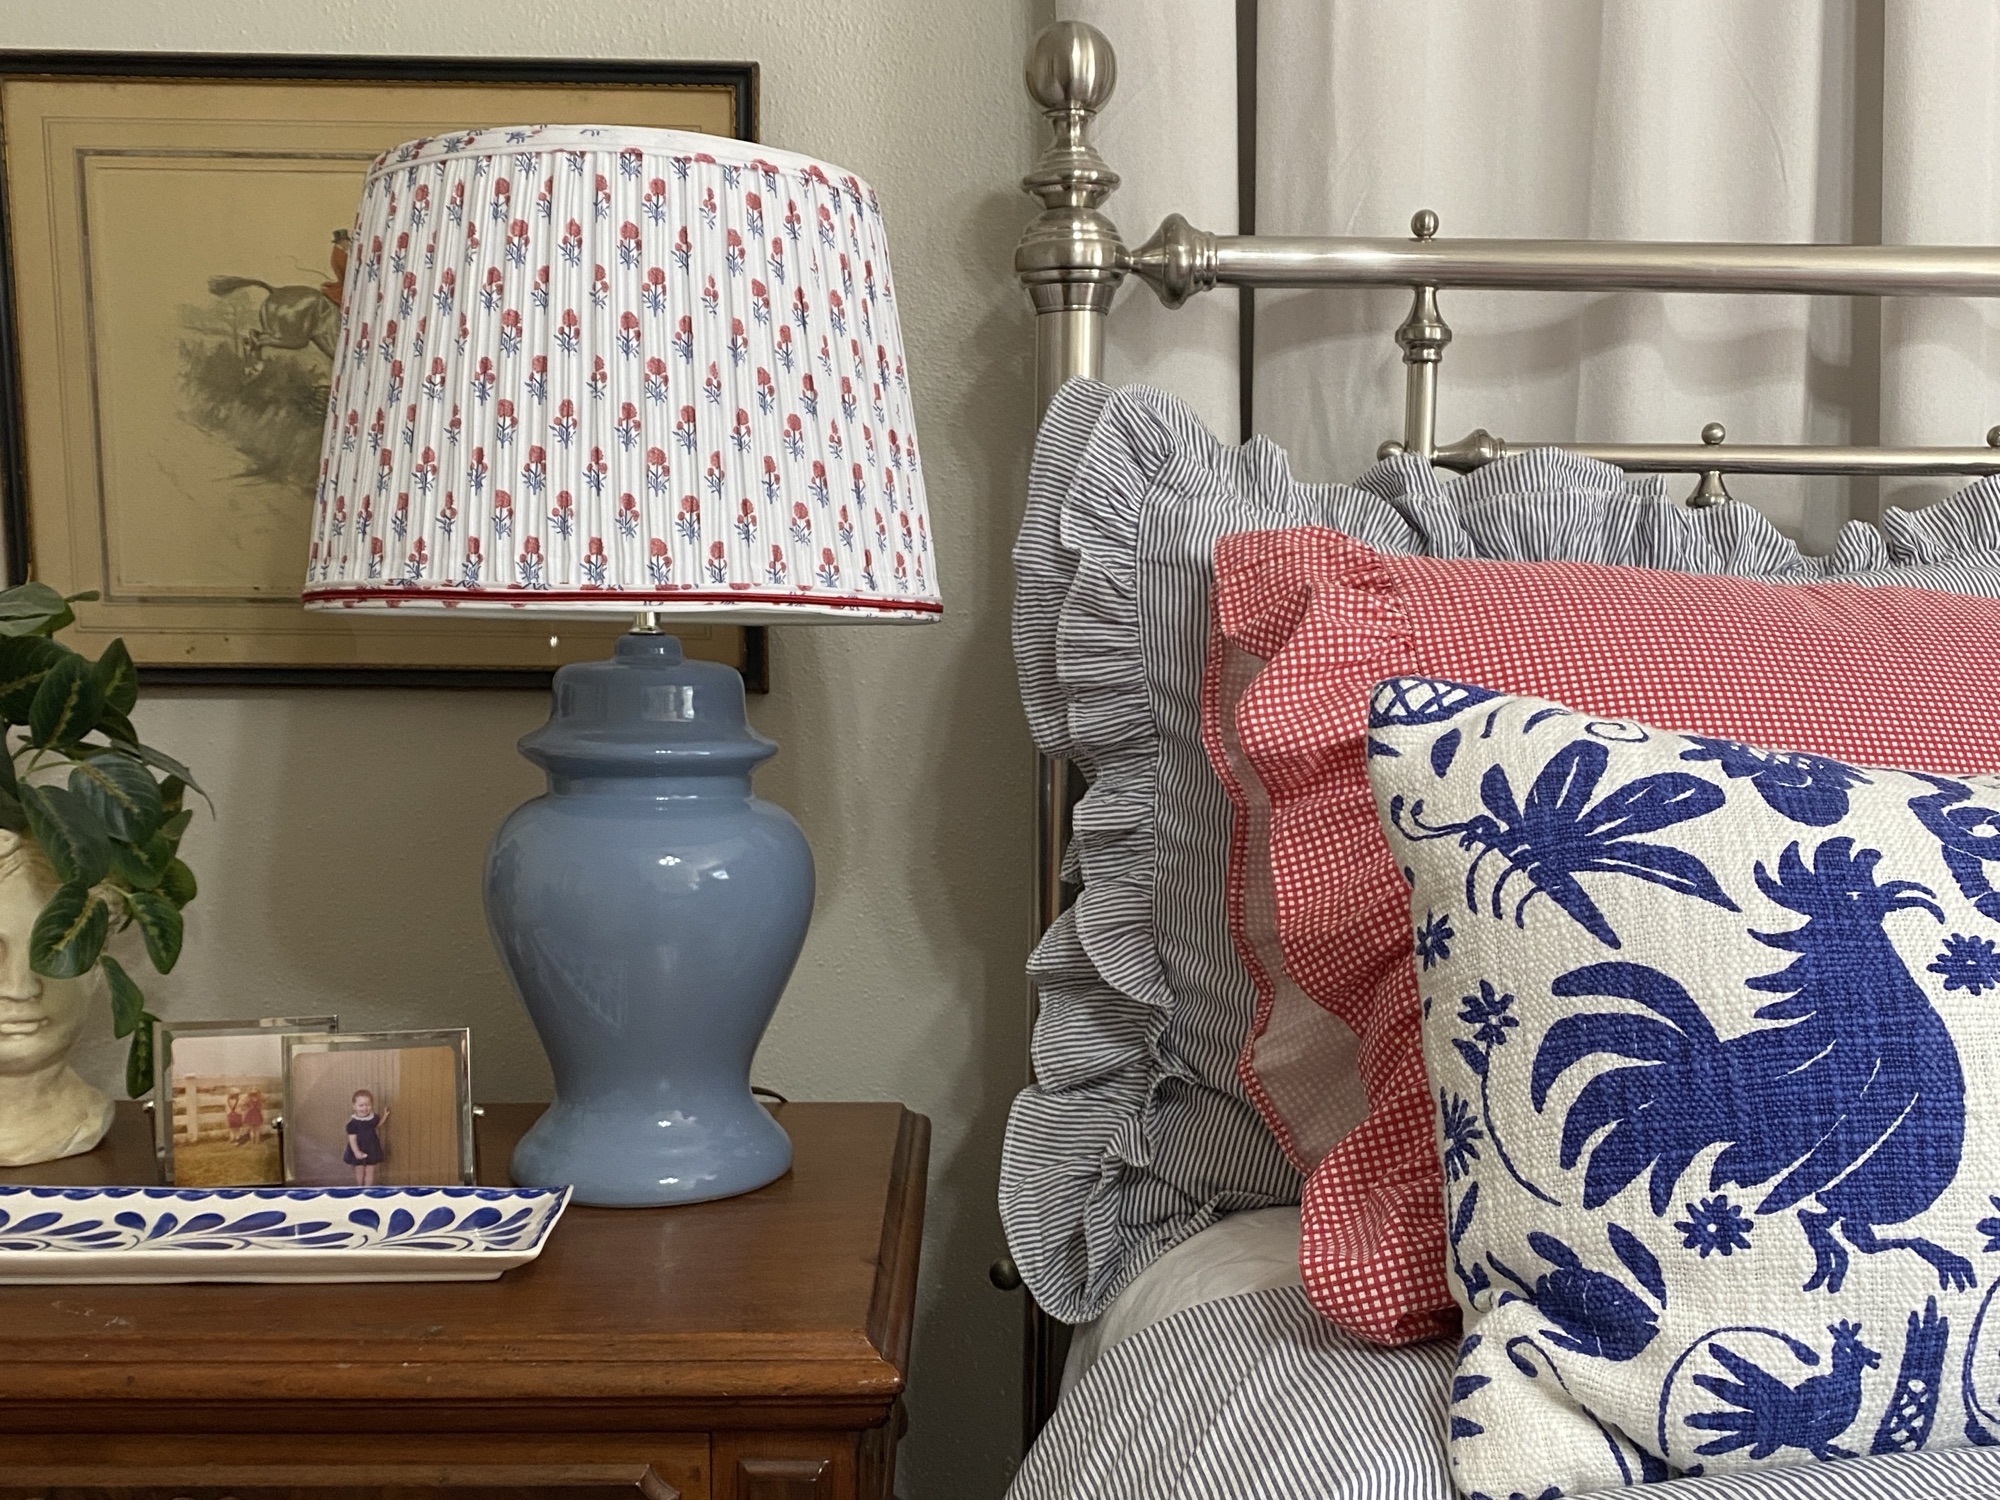
It’s often true that the most charming aesthetics are created when patterns are thoughtfully combined and layered to create depth and interest throughout your home and wardrobe. Interior and fashion designers use this technique in both clothing and home decor selections to create a visual conversation and unique story.

Our subconscious minds are attuned to visual interest. In last week’s article, Home as a Haven, we briefly discussed how too much visual interest can prevent you from getting rest in your bedroom. Similarly, too much visual interest in your outfit or home décor can cause unpleasant clashing.

With some practice and a few guiding principles, mixing patterns to create a polished and collected look can be done by anyone. Here are some tips I’ve learned along the way.

What to Pay Attention To

If you’re just getting started with pattern mixing, there are four things to be mindful of to achieve your desired effect.

  1. Color Family – Be mindful to keep color tones in the same palette. Too many different colors, or colors that don’t blend well, will end up clashing with each other. Colors that are next to each other on a color wheel or opposite from each other are usually successful choices.
  2. Scale – When mixing patterns, be aware of size and scale. For example, if you’re selecting a large floral pattern, consider a smaller stripe or plaid to complement it.
  3. Texture – Remember to consider the fabrics and materials of the patterns you’re choosing. Compare how different a velvet paisley is from a crisp cotton plaid.
  4. Balance – An important factor when mixing patterns is balance. Let one pattern be the star of the show, and the other patterns play a supporting role. For example, two different stripes can be successfully combined when one is a large bold stripe, and the other is a small, subtle stripe. Avoid being so over-the-top that you get lost in your aesthetic from trying to do “too much.”

Example Combinations

Have you ever heard people say, “Never mix plaids with stripes”? That’s not necessarily a good piece of advice. There aren’t many hard-and-fast rules for which patterns to mix, and if you follow the 4 design rules that I mentioned above, you can create endless combinations.

If you’re having trouble getting started, here are a few of my favorite patterns to combine for a polished look in both fashion and home décor:

  • Leopard + Plaid – This combination is classic and bold. It works in interiors with combinations like a leopard pillow and a plaid footstool. In fashion, a plaid blazer can be combined with a leopard belt for a touch of playfulness.
  • Paisley + Herringbone – These two traditional patterns can be combined for a refined and classic statement. Select paisley drapery panels with a herringbone chair for a timeless duo. You can’t miss when you combine a paisley scarf with a tweed herringbone jacket.
  • Floral + Buffalo Check – Florals balance the bold, graphic nature of buffalo check to create a charming and approachable look. In your home, combine a floral sofa with buffalo check throw pillows. In your closet, a delicate floral scarf pairs well with a buffalo check skirt or shirt.
  • Stripe + Plaid – These linear patterns can be combined to create an energetic, tailored look. In décor, a striped rug can be successful under plaid armchairs. In fashion, a crisp white shirt layered under a subtle striped sweater and paired with a plaid blazer will be seen as polished and sophisticated.

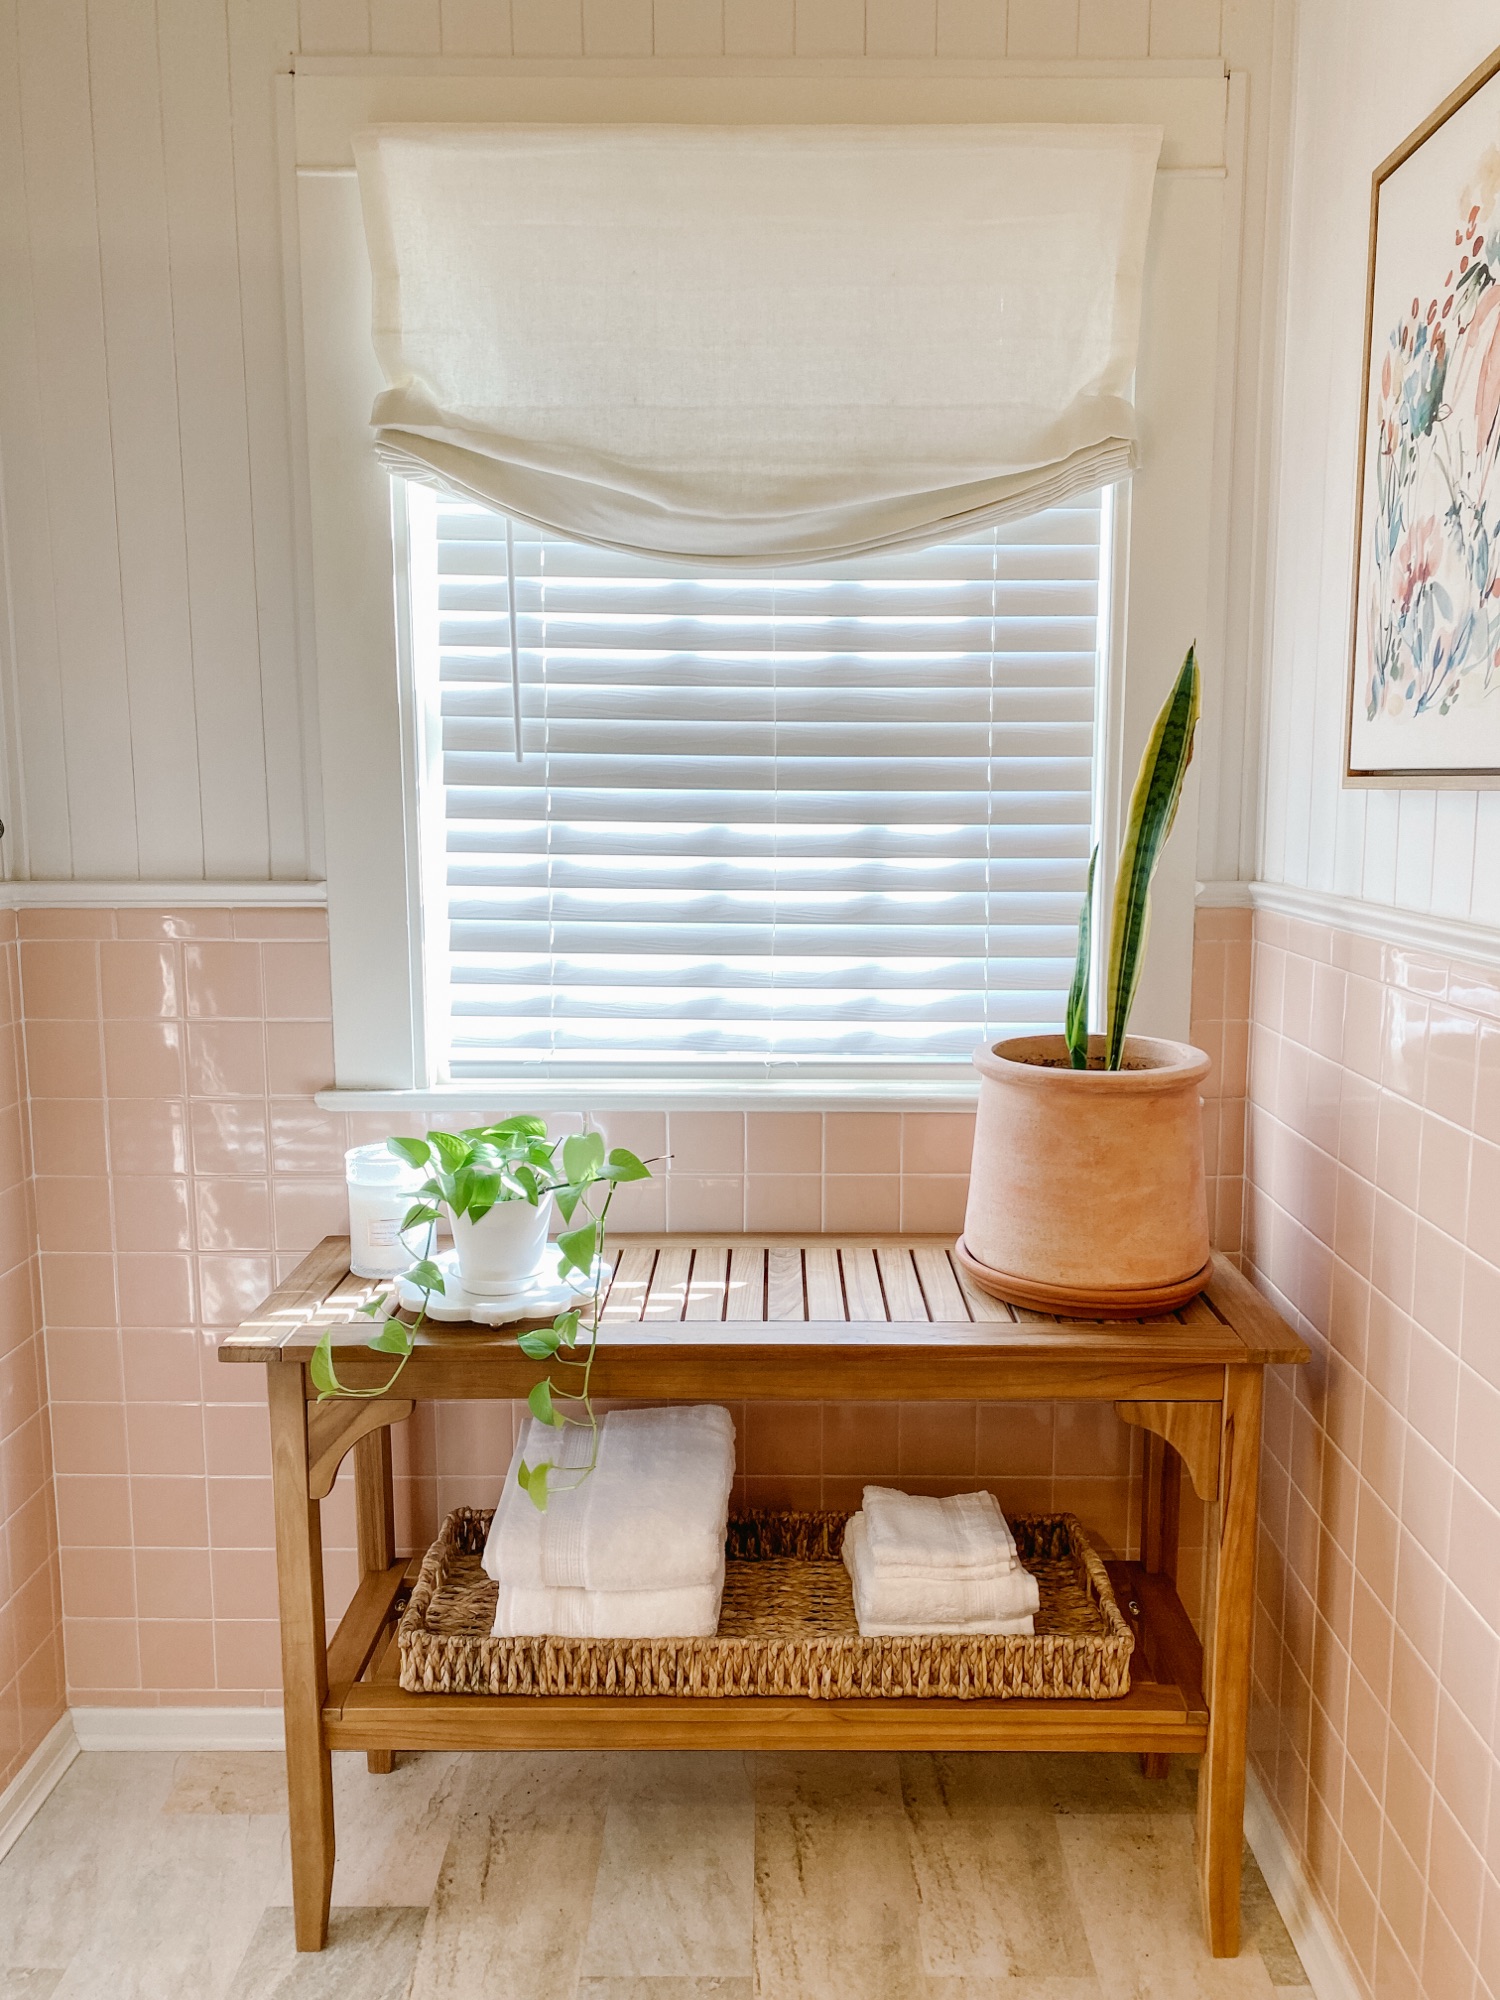
Patina: The Beauty of Time

Patterns catch the eye, but patina holds attention. It’s what makes a room or outfit feel lived in. Patina adds authenticity, character, and a sense of permanence. Patina is the way a lived-in surface changes appearance, and it can only be achieved with use, age, or weathering. Patina is what gives items soul. Antique appraisers look for signs of patina when determining authenticity of an item in question. Furniture will see patina around drawer pulls and surfaces with heavy use. Jewelry and other accessories show patina in the gentle softening of shine and wear on the surface,

When we’re aiming to achieve an aesthetic that includes items with patina, it’s necessary to consider whether new items we purchase will age with time and use. Items made of acrylic, vinyl, “vegan” leather, and laminated finishes do not age well or achieve the desired patina effect. For this reason, items made of those materials should not be treated as investment pieces.

Wondering how to incorporate patina into your home or closet? Here are a few examples of what to be on the lookout for:

Interiors

  • Leather armchairs darkening with use.
  • Unpolished silver trays, candlesticks, or cutlery.
  • Natural wood: farm tables, cutting boards, frames with softened edges.
  • Stoneware or pottery with subtle crazing.
  • Seasonal touches: a patinaed copper bucket for firewood, a weathered wicker basket for blankets.

Wardrobe & Accessories

  • Leather belts, handbags, boots that soften and show character.
  • Jewelry that develops a mellow sheen rather than a perfect shine.
  • Brass buckles, buttons, or clasps with gentle wear.
An antique silver bowl, painted tray, and well-loved books bring pattern & patina to life.

Bringing it Together

Many of us understand that having a solid foundation is essential to décor and fashion. However, a well-honed personal sense of style goes behind finding colors that match. Don’t be afraid to create a style that feels layered and personal.

It’s easy to settle for beige walls and a plain sofa, but your signature look is developed when you begin to layer coordinating patterns to showcase your unique personality. When we add touches of patina to our home and closet, we can explore opportunities to add soul to otherwise lackluster choices. After patterns and patina are combined, they seem to effortlessly create spaces and wardrobes that feel collected rather than staged.

I invite you to embrace layering styles at home and in your daily style. In addition to all the timeless Southern style recommendations that I’ve given in this article, the ultimate test is how your space and outfit make you feel. If it doesn’t feel right, it’s probably not. If it makes you happy and comfortable, then it’s probably a good choice. That’s the beauty of a personal style – it should matter most of all to you.

Discover how to style ticking stripes, gingham, and folk-inspired prints with vintage accents for a cozy and timeless bedroom look.
Stripes, gingham, and folk prints mingle with vintage accents for a collected bedroom.

Join me next week for the final article in this series, Falling for Home: A Weekly Autumn Journal. Next week’s article, Front Doors & First Impressions, is all about the importance of first impressions and how your entryway sets the tone.

Explore More from Falling for Home: A Weekly Autumn Journal

This article is part of my series called Falling for Home: A Weekly Autumn Journal. Be sure to check out these reader favorites:

You can subscribe here to receive new articles, seasonal inspiration, and vintage-style favorites delivered right to your inbox.

How to Update a 1930s Bathroom Without Losing Its Charm

Updating a historic bathroom doesn’t have to mean losing its original charm. Our 1939 bathroom still features the vintage wall tile and fixtures that first caught my heart, but a few thoughtful additions gave the space new life. By keeping the original tile and layering in a teak table, relaxed roman shade, coordinating artwork, and a touch of live greenery, I created a bathroom that feels both timeless and livable. If you’ve ever wondered how to refresh a 1930s bathroom without replacing its historic character, you’ll love this approach. I’ve also included a Benjamin Moore color palette inspired by the original tile, perfect for anyone looking for bathroom design inspiration rooted in history.

Historic Bathroom at First Glance

The first time I saw the main bathroom in our 1939 Colonial Revival Home, I knew it wasn’t living up to its full potential. It’s a rather large bathroom for its era, full of the original soft peach tile on the walls and in the shower. The original bathtub is cast iron with a porcelain enamel finish. It’s very large compared to modern bathtubs. These were elements that I found to be valuable and desirable while looking for a historic home to purchase, and I wanted to honor them in my design.

The bathroom as it looked when toured prior to purchasing the house.

When we viewed our home prior to purchasing it, the large space under the window had a tiny vanity and some wall shelves. After purchasing it, I wanted to update it in a way that made it more functional, while keeping the vintage charm typical in a 1930s and 1940s home. Since nothing was broken, I was able to update without replacing anything major.

The walls in the whole bathroom have peach-colored tile. In this photo you can see a built-in storage cabinet that is set into the wall.

Refreshing a 1930s or 1940s Bathroom

As you might guess, the peach tile was the springboard for the whole design. This color might have been a reason other homeowners would have ripped it out. However, I knew that finding the right paint color to complement the peach would create a better feeling in the space. For the walls above the tile, I went with Benjamin Moore China White OC-141.

Again playing with peach tile, I leaned in a bit to the orange tones, and selected a teak table to place under the window. I also added a relaxed roman shade over the window blinds to soften the edges of the window. A lucky find, the seagrass basket was a clearance rack find, and it fits perfectly on the bottom shelf of the table.

Next, I added a few plants to the space. The live greenery adds a spa-like touch, and brings in green as an accent color. The last selection that I made for this design was the artwork. It’s the only artwork in our whole house that isn’t an original piece, but it brings together all of the colors in this bathroom perfectly.

Best Paint Colors for Bathrooms with Vintage Tile

The color palette for this bathroom is built around the original 1939 bathroom tile. For a similar color in wall paint, use Benjamin Moore Clementine Rose 1219. A complementary neutral trim color is Benjamin Moore China White OC-141. If you’re looking for an accent color that pairs well with the other two colors, try Benjamin Moore Paris Rain 1501.

Adding Modern Comfort to a Historic Bathroom

I hope this inspires you to rethink a total remodel. There are many ways to add modern comfort to a historic bathroom without gutting it. For us, the space functions well and the original tile and fixtures are in fantastic condition. (What you might not be able to tell is that the built-in cabinet is set deep into the wall, so we didn’t have a need to create additional bathroom storage.)

I know there’s a temptation from social media, TV, and Pinterest to “update” every space that isn’t decorated in a modern way. But the best way to truly honor a historic home is to allow it to be what it was built to be. Most historic homeowners will embrace the imperfections and charm of designs from by-gone eras.

The finished design. A 1930s vintage bathroom with modern comfort and classic accessories.

Shop This Look

If you see something you like in this design that you’d like to incorporate into your own space, you can find many of the items linked HERE for shopping.

Click to Shop

While You’re Here…

While you’re here, I hope you’ll take a few minutes to “look around” and read a few of our other articles. We’re currently in a series called Falling for Home: A Weekly Autumn Journal, which is all about falling in love with our own homes again as we meander through the autumn season together.

Let me know what you think of these bathroom colors in the comments below. Would you ever live with peach colored tile?

How to Create a One-of-a-Kind Father’s Day Gift from the Antique Store

If you’re looking for a thoughtful Father’s Day gift that’s as unique as Dad, head to your favorite antique store. With a little creativity and a touch of nostalgia, you can create a meaningful gift that feels personal, useful, and memorable.

Step 1: Start with a Container

Look for a piece that can hold the other items—a vessel that becomes part of the gift itself. Think beyond traditional gift baskets. Great choices include:

  • A vintage wooden toolbox
  • A retro tin
  • An enamel dishpan
  • A metal tray
  • A wooden crate or drawer

Step 2: Find a Feature Antique

This is the item that gives the gift its character. Try to find something with history or a bit of charm that fits Dad’s interests. A few ideas:

  • A cocktail shaker for the home bartender
  • An old fishing lure or gear for the outdoorsman
  • A vintage pen for the journaler or writer
  • Records from his favorite artist
  • A metal sign for his garage or workshop

Step 3: Add Something New

Tie it all together with a small, new item that complements your finds. This bridges the gap between vintage charm and modern practicality. Try:

  • A bottle of bourbon
  • A new set of grill spices
  • A local coffee blend
  • A gift card to a tool or record store
  • A fresh notebook
Cigar Box + Vintage Shaker + Bartenders Book + Whiskey

Gift Combinations to Inspire You:

  • Bar-Inspired: Metal tray + antique shaker + favorite bourbon
  • Fishing Fan: Tackle box + vintage lures + local bait shop gift card
  • Grill Set: Old ammo box + cast iron branding iron + spice rubs
  • Coffee Crate: Vintage tin + enamel mug + fresh ground beans
  • Writer’s Box: Wooden cigar box + vintage pen + new leather journal

The beauty of this idea? It supports small businesses, gives new life to old treasures, and creates a gift that can’t be duplicated.

So this year, shop with heart. Celebrate Dad with a gift that’s built on history, thoughtfulness, and a little antique magic.

Essential Elements for a Beautiful Entryway

It’s the beginning of a new month, which means it’s time to release another designed space. This month’s design plan features an entryway 3 ways: casual, formal, and transitional.

This article contains affiliate links and ads. You can find the products I recommend by clicking on the links throughout and at the bottom of this page. These are designs that you can pick and choose which elements to bring into your own spaces. They’ll be saved here on my website, or you can save them on Pinterest. You can come back and add pieces to your spaces as time and budgets allow.

This month I am sharing what I consider to be the perfect recipe for a successful entryway design. The best entryways have the following essential elements in common:

  • a functional piece of furniture
  • a lamp
  • artwork
  • a mirror
  • storage/catchall
  • something alive/fresh
  • a rug
  • a clock
  • and a place to set a wet umbrella.

Not only do these items create a beautiful space, but they are functional as well. For example, the mirror allows residents and guests to check their appearance before coming and going, as well as reflecting light into the space. A lamp allows residents to find their way inside on a dark night, as well as helping guests find the door on their way out.

Below you can see a colorful and vibrant entryway design. Since the entryway is the first impression of your home, it’s an opportunity to create a space that reflects your personal style. This design leans more towards casual and bohemian. It is full of visual interest and layers of texture. Combining two separate pieces, like the green and white plate and the pink framed artwork, you can create a one-of-kind, original piece of art in your home that no one else will have. Try using Command brand hooks to mount the plate on top of the pink art before hanging it on the wall.

Click the photo to shop for these exact items.

Traditional decor thrives on symmetry. The design below uses symmetry to create balance by flanking the mirror with matching lamps and plates from the same series. While the first design is considered modern and casual, I would consider the design below to be formal.

Click the photo to shop for these exact items.

Entry Table

Below you will find the final entryway design for this month. Notice how similar metal tones and a soft ivory color are carried throughout. Natural materials like wicker, marble, and wood counterbalance the glamorous gold and brass to create a sophisticated but approachable space. This design is a midway point between casual and formal.

Click the photo to shop for these exact items.

In many cases, the front door to the home opens directly into the living space without a designated foyer or entryway. In these situations it’s possible to create an entryway by grouping specific items on a wall next to the front door. Are you missing any of these essential items in your entryway? Do you have any items in your entryway that you would add to this list? Let me know in the comments below.

Never miss a design release in the future by subscribing using the box at the bottom of this article.

You can find many of these items in my LTK Storefront HERE.

Transforming Our Breakfast Room: A Makeover Journey

Today I am sharing some before and after pictures of the breakfast room in our 1939 home. This is the casual dining space in our home that we use for our everyday meals, playing board games, and doing puzzles.

Our breakfast room is off of the kitchen, and has also has a door to the center hallway on the main floor. One of the things we love about living in a house that is not open concept, is that we can dedicate rooms to the functions we need and completely close the room by shutting the doors to it.

Before, the previous homeowners used this space as a family room.
After, we restored the space to its original purpose, a breakfast room.

The previous owners were using this room as a family room. They were using a sectional sofa that took up the entire room. The walls were painted a sherbet orange color with a lighter orange color on the ceiling. The only light in the room was a pendant fixture that was so dark we couldn’t tell if it was on unless we opened the yellow glass shade.

Before, a large sectional filled the entire room.
After, the space is restored to its original purpose, a breakfast room.

We transformed this space by painting the walls Benjamin Moore “Pale Oak” and the ceiling “White Dove.” Our general contractor gave us a handmade stained glass shade that his father had made. The shade is far from perfect and a little uneven on the edges, but we loved it for this space. I found a pendant online that could accommodate the shade.

The orange paint colors on the walls and ceiling were not appropriate for the room. The windows have south and west sun exposure, which means direct light comes into the room for most of the day. As a result everything in the room took on an orange glow. Combined with a light fixture that wasn’t functional, this was a space that no one in our family wanted to be in.

After I corrected the color on the walls and installed a functioning light fixture, the breakfast room was completely transformed. The total cost was around $250 for the paint and a pendant fixture. The breakfast room isn’t completely done. We’re on the hunt for a very specific table and chairs. I’m also deciding what to put on one of the walls. But I wanted to share how simply changing the paint and lighting can completely change a room.

I’d love to see how you transform your own spaces with paint. Be sure to tag me on Instagram or comment below to share your photos!

Achieve Your New Year’s Goals: Tips for Success

Happy New Year! It’s our human nature to bookmark the chapters of our lives in terms of years. We begin today on a fresh new page for a wonderful new chapter. I prefer to set goals for myself to achieve new things, rather than to set “resolutions” to change things I don’t like. It sets a positive outlook for something new, rather than a negative outlook to change something old. Today I am sharing some common New Year’s goals. I have found that to achieve success with my goals, it is essential to set myself up for success with the necessary tools to do so.

This article contains affiliate links and ads. You can find the exact products and services I recommend by clicking the links and photos below.

Goal: Travel More

A common New Year’s goal is to travel more and to explore new places. Often people have a misconception that this is something that can only be done if they have a lot of extra cash. But traveling for little to no money is something everyone can do. Last year my husband and I took five trips, and we did it for almost no cost using credit card travel rewards. Our favorite travel rewards card is THIS ONE. The rewards can be used for hotel rooms, all inclusive resorts, and airline tickets all over the world. Our next favorite travel rewards card is THIS OTHER ONE. That one covers many of the same expenses, but also things like rental cars. Want to learn more from experts on travel rewards? Check out Travel Mom Squad. It’s our favorite podcast on travel hacking, and their website is a useful resource for learning the travel points hobby. Below are a few more helpful travel things that I recommend:

Goal: Improve Health

The health of Americans has been all over the news lately. More and more people are realizing that the food we’re eating contains ingredients that are putting our health at risk. One simple solution to taking charge of our health is to cook at home. This can seem daunting and overwhelming, but it can be easily done with some preparation and planning. I stay away from recipes that have dozens of ingredients and complicated instructions. Keeping meals simple is one way to stay on track. Another thing we do is meal prepping. Once a week we make our lunches and pack them into meal prep containers. We take our lunches to work to make sure we’re: 1-eating healthy food, 2-preventing the urge to buy fast food, 3-saving money. The last thing we do to make sure we’re consuming healthy food is something that is often overlooked; we make sure the pans our food is cooked in don’t contain harmful metals or chemicals. We’ve been extremely happy with this set we use.

Goal: Increase Fitness

Moving our bodies consistently has more benefits than I can go into detail today. A few examples often given are reducing blood pressure, increasing metabolism, and helping with bone density. My favorite ways to be active are walking (both outside and on my treadmill) and resistance training with weights. I read years ago that as we get older, working out with weights becomes more and more important in order to protect our bone density. I often hear people say things like, “I don’t have money for a trainer,” or “I don’t know what to do.” I hung these exercise charts up in my workout area. The sturdy, laminated charts show examples of exercises for all of our body parts. If I see an exercise on the chart that I’m not quite sure how to do, I just look it up on YouTube for an example. Another tip I have is to anticipate excuses I might come up with, and remove the obstacles ahead of time. For example, set out your workout clothes the night before, or maybe even sleep in them. If you plan to walk outside, buy yourself a great rain jacket and spray waterproofing on your walking shoes. Don’t let a little rain stop you from getting your walk in!

Goal: Get Organized

A place for everything, and everything in its place. I’m not the first person to say it, and it’s definitely true. Living in a historic house means that we don’t have a huge pantry or closets. Even though I had already purged our belongings several times over the last few years to get rid of unneeded things, I was worried that we were going to have to get rid of even more. Instead, I began to focus on making sure the spaces we had were being used to their best potential. I bought organizational pieces that maximized the vertical space. In any space that I had on a shelf, I used racks or acrylic shelves to make sure the entire vertical space was being used. Underneath beds we are stacking flat narrow containers to hold things like off-season clothing and wrapping paper. In closets, we added 3 tier shelves to hold shoes and purses. On shelves above closet rods, we’re using more acrylic drawers and stacking the same flat containers that we use under the beds.

Goal: Financial Health and Financial Literacy

Something I am very passionate about is living debt free. I’m not exaggerating when I say that if there is one thing that I could talk to anyone about for hours, it would be finances. Money is something that has always been taboo to talk about. A lot of us were raised by a generation who didn’t teach us how to budget or invest, much less how to keep a checking account or strategically pay taxes. When our kids were in high school, we encouraged both of them to take a series of 3 classes that taught them about finance and business. Our culture has become increasingly focused on consumption, with access to every store we could ever want right on the phone in our pocket. It is really important that we educate ourselves and our families on how to live a content, full life away from the choking burden of debt. My very favorite podcast is ChooseFI. This podcast has been around for a while, and I really encourage you to go back and start at some of the earlier episodes and move forward from there. (Did you know that one of the largest groups of millionaires in the U.S. is teachers? This podcast can show you exactly how it’s done.) I have so many easy-to-read favorite books on how to live financially independent, but my top choice is A Simple Path to Wealth by JL Collins. If you don’t have time to read, listen to the audiobook. Another essential tool that I recommend is YNAB. YNAB is an app/website for budgeting. In YNAB you link all of your accounts (banking, savings, credit cards, etc) and you categorize spending and savings in real time. It gives you the freedom to spend money and also keep track of bills. One thing I love about YNAB is that each subscription can share their subscription with up to 5 people. Those 5 people can if they want to, but do NOT have to share their budgets with you. It’s completely private.

These are some of the most common New Years goals. Whether you are wanting to travel more, get healthier, increase your fitness, get organized, or find financial freedom, I hope some of these tools help you on your path to success. Take one step today and another step tomorrow. In time you will find yourself closer to your goals than you were yesterday. The important part is to keep putting one foot in front of the other. I wish you a happy, healthy New Year. As always, this is a community to share ideas. Please feel free to comment below if you have other tips that you would like to share!

Click the image to find most of these tools in my LTK shop.

Creating a Cozy Holiday Experience for Guests

It’s less than twenty days until Christmas, and touches of holiday spirit can be felt in nearly every room in our home. One of the things we love most about the holidays is welcoming our friends, family, and neighbors into our home to celebrate the season with us. It’s important to us that our guests experience the contagious holiday excitement, while also feeling at ease. We truly want them to make themselves at home when they come through the door.

I recently had the opportunity to talk with Kierra Todd with Redfin.com. Kierra asked me how we ensure a comfortable experience for our guests during the holidays. One way I do this is by mixing natural elements with conversation pieces. Today I am sharing our dining room decorated for a Christmas gathering. The vintage and antique Christmas decor we’ve collected over the years has started many conversations while gathered around the table with guests. And by collecting and foraging from our yard for decor, we ground the space and bring commonality.

Interior designer Abby Smolarsky at Belle Antiquarian, highlighted, “By mixing natural elements and conversation pieces, guests will feel the excitement of the season. In the dining room, guests will see magnolia and holly from our yard, as well as a tree sparkling with collected antique ornaments. It’s the perfect mixture for putting people at ease.”

Redfin.com

In the South we are blessed to have quite a few plants to forage at Christmastime. Our property boasts several magnolia species, abundant holly trees, and evergreen. I gather clippings and wire them together to adorn tables, buffets, and fireplace mantels throughout the house. Tucked here and there you will see some of my favorite pheasant feathers. My wonderful neighbor, Claire, gave me a bag of long-leaf pine cones that she had collected, which were the perfect finishing touch. Each region will have vegetation that can be brought inside for decor. If you don’t have anything in your yard, try asking a friend or neighbor if you can come clip a few things to add to your decor. Be sure to bring a basket, sharp clippers, and gloves to protect your hands from pointy leaves like holly.

Vintage and antique Christmas decor are among my favorite things to look for while treasure hunting. Throughout my years of selling antiques, I have collected some unusual and special ornaments. It’s fun to gaze and watch them sparkle on our dining room tree while gathered for a special meal. Part of the reason these ornaments are so special is because they were collected slowly over time and in various places. They each hold a story or memory, and they have kept the conversation flowing at the Christmas table on more than one occasion. It’s okay to start small with one or two baubles and add to them as the years go by. They’ll become part of your story as well.

The dining room feels festive, but also approachable. It’s doable. Anyone can gather foliage from their yard and bring it inside. Everyone can pick up a vintage ornament here and there. It’s how we share our space with the people we care about, sharing a little bit of our lives with theirs.

I’m honored to be featured on Redfin for this special holiday article. You can find the whole article and many more tips HERE.

No matter if you live in an apartment in Miami, FL, a rental home in Tuscaloosa, AL, or a
house in Bakersfield, CA
, this guide will walk you through essential steps to declutter and clean your home, add festive touches, prepare for guests, and set the stage for holiday entertainment, ensuring your home is ready to impress and delight all season long.
Prepare Your Home for the Holidays: 7 Tips for a Festive Season | Redfin

American Living Room Design Plan: Warmth and Style

It’s the beginning of a new month, which means it’s time to release another designed space. A few weeks ago I took a poll on Instagram, and the majority of followers voted for this month’s design to feature a living room.

This article contains affiliate links and ads. You can find the products I recommend by clicking on the links throughout and at the bottom of this page. These are designs that you can pick and choose which elements to bring into your own spaces. They’ll be saved here on my website, or you can save them on Pinterest. You can come back and add pieces to your spaces as time and budgets allow.

In most American homes, the living room is the space in the house where a family will gather to sit and relax together. Living rooms provide the perfect opportunity to show your style and to incorporate pieces that reflect your personal flair. In this living room design plan, I’ve purposely used multiple sources for the items featured. I want to discourage you from walking into a furniture showroom and buying a completely matching living room set. In order to create a collected aesthetic that is a unique reflection of your style, you’ll need to pull together pieces from different sources.

Click the photo to shop this design.

Design preferences are FINALLY moving away from sterile, all-white or gray interiors. The design I’m featuring today is warm and evokes a feeling of “home” with saturated and inviting colors. The wall color for this living room design is Shaker Beige, HC-45, from the Benjamin Moore historic color collection. On the floor you will find a timeless selection of traditional hickory hardwoods. Using Shaker Beige and hickory hardwoods as the base for our design, we begin to layer in warmth and richness, starting with a woven Persian rug.

The sofa in this month’s design is fully customizable. After choosing the basic shape of the sofa, I selected the number of cushions, fabric, cushion filling, and feet. The feet selected are walnut stained feet with brass castors. The fabric shown is “Atlantic Performance Blakely.”

At this point in the design, we have the base in which to start adding complementary furniture, art, and accessories. I added some leather armchairs and walnut end tables that echo back to the lines of the traditional sofa. The elegant coffee table pairs well with the metal accents on the sofa feet.

The table lamps in this living room design are ones where a visitor might wonder if they’re new or if they were found on an antiquing adventure.

I selected window treatments and an art piece for this space that pull from the colors found in the rug, sofa, and wall color. If you’re only able to change one thing in your living room, try finding a new art piece that will unify the other colors used in your space.

The final layer in this living room design plan is for accessories. Accessories are such a fun way to inject personality into your space. Here I have used conversation pieces that add texture and interest.

You can find the sources for each of the items that I recommend below. Never miss a design release in the future by subscribing using the box at the bottom of this article.

You can find many of these items in my LTK Storefront HERE.

Top Sources for Original Artwork in Collected Design

This post contains commissionable links and ads.

If someone were to ask me what my interior design style is, I would say “collected.” Collected interior spaces are ones that can rarely be rushed or quickly pulled together, so they range from feeling as though they are not finished to sometimes being a little overly done. People who resonate with collected interior design are ones who wish to have their personality reflected in their spaces by featuring a mixture of old and new pieces, original artwork, items collected from travels, and multiple design styles.

Of all of these characteristics of collected interior design, the one that resonates the most with me is original artwork. Do you remember that fear of showing up to a homecoming dance and seeing another girl wearing the same exact dress as you? That’s how I feel about potentially walking into someone’s home and seeing the same exact mass produced artwork hanging on the wall.

In our family, artistic ability was highly treasured and encouraged. In my large, extended family I have multiple family members with an incredible gift for all types of artwork, ranging from jewelry design to painting to large scale commercial art installations. It’s for these reasons that I have found myself drawn to purchasing original artwork over the years to decorate my homes with.

Until now, I have closely guarded my source for much of this artwork. Today, for the first time ever, I am sharing where I have purchased original artwork for many years and a list of tips so that you can also find amazing pieces for your home or business. This began as a source that I used when I was a seller in the antiques industry. Initially, I kept this source close to the chest because sourcing artwork to resell can be difficult. Then, I kept quiet about it because I didn’t think people would take it seriously.

So are you ready for it? My source for a great deal of the original artwork in my home is GoodwillFinds.com. I know, I KNOW. Not what you were expecting, right? Let me tell you why this website has been such a success for me. You can discover hundreds of hard-to-find pieces and hidden gems. I have purchased a massive painting for $30, which turned out to be worth over $3,000. I purchased my treasured dog painting that you’ve seen in many pictures for only $100. And the best part? No one in the world has a painting exactly like mine.

Logo 468x60

Here are just a few tips for successfully buying artwork on GoodwillFinds.com:

  • I’m listing this tip first because it’s often overlooked. Make sure you read the description carefully, especially the dimensions. You don’t want to be surprised when it’s delivered by receiving something much smaller or much larger than you expected.
  • Read to see if there is anything regarding delivery you need to know.
  • Before you start searching the website, create an account!
  • Use the search features wisely! At the top of the website is a search box, and you can also click on the top left to view by categories. Artwork can be found under the home category.
  • It can take a bit of digging to find something that you want to own and be proud of. Since artwork is unique and items are constantly being added, check back often to see what’s new on the website.

I hope you found this information helpful, and I wish you much success in your hunting! I have a few promo codes that will work for first time shoppers below. I was very hesitant to share this source, and my husband was actually surprised when I told him that I was going to. It would bring me great joy if you would share your finds with me in the comments or tag me on social media. (Facebook, Instagram) Happy hunting!

Promo codes:

Logo 300x100

Transform Your Dining Room on a Budget

This article contains affiliate links and ads. You can find many of the pieces I feature by clicking on the links at the bottom of this article.

I’m happy to finally share the details on our dining room refresh. Months before our kitchen renovation began, we started on our dining room. This was a low cost project that we completed over a long weekend. With some paint, new draperies, an estate sale find, and collected antiques from the storage bins, I created a dining room that we look forward to hosting holiday dinners in.

The homeowner that did all of the major renovations on our home in the early 2000s painted it a sherbet green with a lighter shade of green on the ceiling. The seller we purchased it from didn’t make any changes to the dining room at all. Every room was kept exactly the way it was when they bought the house, right down to where the nails in the wall were. It was important to me to make this OUR home, and painting is an easy way to do that without changing the style and architecture of a historic home.

One of the changes we made with the biggest impact was to paint the ceiling. If you’re considering painting your ceilings a lighter shade of the wall colors, pause and think twice. Not necessarily because of resale value, but think of how you want people to feel while they’re in your home. If you’re wanting a dramatic effect and an artistic environment, then go for it! But if you want people to feel relaxed and settled, it’s not for you. It’s distracting and chaotic if it’s not done properly.

We painted our walls with Benjamin Moore “Revere Pewter,” and the ceiling is “White Dove.” The trim is Behr “China White.” The trim was already painted for us, and I like how it works with the Revere Pewter. China White reminds me of the color of antique ironstone dishes.

When we sold our last house three years ago, we sold most of our furniture, including the dining room table, chairs, and china cabinet. The rental house we were moving to didn’t have a dining room, and the dining set was looking a little dated, so we sold it on Facebook Marketplace. After we bought this house, I found an estate sale that was selling an Ethan Allen dining set for less than 1/10th of the retail cost. It’s currently on the Ethan Allen website, and the total cost for the table, 8 chairs, and buffet would’ve been over $11,000. We paid around $1,000. It’s worth it to check out estate sales!

I featured the drapery and hardware on an Instagram post several months ago. The drapery and hardware ended up being a source of frustration. The bay windows in our house do not match the measurements of modern bay windows. Modern bay windows have a larger center window with a smaller functional window on each side. Our original historic bay windows have a smaller center (functional) window, with a larger stationary window on each side. The drapery and hardware for our bay windows were custom made to fit them. And unfortunately, they were removed by the seller. I ended up finding hardware and drapery that I preferred, but it was time and money that we weren’t expecting to spend.

The other items in the room, like plates, pitchers, and artwork, are things that I’ve collected over the years. It was a little like Christmas opening all of my boxes that had been in storage for three years, and we’ve only had one broken crystal glass so far!

I’m lucky to have two pieces of artwork by my twin brother, Tyrus Lytton, displayed in our dining room. He painted a portrait of our daughter when she was two or three, and I found a frame online that complemented the antique mirror on the other side of the doorway. He also painted a small watercolor of our house. (Side note: my brother normally does large scale art installations all over the world. I’m very proud of him and thankful to have some of his artwork on a smaller scale.)

Below you can find a list of sources for the items that I used in our dining room. Some of the pieces are antiques, but I have linked similar ones that I found online. Click on the word to be taken to the source where you can find them.

P.S. There are also a few side-by-side- before and after photos below.

As you can see, a little paint and some new draperies can make a big impact. I’m curious if you’ve ever purchased a house and had items removed that were supposed to stay. Let me know in the comments if you’ve experienced that, too!

Until next time,

Abby